Mastering Package Wrapping: Guide to PSAppDeployToolkit Integration
PowerShell App Deployment Toolkit, often called PSAppDeployToolkit, PSADT, or PDT, is a powerful set of PowerShell modules designed to assist with application deployments, system configurations, and more. Its flexibility and extensive functionalities make it a preferred choice for IT professionals worldwide.
Package deployment plays a pivotal role in the realm of software management. Among the many tools available, PSAppDeployToolkit stands out for its robustness and versatility. This guide explores how PACE Suite seamlessly integrates with PSAppDeployToolkit, enabling efficient and controlled software deployments using silent installs and unattended command line switches.
What is Silent Install?
Silent installation is a method where an application is installed without user interaction or minimal user intervention. It’s often used in IT environments to efficiently deploy software across multiple machines.
For instance, the command-line parameter “/S” or “/silent” is frequently used in Windows installations to initiate an MSI install in silent mode. It allows the installation process to run in the background without any prompts or notifications to the user.
How to Set Up Unattended Installation of WinMerge with Package Wrapper and PSAppDeployToolkit
WinMerge, a powerful file comparison tool for Windows, can be efficiently deployed across multiple machines using PACE Suite’s Package Wrapper combined with PSAppDeployToolkit. The following steps will walk you through creating an unattended installation of WinMerge with the help of PACE Suite.
Step 1: Creating blank PSAppDeployToolkit
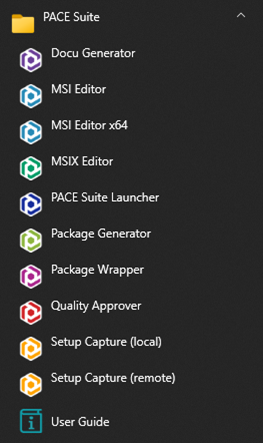
Run the Package Wrapper by accessing it from either the Start Menu or via the PACE Suite Launcher.
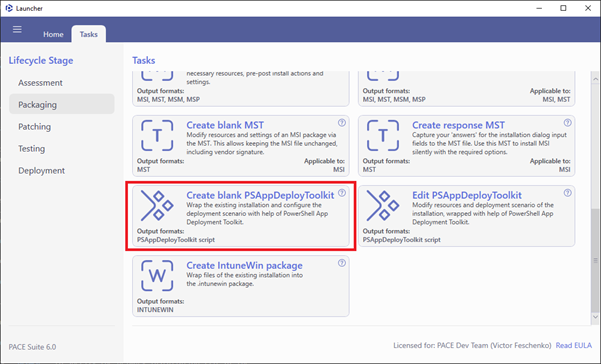
Upon launching PACE Suite Launcher, navigate to the Tasks > Packaging group and select “Create blank PSAppDeployToolkit”.
Step 2: Creating a New Package
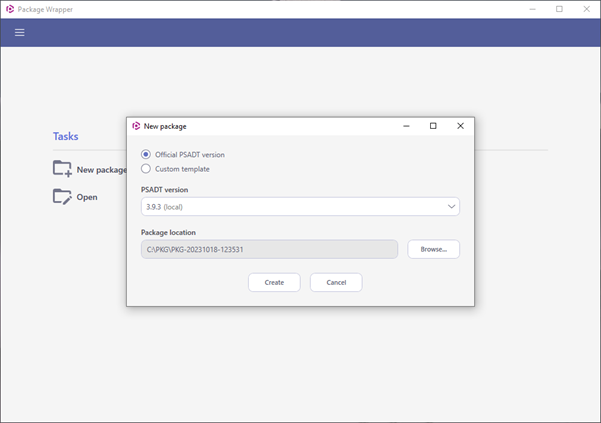
Select the package options (described below), then choose Package location, and click Create.
Official PSADT version – an option that allows creating a new package based on the official PowerShell App Deployment Toolkit version. The list of available versions is obtained from the GitHub page. The label (local) indicates that this version is available locally; the label (online) means that this version will be downloaded from the Internet.
Custom template – an option that allows creating a new package based on the custom templates of the PowerShell App Deployment Toolkit version. The template’s location can be customized at MENU > Settings > Templates.
Step 3: Managing package appearance and identity
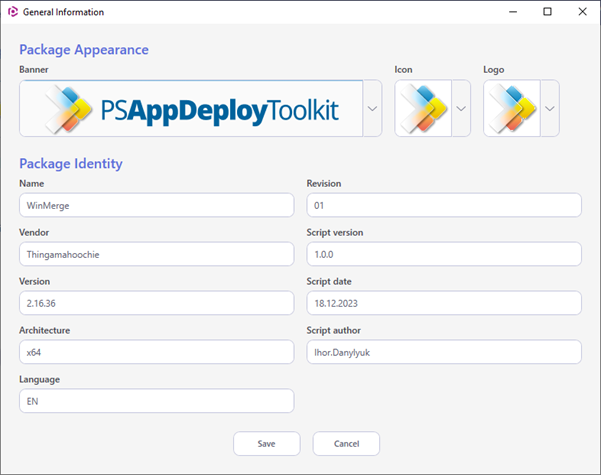
With PACE Suite , you can easily manage the package appearance settings such as banner, logo, icon, and package identity properties. To do so, ensure that the General tab is opened. Here you can find the current package appearance and identity settings.
If no variable is found or the variable value is empty, the label None is displayed instead. Any single quotes you enter will be automatically escaped when saving the data to the PS script file. If a variable’s value references another variable, it will be displayed here as disabled, and you can edit it only at the Package Builder > Actions > Raw Deployment Script tab.
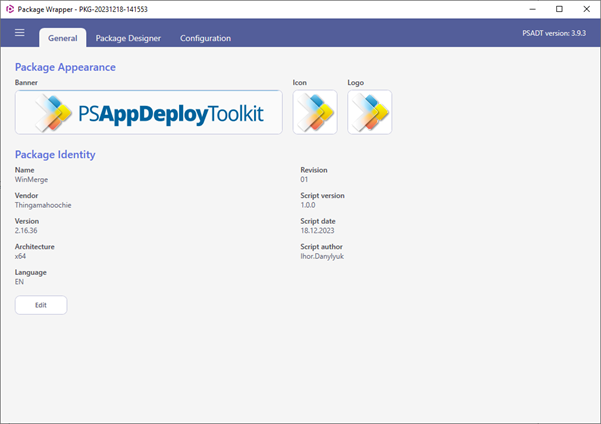
Update the necessary package appearance and identity settings and then click Save.
Step 4: Managing the installation files and supporting resources or assets
To manage the primary installation files (e.g., MSI, EXE) and the supporting resources or assets of the PSAppDeployToolkit package, do the following:
Go to the Package Designer > Files > Installation tab to manage the primary installation files that are stored in the Files/ subfolder.
Go to the Package Designer > Files > Support files to manage the supporting resources or assets that are stored in the SupportFiles/ subfolder.
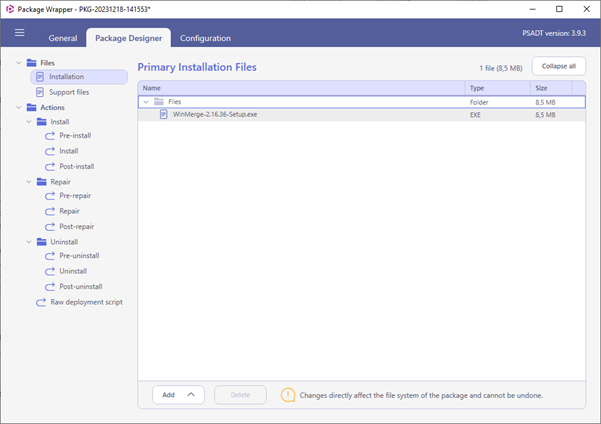
Use the context menu of an item that you need to modify, add a folder, files, or delete. Also, you can directly manage files in Windows Explorer. For this, select Open in Windows Explorer from the context menu.
Step 5: Configuring deployment scenarios
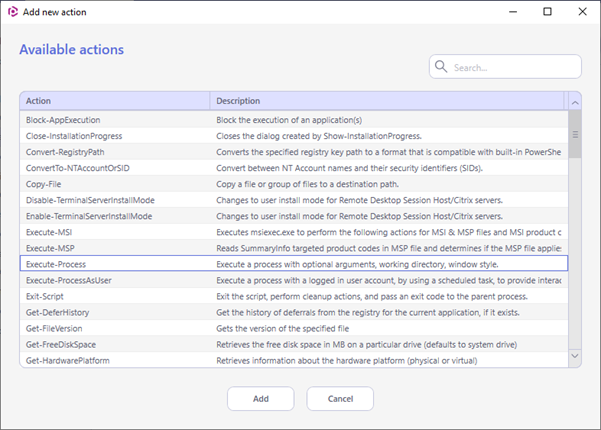
To customize the deployment scenario, insert the pre-defined PSAppDeployToolkit actions into the deployment script:
Go to the Package Designer tab and select the Actions section (from Pre-install to Post-uninstall) that you must configure.
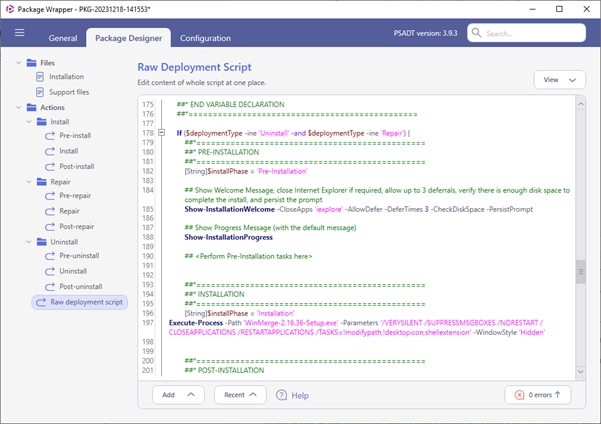
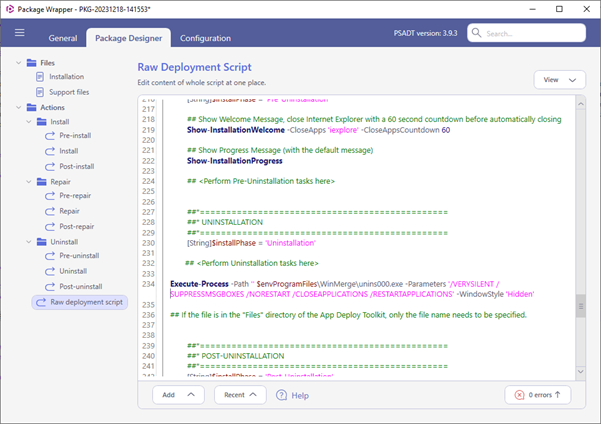
To review and edit the whole deployment script in one place, open the Actions > Raw deployment script tab.
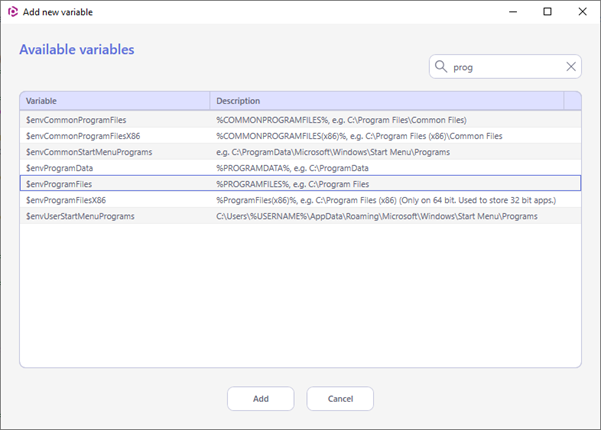
Step 6: Adding variable
To add a variable, place a cursor in the body of the script where you want to insert the variable and click Add > Variable.
Step 7: Validating the script
This step will help you to validate the deployment script for structural integrity and general errors.
Validation is run automatically when opening a package, during editing, and when saving is invoked. To view the validation results, go to the Package Designer > Actions > Raw deployment script tab and take a look at the panel at the bottom. This panel is automatically opened if the script has validation issues.
Click on an error in that panel to jump to the position in the script, where this error was found.
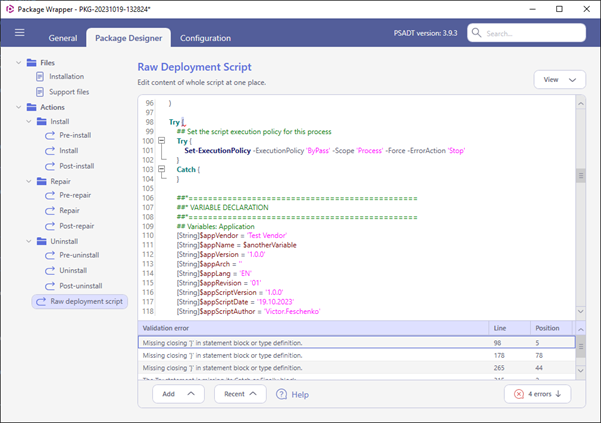
To manually close/open the panel with validation errors, click the button as shown.

Step 8: Testing and deployment
To deploy a package created via the PowerShell App Deployment Toolkit (PSADT), you typically use the deployment script generated by PSADT along with its accompanying files. Here’s a general overview of the process:
Monitor the PowerShell console for any prompts or status messages related to the deployment process.
Depending on the script configuration, the deployment might be silent or interactive.
Benefits of Integrating PSAppDeployToolkit into Package Wrapper
Integrating the PSAppDeploy Toolkit into PACE Suite’s Package Wrapper yields numerous benefits, revolutionizing the application packaging and deployment landscape for corporate environments.
- Streamlined Packaging Process. The PSAppDeployToolkit simplifies and automates complex packaging tasks within Pace Suite’s Package Wrapper. This integration enables users to create customized installation packages efficiently, reducing the intricacies associated with scripting and configuration.
- Consistency and Standardization. Leveraging the Toolkit ensures a consistent deployment experience across diverse IT environments. It promotes uniformity in application deployment, crucial for maintaining stability and reliability within corporate setups.
- Simplified Deployment Operations. By utilizing the PSAppDeployToolkit’s functionalities, Pace Suite significantly reduces the complexity of deployment operations. This simplification empowers IT teams to execute deployment tasks more effectively and swiftly, saving time and effort.
- Enhanced Productivity and Efficiency. The synergy between PSAppDeployToolkit and PACESuite’s Package Wrapper enhances overall productivity. It enables IT professionals to optimize their workflow, focus on strategic tasks, and expedite application deployment processes.
Wrapping Up
The incorporation of the PSAppDeployToolkit into PACE Suite’s Package Wrapper not only simplifies and streamlines app packaging but also ensures consistent, reliable, and efficient deployment processes. This synergy marks a significant advancement in empowering corporate environments to manage software deployment seamlessly.


