From Code to Production: Automate App Releases with CI/CD Tools
Imagine the frustration of a lengthy software release process, where every step from code writing to deployment is manual. That’s where CI/CD (Continuous Integration and Continuous Delivery) comes in as a game-changer. It injects automation into the entire application lifecycle, with a particular focus on creating installation packages.
This how-to guide highlights the impact of CI/CD on the process of creating installers for Windows applications . It also explores how continuous integration and continuous deployment streamline the MSI build process, integrate smoothly with PACE Suite installer tools , and ultimately provide a more efficient and reliable path to production. But first, let’s have a look at what exactly CI/CD is.
What Is CI/CD?
Continuous Integration (CI): This practice automates the process of merging code changes from developers into a central repository. It also triggers automated builds and tests to ensure early detection of integration issues and maintain code quality.
Continuous Delivery/Deployment (CD): Building upon CI/CD automates the packaging and deployment process. It prepares the application for different environments, like staging and production, and streamlines the final push to users.
Simply speaking, CI/CD or continuous integration and continuous deployment is a practice that helps automate, accelerate, and simplify the entire software development process.
Benefits of Building Software Installation Package with PACEMSI Project
PACE Suite is an MSI package builder software that provides a streamlined approach to creating software installers. Its MSI in CI/CD feature can be easily integrated with the most common CI/CD tools.
PACE Suite offers numerous benefits:
- Automated MSI Generation: Effortlessly build installer for Windows for your software directly within your CI/CD pipeline.
- Simplified Configuration: A user-friendly wizard on how to make an installer for Windows guides even non-MSI experts through project setup, ensuring a smooth start.
- Advanced Customization: Fine-tune your installer to perfection. Customize resources, installation behavior, and user interface to match your specific needs.
- Intelligent File Management: The File Harvesting feature automatically includes essential files generated during compilation. Leverage powerful filtering options to ensure only the necessary files are included. Plus, work with absolute and relative paths and define user variables for flexible file management.
How to Create Windows Installer?
To create a Windows package installer, we need to use PACE Suite to perform a few easy and straightforward steps.
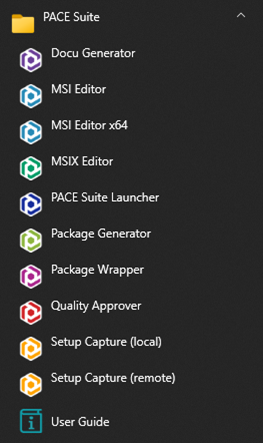
1. Start the PACE Suite Launcher, which can be found in your Start Menu or on your desktop.
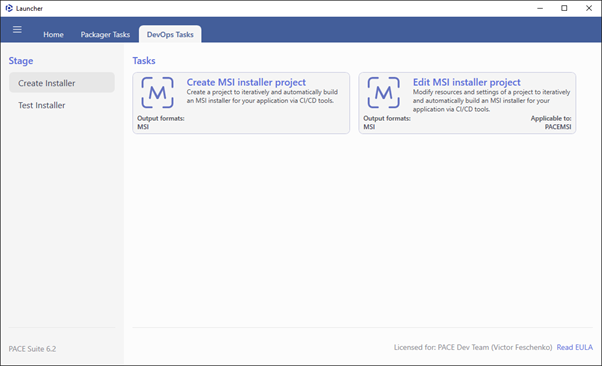
2. Create a New Project by clicking “Create MSI installer project” under “DevOps Tasks > Create Installer.”
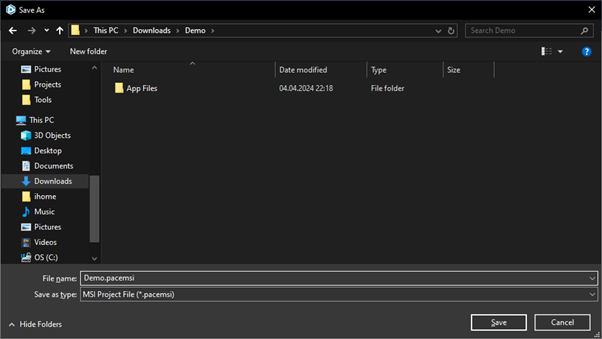
At this stage, choose a location and a name for your project file, then click “Save.”
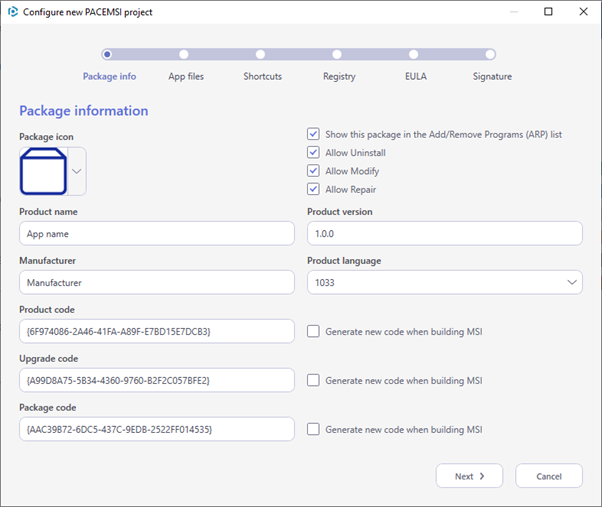
A wizard will guide you through configuring basic aspects.
3. Configure Project Details (Wizard Steps) by entering your application name, manufacturer, and version. Optionally, choose a package icon:
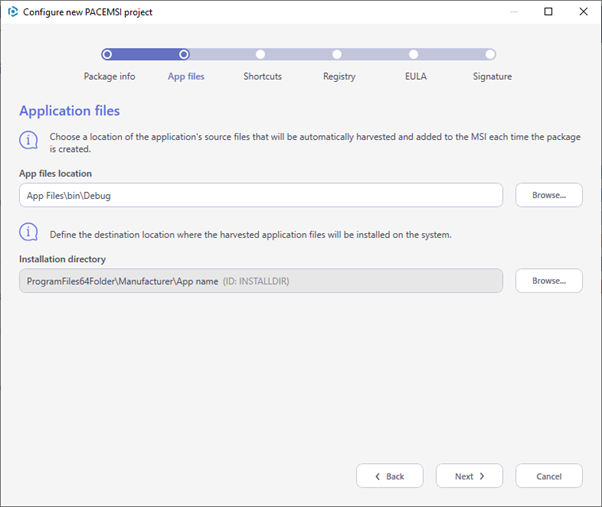
Select your application file location. PACE will automatically include these files in the generated MSI.
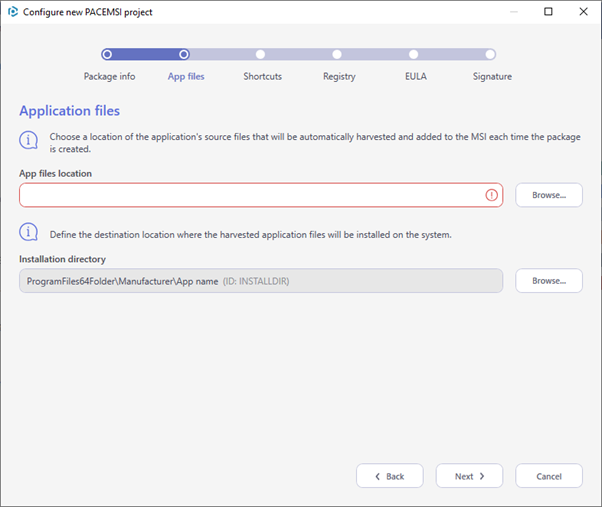
Review and adjust the installation directory where your application files will be placed on the user’s system.
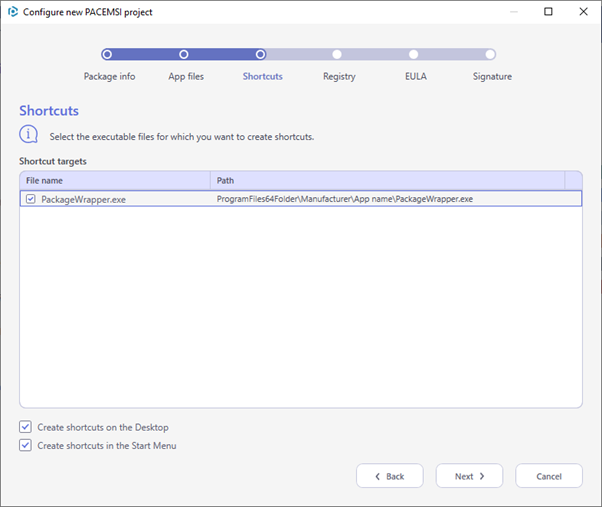
Choose which application files should have shortcuts created in the Start Menu and/or Desktop.
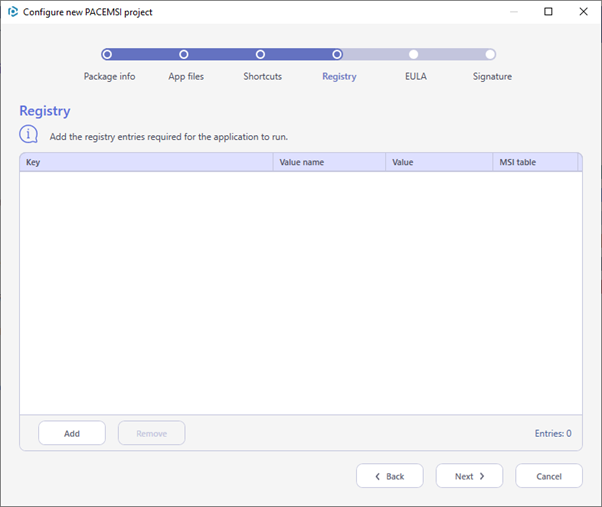
If your application needs specific registry entries, import them from a .REG file.
Select your application’s End-User License Agreement (EULA) file.
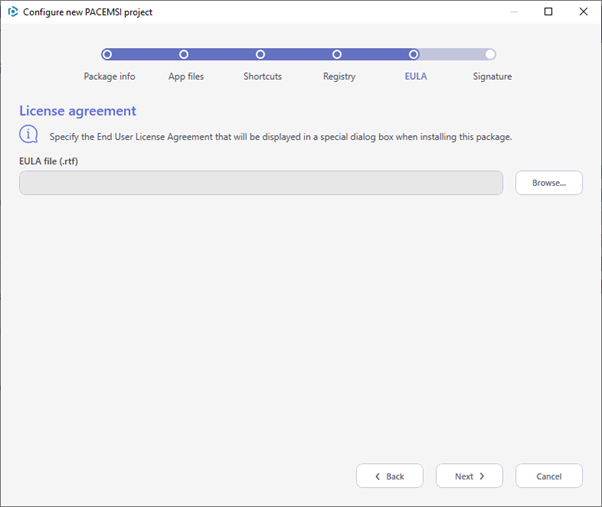
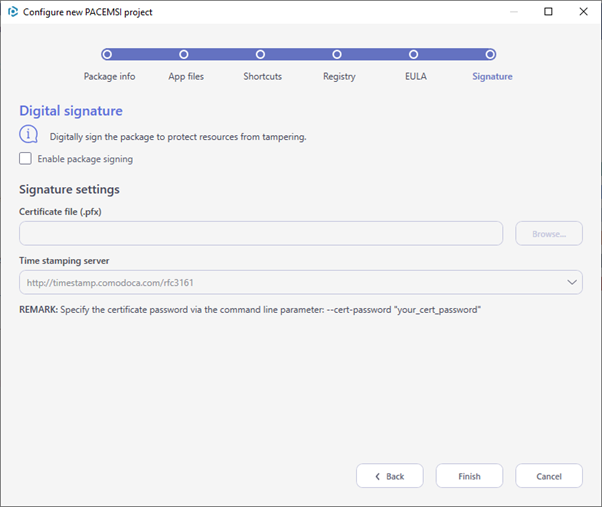
Optionally, digitally sign the MSI package for security and network distribution.
4. Customize Your Installation (Package Designer):
Once the wizard completes, you can access the “Package Designer” tab.
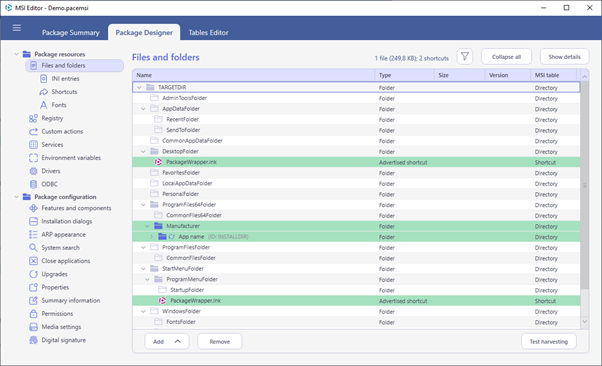
This interface allows you to further customize resources like icons, messages, and installation behavior.
Newly added or changed resources are highlighted in green for easy identification.
How to Automate File Inclusion with PACE MSI Builder’s File Harvesting
The File Harvesting feature simplifies the process of including dynamic files generated during compilation into your MSI installer. Here’s how it works:
Automatic Inclusion: PACE automatically identifies and adds all files and subfolders from a designated harvesting folder to your MSI package. This ensures all necessary files are included, even if they weren’t explicitly added to your project.
Selective Harvesting: Don’t need everything in the folder? No problem! Use include/exclude filters based on regular expressions to ensure only the essential files are packaged.
Flexible Paths: Define harvesting paths as absolute, relative, or even leverage user-defined variables for dynamic folder locations (e.g., bin\<%variable-name%>\App files).
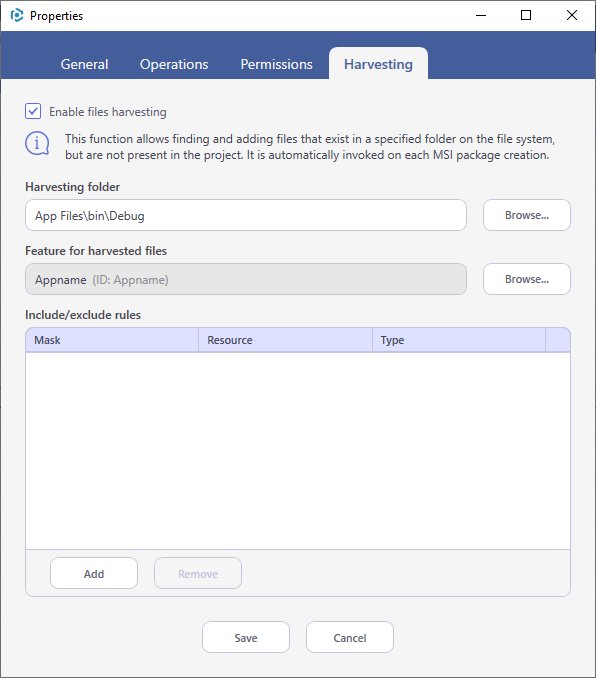
Navigate to the “Package Designer > Files and folders” tab. Then, right-click the folder where you want to configure file harvesting and choose “Edit.”
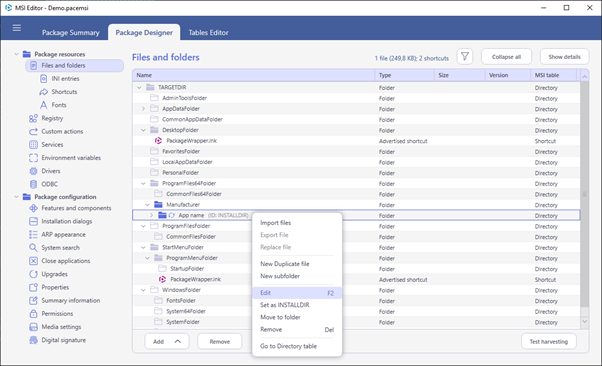
2. Open the “Harvesting” tab and customize the settings below:
- Harvesting folder: Specify the location containing the files you want to include.
- Feature for harvested files: Assign the harvested files to a specific MSI feature.
- Include/exclude rules: Use regular expressions to filter files (e.g., ^.*\.log$ to include only .LOG files).
Transform your application into a professional-grade MSI installer with ease using the PACEMSI project. Simply run this command line from your CI/CD tool’s pipeline and enjoy the seamless experience.
Syntax:
“MsiEditor.exe” [–parameter “value”]
Usage:
“MsiEditor.exe” build-msi –project “C:\My App\Installer Project.pacemsi” –output-package “C:\My App\Setup.msi” –path-variable “<%profile%>=Debug” –product-version “10.10.10”
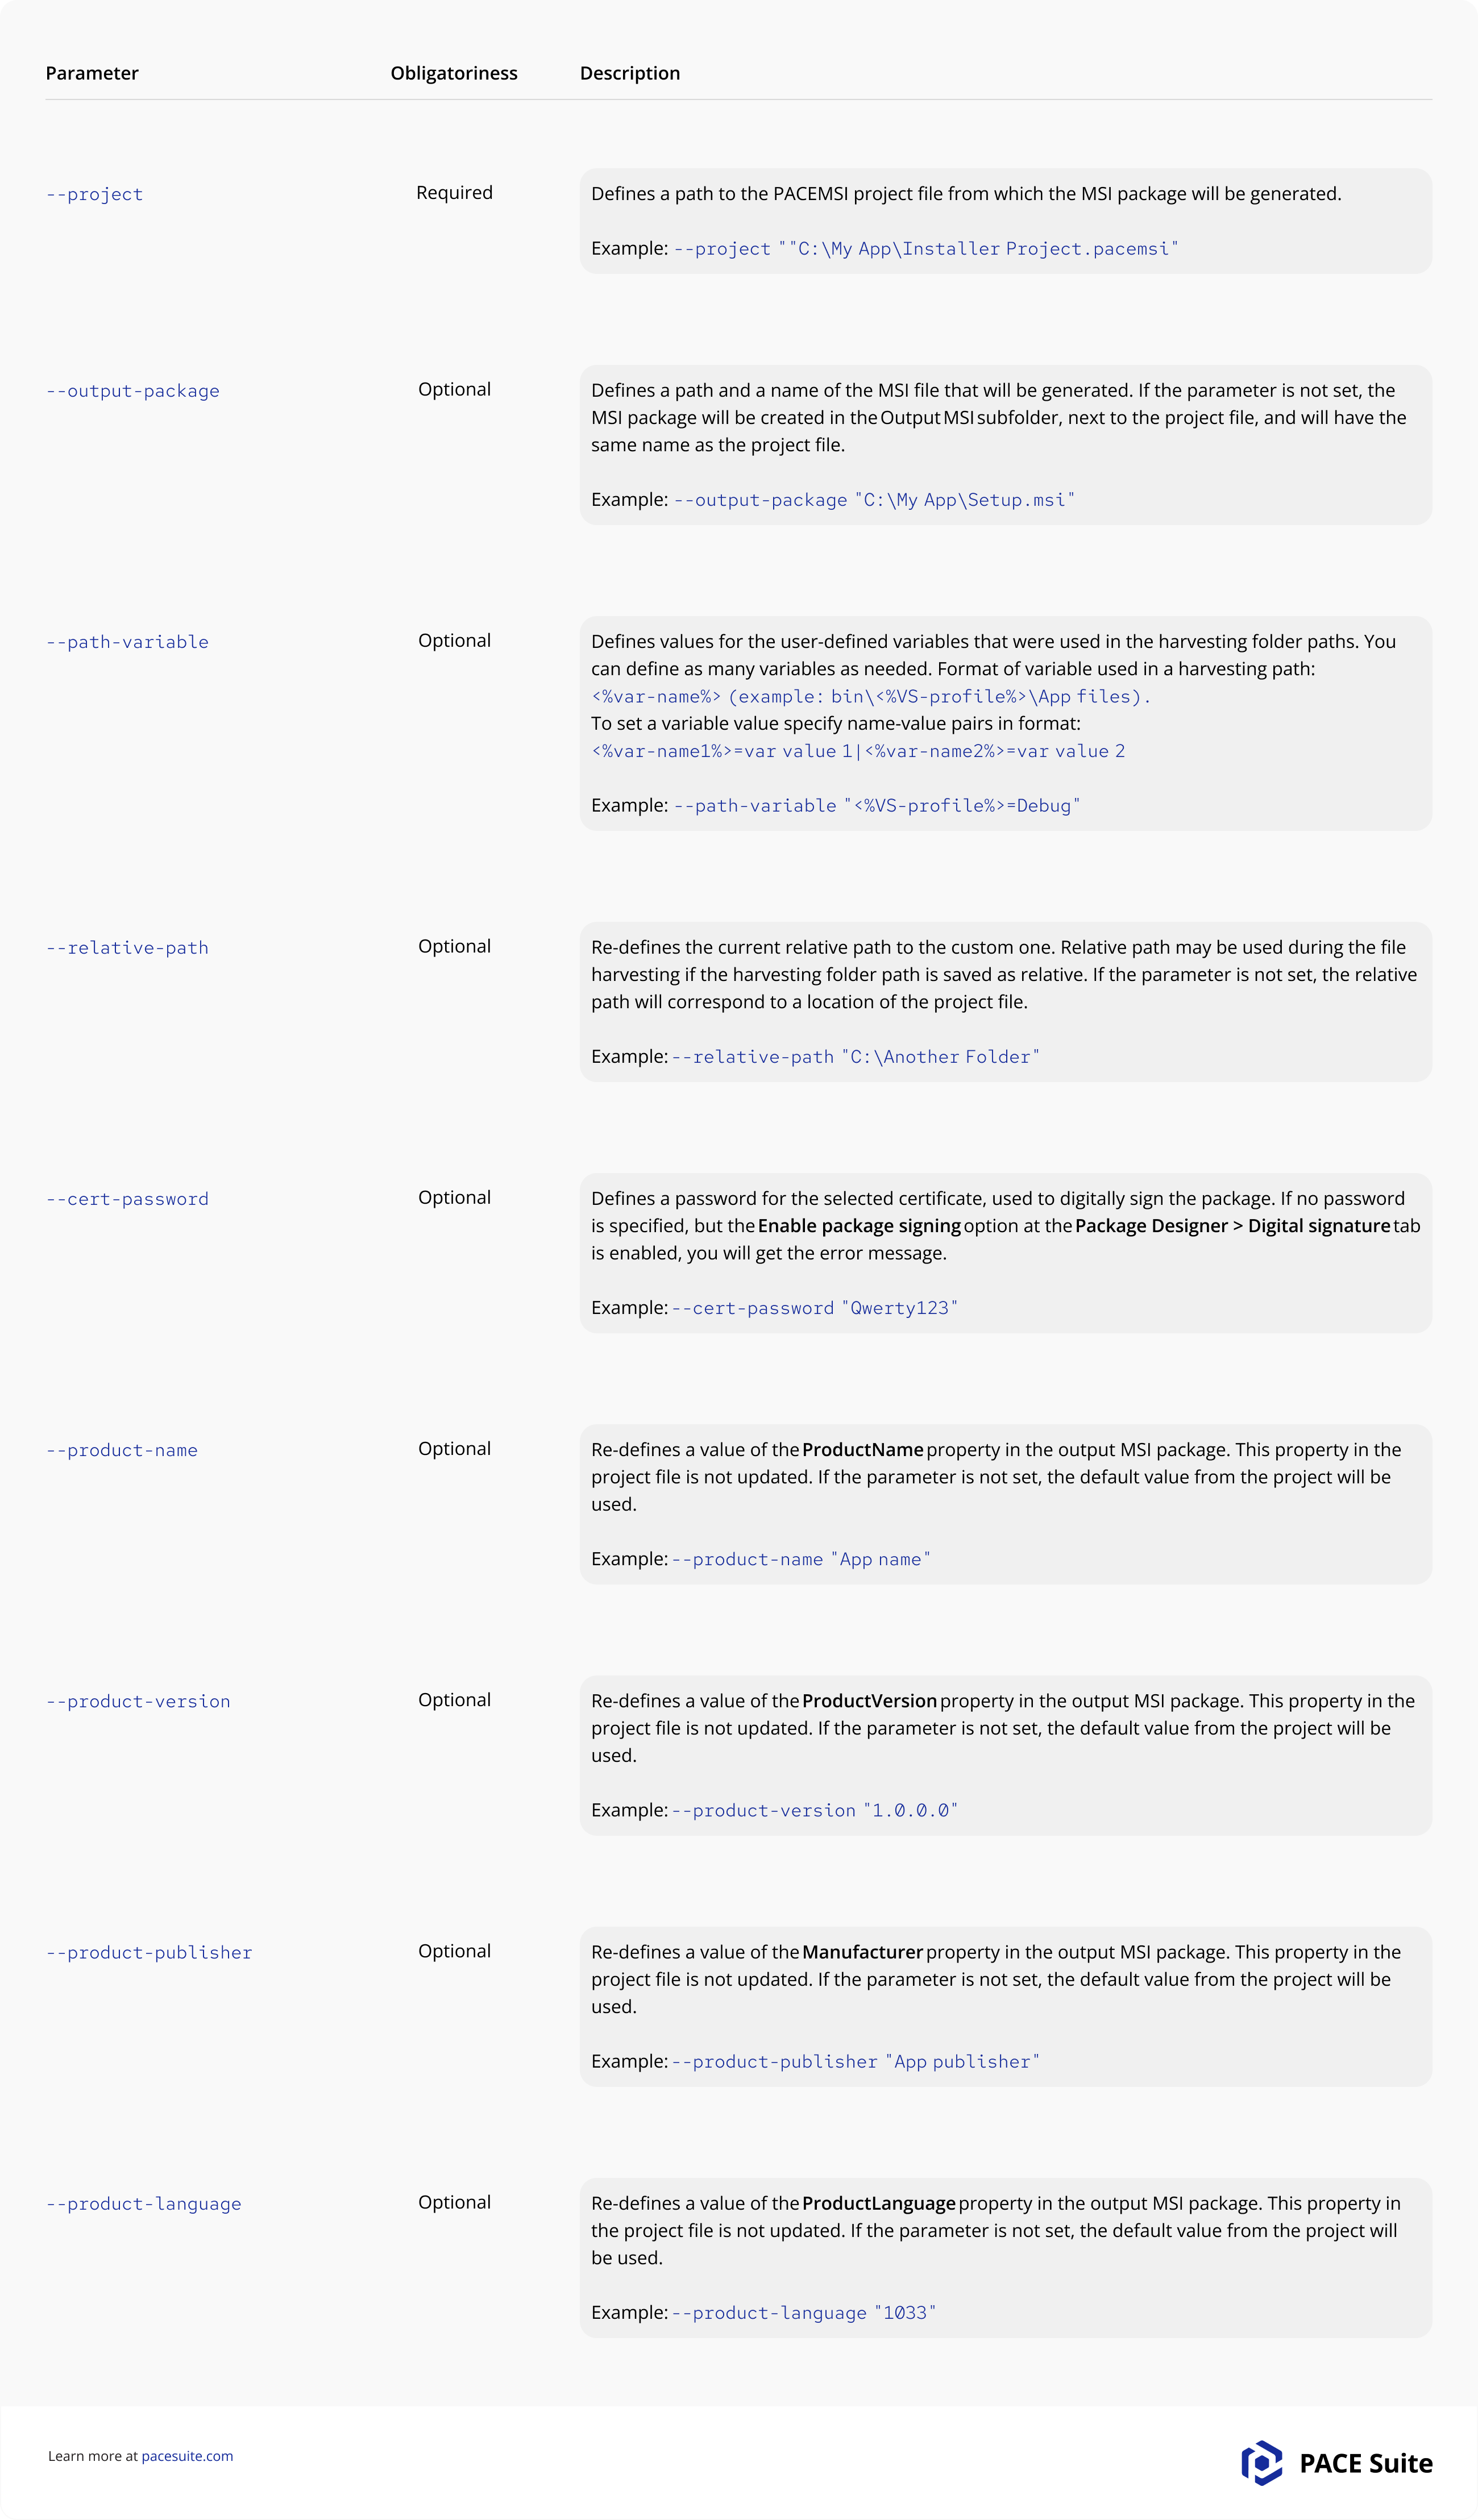
Parameters of the build-msi command:
In conclusion, the CI/CD process isn’t just about faster releases; it’s about smarter releases. By automating the msi build and packaging process within your CI/CD pipeline, you eliminate manual errors and inconsistencies. This translates to:
- Reduced Packaging Time: No more manual configuration or repetitive tasks. CI/CD automates the creation by installer tools, freeing developer time for more strategic tasks.
- Improved Consistency: Every build and package follow the same automated process, ensuring identical and reliable installers across releases.
- Early Error Detection: Integration with automated testing within the CI/CD process allows for early identification of packaging issues, preventing them from reaching later stages of the deployment process.
- CI/CD workflow transforms application packaging from a time-consuming hurdle into a seamless and automated step in your software delivery pipeline.


