
Convert EXE to MSIX: MSIX Packaging Done Right
MSIX is a relatively recent app packaging format (Microsoft introduced it in 2018). It helps you convert Win32 applications without hassle and will generally standardize the entire app packaging process, bringing a modern packaging experience to Windows apps. In a nutshell, this format makes the packaging process easier and more streamlined. Use this guide if you want to convert any Win32 application to MSIX .
An application packaging tool, PACE Suite offers several unique features that make MSIX packaging easier, faster, and more accessible for new users.
How to Convert EXE File to MSIX with PACE Suite
- Review and modify the package logo and application root folder at any time.
- Manage MSIX apps and their appearance settings at any time.
- Generate a self-signed certificate to sign the package/bundle.
- Generate the ‘modification’ package from the existing project at any time.
- Easily manage supported platforms and versions directly in the interface. No knowledge of editing manifest files is required!
- Generate separate packages for all of the specified processor architectures at once.
- Combine the generated packages into a bundle that could be signed automatically. There is no need to open the command line.
- Generate the AppInstaller file in one click for your app’s non-Store distribution and auto-update.
- Leverage many validation rules that allow detection and fix issues before package creation and deployment.
Convert EXE to MSIX: A Step-by-Step Tutorial
A. To recreate the business logic of any source installation in MSIX, you first need to capture all changes that this installation makes to the local drives, registry, services, and other system areas.
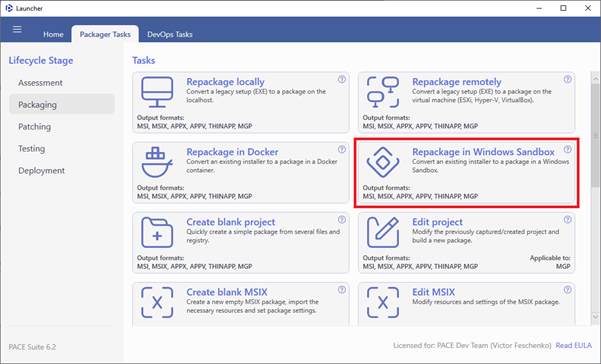
B. To capture the source installation, follow one of the instructions below. For this example, we’ll choose Capturing in Windows Sandbox . If you want to capture the source installation on the local host and virtual machine, read this guide.
Capturing in the Windows Sandbox
Capture all the changes to the local drives, registry, services, and other areas of the sandboxed Windows OS environment.
The changes can be made by an existing installation (like a black-box EXE) or by the user’s actions (like copying files, importing. REG to the system registry or changing app settings).
The captured resources will be automatically transferred from the Windows Sandbox to a specified project location via the host, where the capturing wizard is run.
Attention
Windows Sandbox is a built-in Windows OS feature that provides a temporary desktop environment to run applications in isolation safely. Software installed inside the Windows Sandbox environment remains “sandboxed” and runs separately from the host machine.
1. Run PACE Suite Launcher from the Start Menu or Desktop shortcut on your workstation (PC). .
2. Review the issues, which were detected on your system, and try to resolve them by closing the non-essential applications and stopping services. Thereafter, click Next .
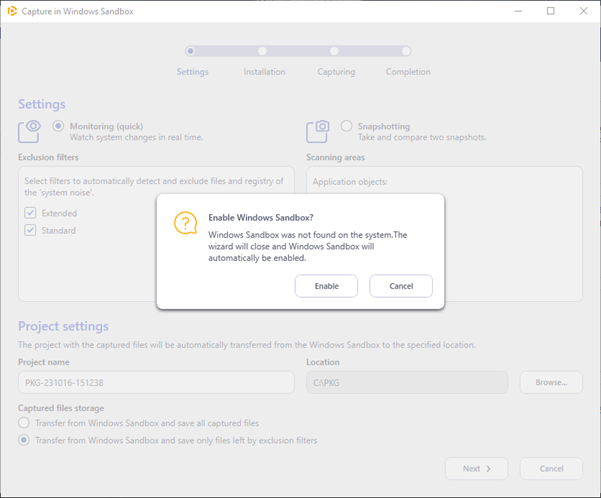
3. The wizard checks whether the Windows Sandbox OS features is enabled. If not so, click Enable to automatically enable Windows Sandbox.
Note
After enabling Windows Sandbox, be sure to restart your computer.
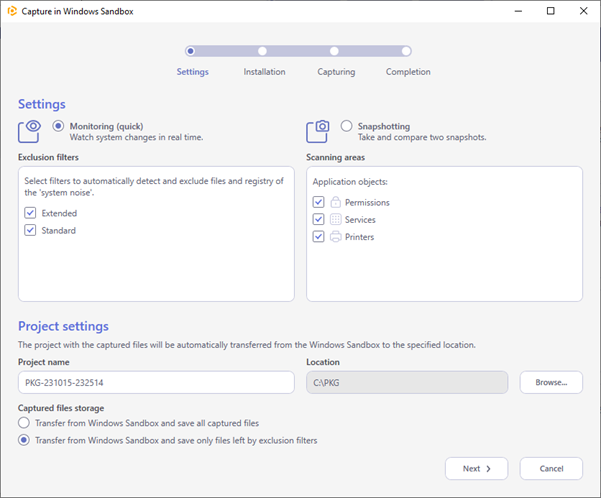
4. Select the capturing method, project name, and its location. Choose exclusion filters that will be used to detect and filter out unnecessary resources. Then, click Next >.
- Use the Monitoring method for quicker capturing.
- Use the Snapshotting method to capture huge installations.
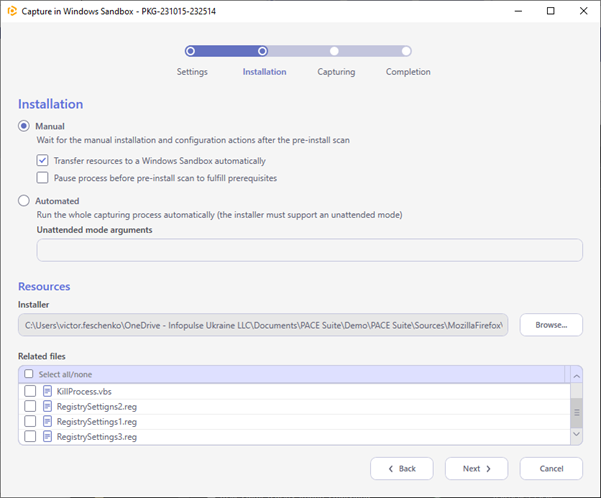
5. Select the installation processing mode, installer, and related files to transfer to the Windows Sandbox and click Next.
- In the Manual mode, the wizard will pause after the pre-install scan to allow you to install any apps, change the required app settings, and make any system changes you need to capture and include in the package. If you need to install or configure prerequisites before capturing, tick the Pause process to fulfill the prerequisite option.
- In the Automated mode, the wizard runs the specified Installer with Unattended mode arguments for the pre-install and post-install scans. The post-install scan runs once the installer process is finished.
6. If you have selected the Manual mode, wait while the Windows Sandbox is getting ready, and pre-install scans are made.
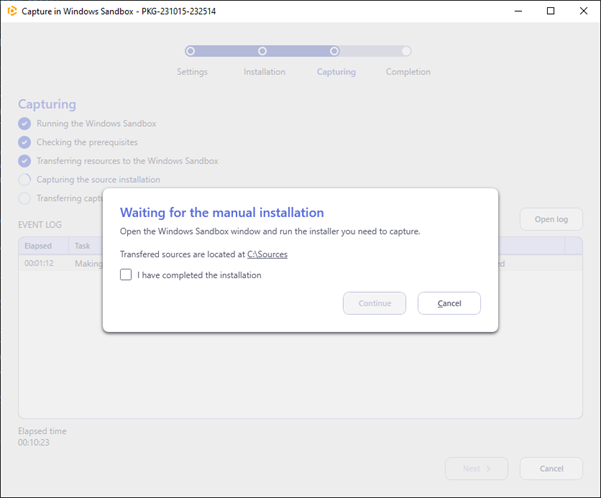
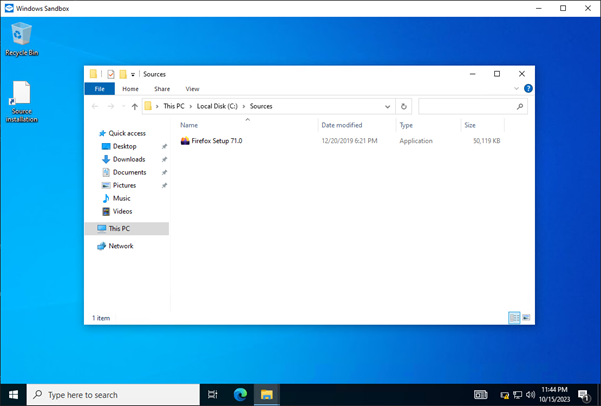
7. Switch to the launched Windows Sandbox and navigate to the C:\Sources folder. There, you will find the specified source installation
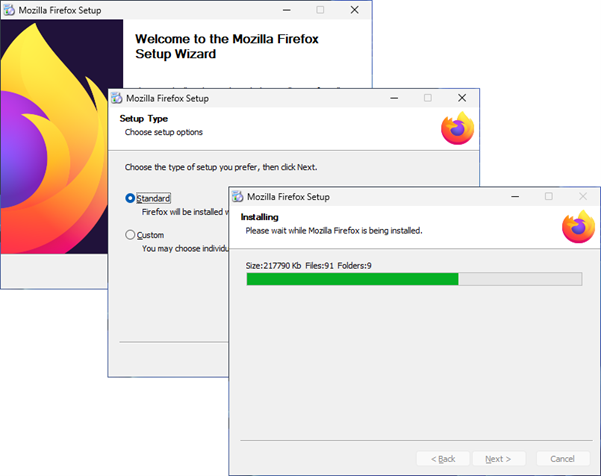
8. Run and complete installers of apps that you need to capture. Also, at this stage, you can make any system changes you need to capture along with apps.
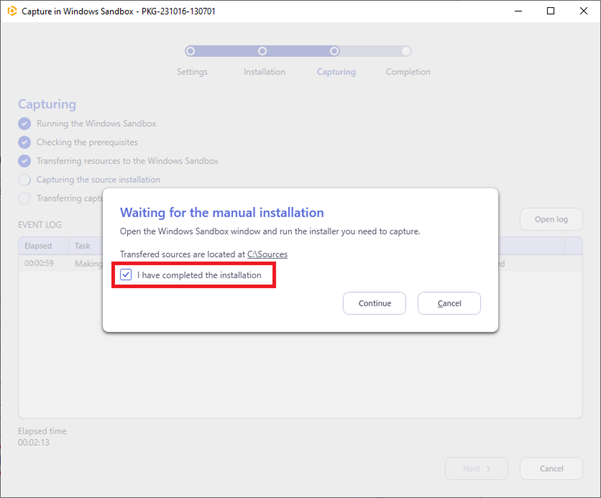
9. When finished, switch back to the capturing wizard, tick I have completed the installation and click Continue.
10. Capturing is completed. Click Finish to close the wizard. By default, the created capturing project will be opened for editing, and the Windows Sandbox will be closed.

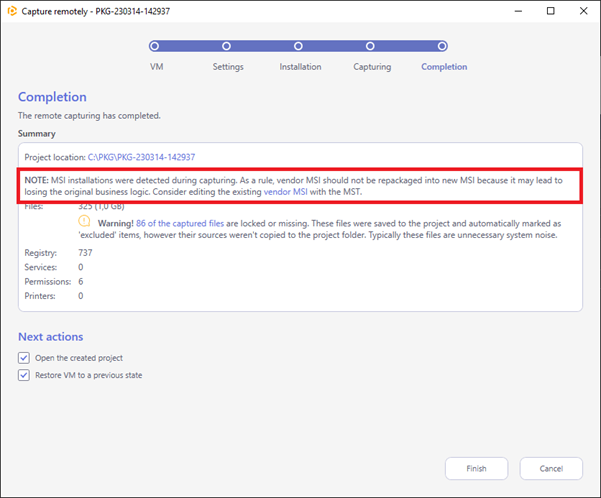
Note
If the capturing Summary contains the detected ‘vendor’ MSI packages, consider editing them via transform (MST) instead of repackaging. Repackaging the existing vendor MSI into a new MSI may lead to losing the original business logic.
11. Once capturing is completed, open the capturing project in Package Generator. By default, it will be opened automatically.
12. We recommend to review the capturing results and exclude resources that do not belong to the captured app.
13. Then, specify the product information, MSIX/APPX apps, capabilities, signature, and other package settings.
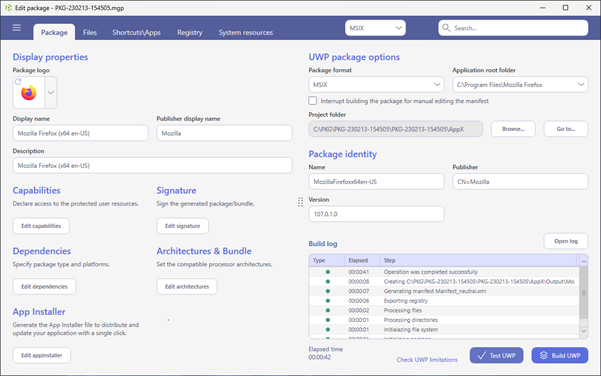
14. Switch to the Package tab, select the MSIX package format, and click Build UWP to generate the MSIX package for the project.
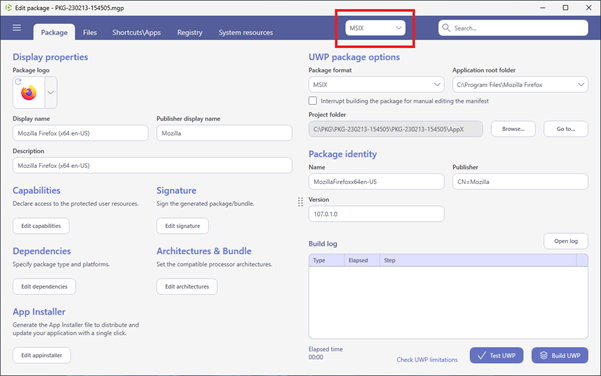
15. Switch to the Package tab, select the MSIX package format, and click Build UWP to generate the MSIX package for the project.
16. Find your package in the “AppX\Output” subfolder of the project folder. To open the project folder, click Go to…, located next to the Project folder field.
17. To install the generated MSIX package:
- (1) enable the Developer Mode or Sideloading apps on the target system
- (2) ensure that the certificate, used for signing, is trusted on that system. If you are using the self-signed certificate, install it manually to the Trusted People or Trusted Publishers local machine certificate store. By adding a certificate to local machine certificate stores, you affect the certificate trust of all users on the computer. It is recommended that you remove those certificates when they are no longer necessary to prevent them from being used to compromise system trust.
That is all you need to do to convert EXE to MSIX package using PACE Suite. Download a free PACE Suite trial now to try creating MSIX packages yourself and contact our support in case you have any questions.