Seamless Software Deployment through PACE Suite’s Dialog Editor
In software deployment on Microsoft Windows systems, the user interface (UI) guides users through complicated installation processes. At the heart of the UI lies the Windows Installer MSI dialogs, interactive gateways that facilitate user communication and make the installation process much easier. Additionally, two installation modes, interactive and unattended installations, play pivotal roles in deployment strategies.
In this article, we’ll take a closer look at the definition of UI in Windows Installer , the differences between interactive and unattended installations, uncover how these components work together within software deployment, and show how to make a dialog with the help of the Dialogs Editor in PACE Suite .
What is UI in Windows Installer?
Simply put, the User Interface (UI) in Windows Installer shows what happens on the screen during software installation or uninstallation. The UI components, called MSI dialogs, guide users through various stages of the installation process, providing crucial information, main choices, and prompts for user input.
Main Types of Windows Installer Dialogs
MSI dialogs come in different forms, each with a specific purpose:
1. Welcome Dialog Box: The installation process begins with an introduction that has important information about the installed software.
2. License Agreement Dialog Box: A step where the user reviews the software license agreement and accepts the terms and agreements before proceeding.
3. Installation Options Dialog Box: An interactive screen where the user can customize their installation by selecting specific features, components, or preferred installation locations.
4. Progress Dialog Box: A dynamic screen showing the installation progress, giving updates on the current status and remaining estimated time.
5. Completion Dialog Box: The final step of the installation process, often with post-installation instructions or celebratory messages.
All these dialogs create Windows Installer UI, guiding users through the user interface wizard behavior. The term “user interface wizard behavior” means that each dialog box in a sequence contains a Next button, which the user clicks to move to the next box after entering data or configuring information in the current dialog box.
If the user decides to go back and change any information entered in a previous dialog box, each box contains a Previous button that the user clicks to go back. At the end of the wizard sequence, the user clicks the Finish button to complete the installation process.
Interactive vs. Unattended Installation
There are two main installation modes in software deployment: interactive and unattended installations. Understanding the differences between them is paramount for orchestrating efficient deployment strategies suited to different user scenarios.
1. Interactive Installations
Interactive installations allow users to actively participate in the installation process through the series of installation dialogs. Users engage with these dialogs by providing input, making decisions, and responding to prompts throughout the process. This mode is quite flexible as it allows users to tailor their installation experience according to their preferences.
The main features of interactive installations include:
- User involvement during the entire installation process.
- Opportunities to customize installation settings to match their preferences.
- Clear visibility into installation progress, providing full control of the process.
Interactive installations are useful in scenarios requiring user involvement, such as individual workstation deployments or personalized software installations.
2. Unattended Installations
Unattended installations proceed without user involvement guided by predefined scripts and configurations. Users give up control, allowing the installation process to follow its predetermined course autonomously. The custom dialog boxes that mark interactive installations are absent. Instead, these installations happen quietly in the background, hidden from user intervention. Key characteristics of unattended installations include the following:
- No user involvement during the installation process.
- Predefined installation settings and parameters scripted for automated execution.
- The installation progress is hidden from the user.
Unattended installations are efficient and fast, ideal for deploying software across large enterprise networks or seamlessly updating without disrupting user tasks.
Dialogs Editor in PACE Suite
For software vendors, installation dialogs are more than just functionality. They play an important role in innovation and user engagement. With each new software version, vendors use installation dialogs to show what new features and enhancements are waiting ahead. Well-designed dialogs not only make the installation process simpler but also represent the brand, creating a lasting impression on users and creating long-term relationships.
Recently, PACE Suite, an application packaging tool, has introduced the ability to create and edit package dialog boxes using the MSI dialog editor. This provides software developers with the capability to make changes to existing dialogs and create new dialog boxes, add additional dialogs based on pre-installed ones like Files in Use dialog, and import templates into the user interface. An indisputable advantage is the ability to simulate the installation process or preview dialogs without installing on the end computer.
How to Use Dialog Editor
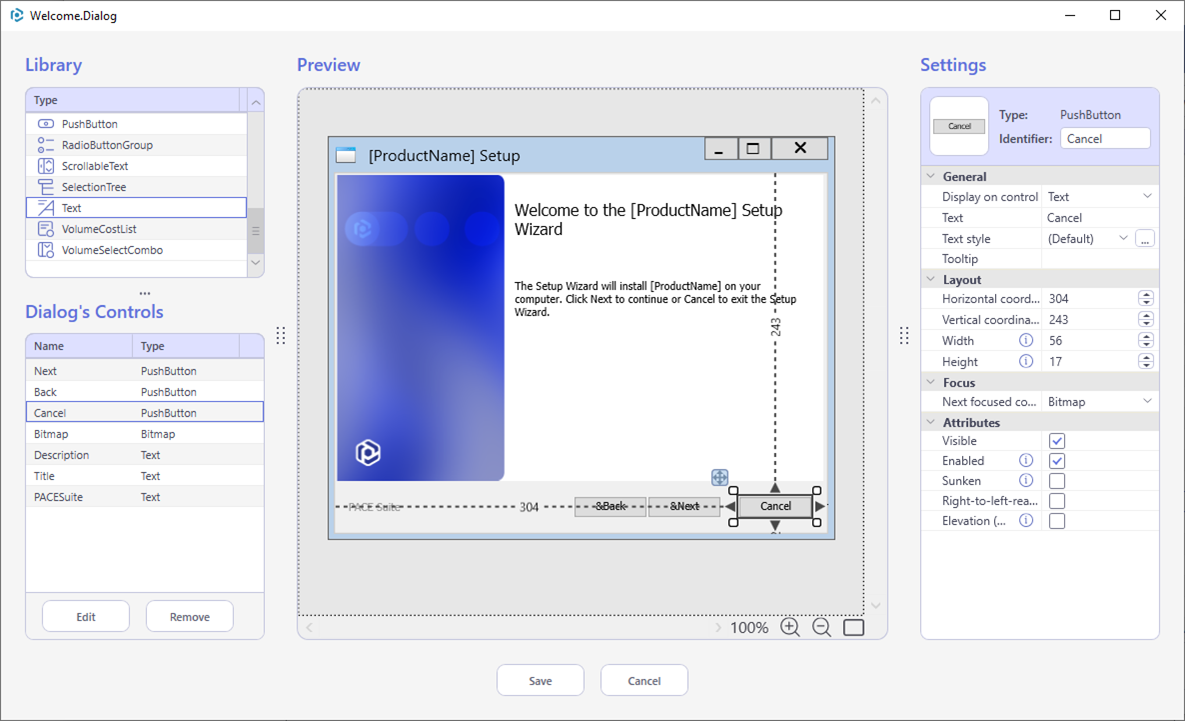
Here is an example of dialog box editor:
Edit the dialog box settings, dialog’s controls, their conditions, and events.
1. Go to the Package Designer > Installation dialogs tab.
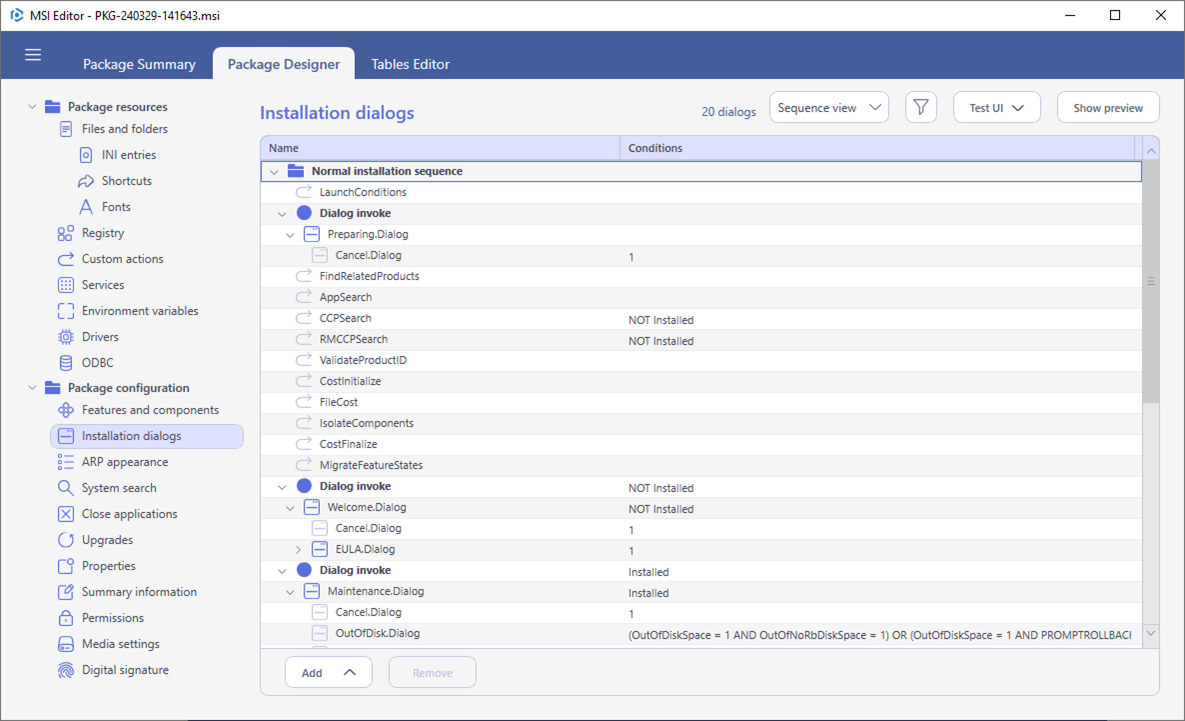
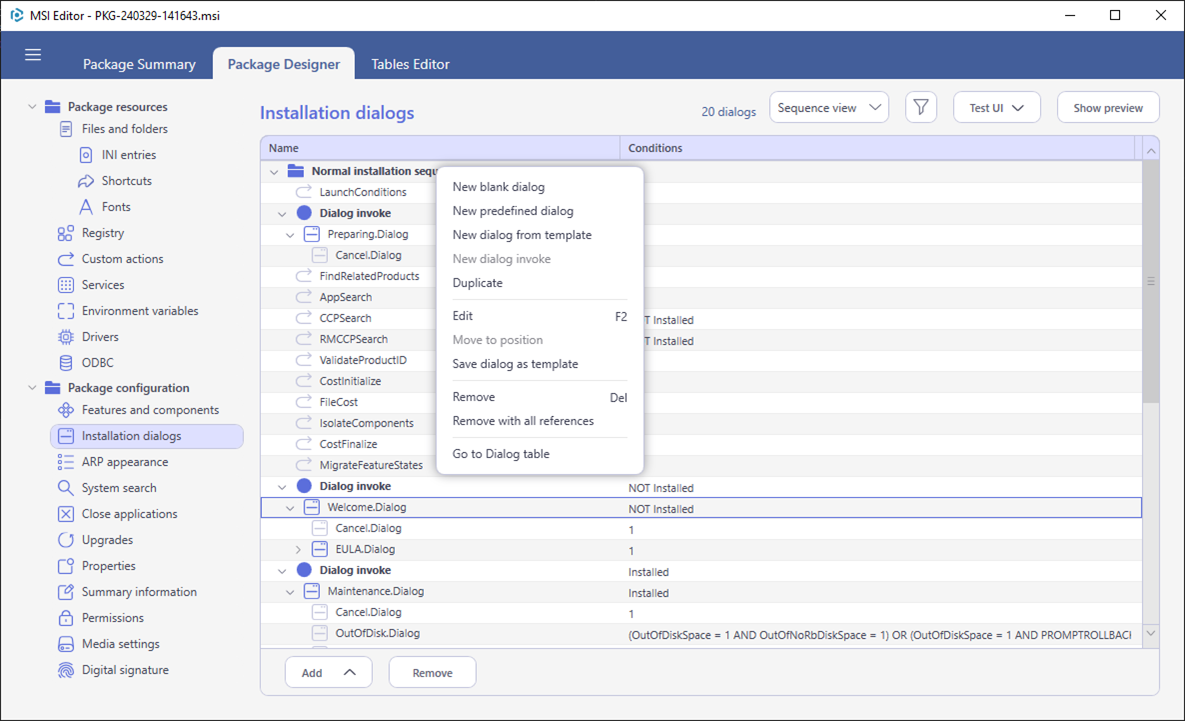
2. Select the Edit from the context menu of a dialog that you need to edit. The Sequence view displays the tree of dialogs in order of how they are invoked. One dialog may appear multiple times in different places.
To simplify the search of the required dialog, switch to the Flat list view that displays only unique dialogs in alphabetical order.
3. To change the dialog name and properties, ensure that the dialog window is selected (click on the window header) in the Preview and edit values in the Settings section.
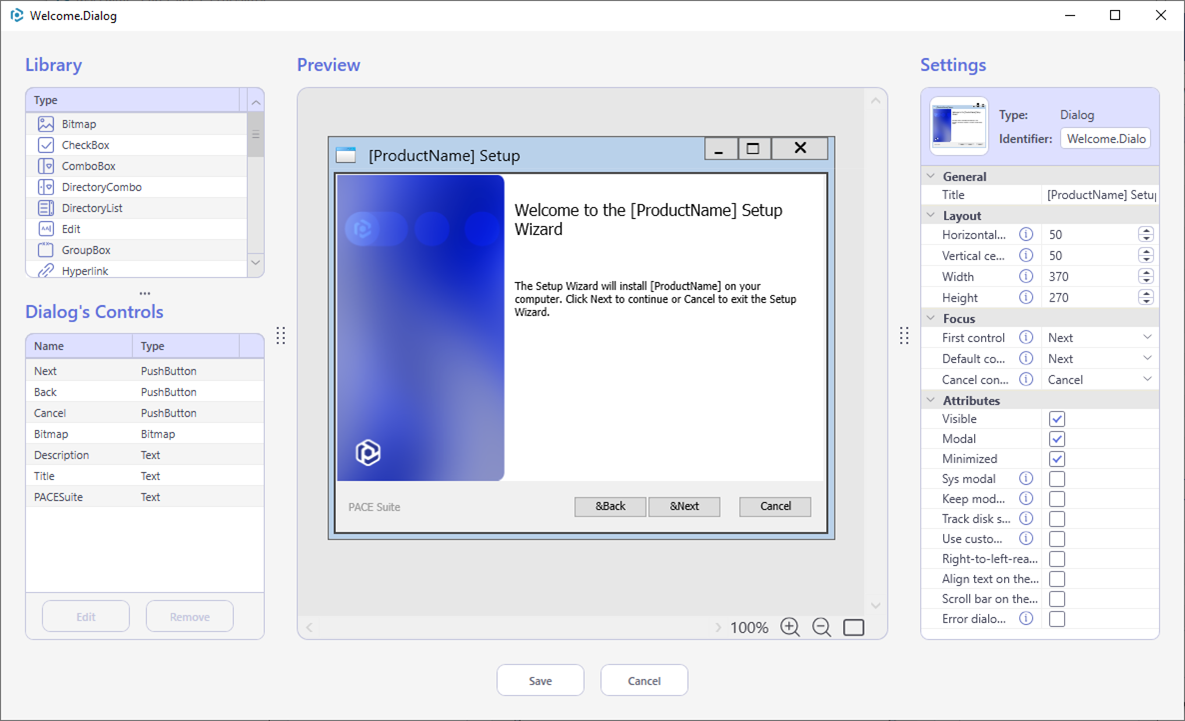
4. To add a new control to the dialog, select the needed control from the Library section, then in the Preview section, click and drag the frame to draw the control of the required size. Configure the control parameters in the Settings section. If the control has the red frame, this means that it has a validation error. Find the issue details in the Settings section.
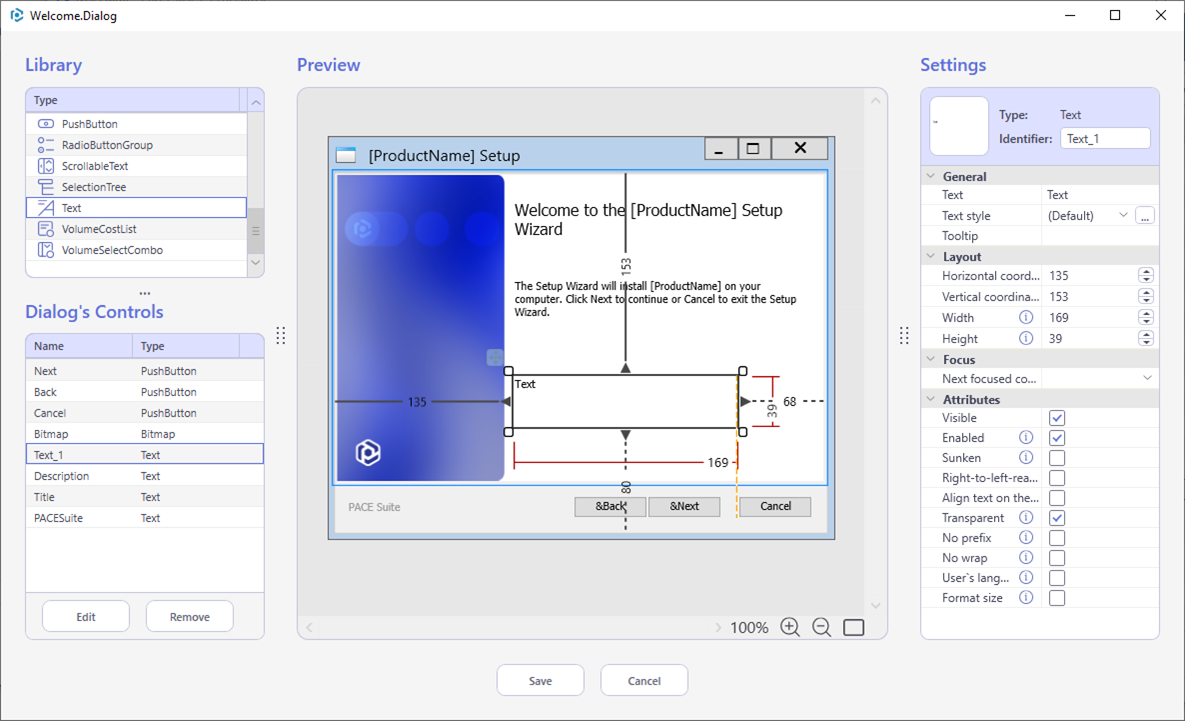
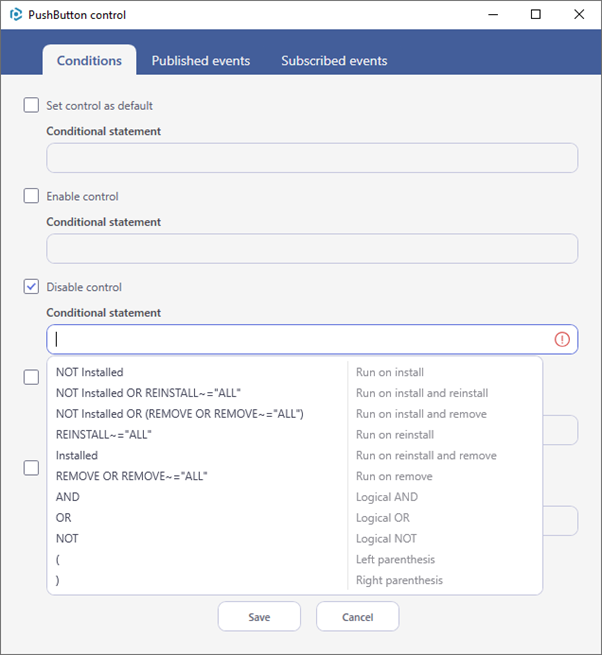
5. To view and manage control events (actions) and has the red frame, this means that it has a validation error. Find the issue details in the Settings section. To view and manage control events (actions) and conditions, select the control in the Dialog’s Controls list and click Edit.
6. If needed, customize under which special conditions the default behavior and appearance of the control should be changed.
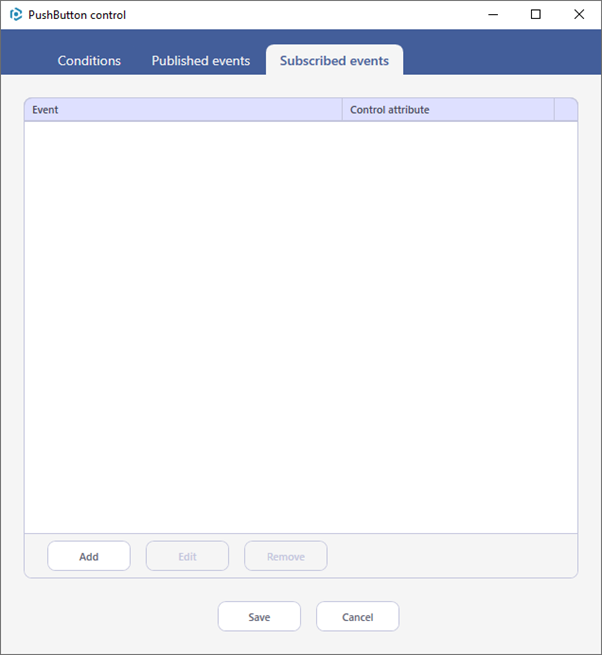
7. For active controls like PushButton, CheckBox, SelectionTree you can define Published events, which will be started when a user interacts with these controls. The ‘Add Event’ dialog lists only the relevant events and arguments but does not prevent you from entering any other event manually. Each control can publish multiple control events. For more information, see Control Event Overview and Control Events .

8. For passive controls that display some information, you can define the Subscribed events, events that the control listens to and changes the displayed data or appearance. For more information, see Control Event Overview and Control Events .
Wrapping Up
In the complicated process of software deployment on Microsoft Windows systems, Windows Installer dialogs guide users through the installation journey with ease and clarity.
Understanding the differences between interactive and unattended installations opens the floor to efficient deployment strategies tailored to various user needs. By carefully configuring Windows Installer dialogs and balancing different installation modes, with the help of dialog tree editor tools developers and administrators can create seamless installation experiences that satisfy users. Meanwhile, software vendors use installation dialogs to inform and engage users with each new software version, turning them into tools for innovation and engagement.