
Custom Actions in MSI: What Are Those and How to Use Them to Your Advantage
If you want to learn more about what custom actions in MSI are and how to create them, you’ve landed on the right page. Follow through to find out more about Windows Installer custom actions.
Numerous actions are available for the installation process in the Windows Installer package. However, in some cases, the technical expert for an installation package may occasionally need to create a custom action.
The need for custom actions includes, but is not limited to, the following scenarios:
- During installation, the tech expert wishes to run an executable already on the user’s computer or install it with the application.
- The tech expert wishes to invoke specific functions defined in a dynamic-link library during installation. (DLL).
- The tech expert wants to use functions created in Microsoft Visual Basic Scripting Edition or Microsoft JScript literal script text.
- The tech expert wants to delay performing some actions until the installation script is finished.
There are numerous MSI custom actions, which makes it impractical to list them all here. We recommend referring to the official Microsoft documentation for a comprehensive understanding of all custom actions. Nonetheless, here are some practical examples of effortlessly creating custom actions using PACE Suite for application packaging.
VBScript custom action
Despite being relatively old technology, VBScript can still be used to achieve a wide array of installation (or uninstallation) goals. VBScript is natively supported by MSI and executed directly by the MSI installation engine.
For example, we can use VBScript to remove a complex tree of folders at package uninstall (e.g., data that was not removed by native uninstallation logic, some unrequired operational data that was created by the application in the installation folder, etc.) Let’s assume these folders are in a per-machine location and require elevated privileges (system context) for removal.
After creating the “cleanup” script, the engineer needs to integrate it into MSI by authoring a custom action. We can use PACE MSI Editor for this.
1. Open the MSI editor and navigate to “Package Designer.”

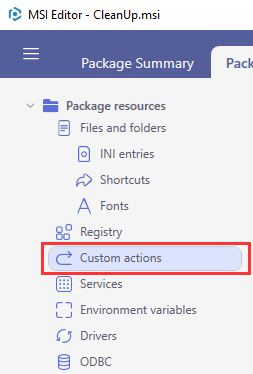
2. In the “Package resources” group, select “Custom actions.”
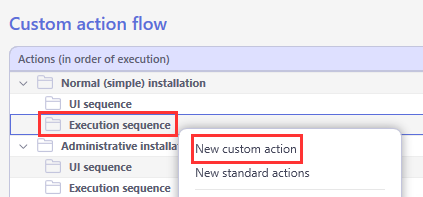
3. In the “Custom action flow” right-click Normal Installation \ Execution Sequence and select new custom action in the context menu.
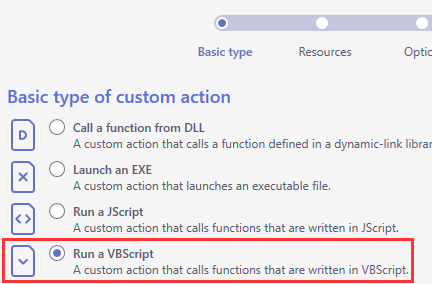
4. Now select “Run a VBScript” as the basic type. Click “Next.”
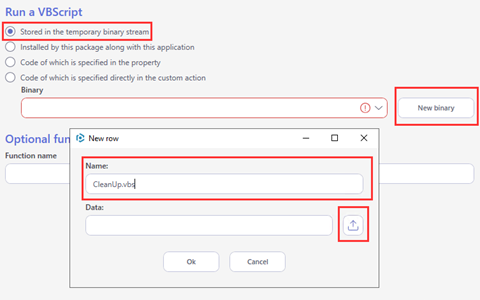
5. Select the “Stored in a temporary binary stream” option (a separate entry in a “Binary” table will be created to store the script body). Hit the “New Binary” button, specify the name for the entry that will hold the script body, and load the VBScript file. Proceed with “Next.”
6. Specify custom action name. Execution mode – deferred and run in the system context. System context is required to get elevated privileges for the script. Note that this only marks custom action to be elevated. It would be best if you also made it deferred (run in the installation script) to enable the system context completely.
7. Such are MSI framework requirements. If required, adjust other options according to your needs. Proceed with “Next.”

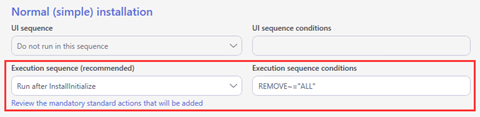
8. Our custom action should run in Normal Installation \ Execution Sequence. Leave the default “Run after InstallInitialize” as an execution sequence (we need to adjust this later in the table editor) and specify REMOVE~= “ALL” as a condition. Click “Finish.”
9. Now, right-click our new custom action and select “Go to InstallExecuteSequence table.”

10. Sort this table by sequence. Near the end, there should be InstallFinalize standard action. Adjust the sequence of our cleanup custom action to execute right before InstallFinalize. This is required to stay inside the installation script (deferred) and usually works best for cleanups.

Set Directory Custom Action
For example, you need to install something in the %PUBLIC% (“C:\Users\Public”) folder. No system folder property in MSI supports this folder. The system folder property for the folder is like a variable inside MSI that is defined internally by the MSI framework. So, even if in some new version of Windows, the location of some system folders will change, MSI framework will always resolve the system folder property to a correct value. Of course, we could “hardcode” the “C:\Users\Public” value into our MSI. But this is a bad design and package compatibility decision. So, let’s try to set the value for this folder using custom action and %PUBLIC% environment variable.
1. First, create an entry in the Directory table. Let’s call this entry “PublicFolder.” The path defined for this folder in the Directory table doesn’t matter, as our custom action will overwrite it. But this entry will help you define your components and other MSI entries that rely on the Directory table if required.
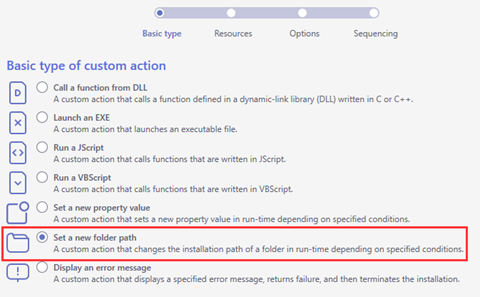
2. Now create a new custom action in Normal Installation \ Execution Sequence. Select “Set a new folder path” as a basic type and proceed with “Next.”
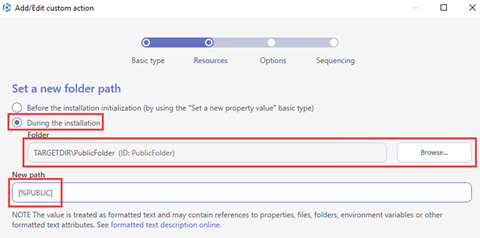
3. Select the “During the installation” option as it is using native MSI framework implementation for this custom action type. Browse for a folder that you want to modify (“PublicFolder” in this example). Set “[%PUBLIC]” as a new folder path. In this case, square brackets and percentage symbols will instruct MSI to resolve this path using the %PUBLIC% environment variable. Click “Next.”
4. In the “Options” screen set a custom action name. Default values for all other options should be OK. Proceed with “Next.”
5. Sequencing options. Only a normal installation \ Execution sequence is required. Set execution sequence to “Run after CostFinalize” (MSI framework requires such sequence for this custom action type). No “Execution sequence conditions” are required (the condition will always resolve to “true”). Click “Finish.”
Launch Installed EXE via Custom Action
For this example, let’s assume that you need to repackage some software with a PDF printer. Usually, it’s possible to split such applications into a repackageable part and a part that requires a native installation mechanism. In this case, the PDF printer requires installation via “InstallPrinter.exe” which resides in the installation folder.
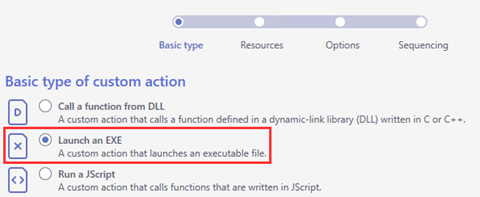
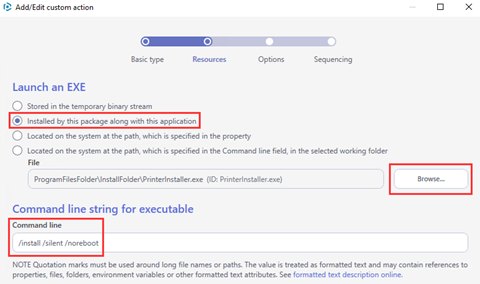
1. Create new custom action in the Normal Installation \ Execution Sequence. Select “Launch an EXE” as a basic type and proceed with “Next.”
2. Select the “Installed by this package” option. Browse for EXE that is in MSI. Provide a command line for printer installation. Proceed with “Next.”
3. On the “Options” screen provide a custom action name, select deferred, and run in the system context as execution mode (printer setup requires elevated privileges). Default values for all other options on this screen should be OK. Click “Next.”
4. Sequencing options. Only a normal installation \ Execution sequence is required. Set the execution sequence to “Run after PublishProduct” (when base application files are already installed is generally the best option for this case). Set “Execution sequence conditions” to “NOT Installed” (setup PDF printer on MSI install). Click “Finish.”