Patch Package (MSP Files): How to Create Them with No Headache
In this article, we will delve into patch packages or MSP files and discover what they are, what they consist of, their advantages and disadvantages, and how to create them from scratch with the help of an application packaging tool PACE Suite.
What is a Patch Package (MSP file)?
A patch package, also known as MSP, is a self-contained package that provides updates to software installed on Windows operating systems. It includes all the required information and changes to update the needed existing application, eliminating the need to reinstall the entire software package.
Windows Installer Patch (MSP) differs from the Windows Installer Database (MSI) in size: MSI contains all application resources, whereas MSP contains only the changes that must be applied, and this is why, as a rule, MSP is much smaller in size than MSI.
Another difference between MSP and MSI is that the former can be only installed if the target MSI (that should be updated) is already installed, while the latter has no such restriction.
What Does the Patch Consist of?
In essence, a patch is an archive that consists of MST and CAB.
MSP = MST + CAB
An MST file (Windows Installer Transform or .mst) contains the modifications or deltas to the Windows Installer database (MSI). It is used in conjunction with MSI to customize or modify the installation settings and resources of an application.
A CAB file (.cab file), also known as Cabinet, is an MS Windows archive file format that contains application files to be installed to the target system.
In simple terms, the MST file includes changes to the MSI database, while the CAB file contains the actual files that need to be installed. During the installation process, the MST can be applied to the MSI.
In contrast to the MST file, an MSP file can be installed separately as a standalone package. It includes both the MST file and the CAB file, enabling the independent installation of the customized application package.
What Are the Advantages of a Patch Package (MSP File)?
Patching is a complex process that should be utilized when no better alternative exists for updating an application. However, it also has its advantages — patches are primarily employed to update crucial software that cannot be uninstalled. An example of such critical software is an antivirus program. Without patches to update the antivirus, maintaining the security and stable operation of the software in a large corporation with hundreds of devices would be highly dangerous and impractical. In such cases, patches offer the ability to update an application without requiring its removal.
Another advantage of patches is their size. For example, consider a scenario where a company needs to update a large enterprise application with a size of 25 gigabytes on several hundred machines. Without a patch, the company would have to place the entire application in a network folder, and then the whole application installation will be downloaded by each computer from the network folder. This process generates significant network traffic and takes a considerable amount of time. However, since the patch contains only those files that need to be updated, the MSP file size, network download time and installation time will be significantly smaller.
Furthermore, a patch can contain either the full file or just a difference (delta) of the file to be updated on the target system. The second option allows creating a much smaller patch package than the equivalent full file patch but may require access to the original application installation package. Unfortunately, there are situations when the original installation is unavailable.
Additionally, patches can be designed as uninstallable, allowing them to be installed and uninstalled independently of the application. In this case, the patch package will be displayed separately in the ‘Add/Remove Programs’ list and end-users will have the option to delete a patch and revert the application to its previous version if desired.
On the other hand, packaging engineers can also choose to disable the option to remove the patch, effectively merging it with the application, making it inseparable from the original installation.
What Are the Disadvantages of a Package Patch (MSP File)?
Unfortunately, it is not always possible to eliminate circumstances where applying a patch may require access to the original installation source. Additionally, when dealing with multiple patches, such as patch 1 and patch 2, it is essential to consider all the changes made by patch 1 when creating patch 2. If a user installs patch 2 without installing patch 1, it can lead to compatibility issues or other problems. Therefore, it is crucial to ensure that patches are applied in the correct order to avoid any complications.
Finally, to create patches, you need to consider the next warnings:
- Do not move files from one folder to another.
- Do not move files from one CAB to another.
- Do not change the order of files in a CAB.
- Do not change the sequence number of existing files. The sequence number is the value specified in the Sequence column of the File table.
- Any new files that are added by the patch must be placed at the end of the existing file sequence. The sequence number of any new file in the upgraded image must be greater than the largest sequence number of existing files in the target image.
- Do not change the primary keys in the File Table.
What Are the Types of Patch Updates?
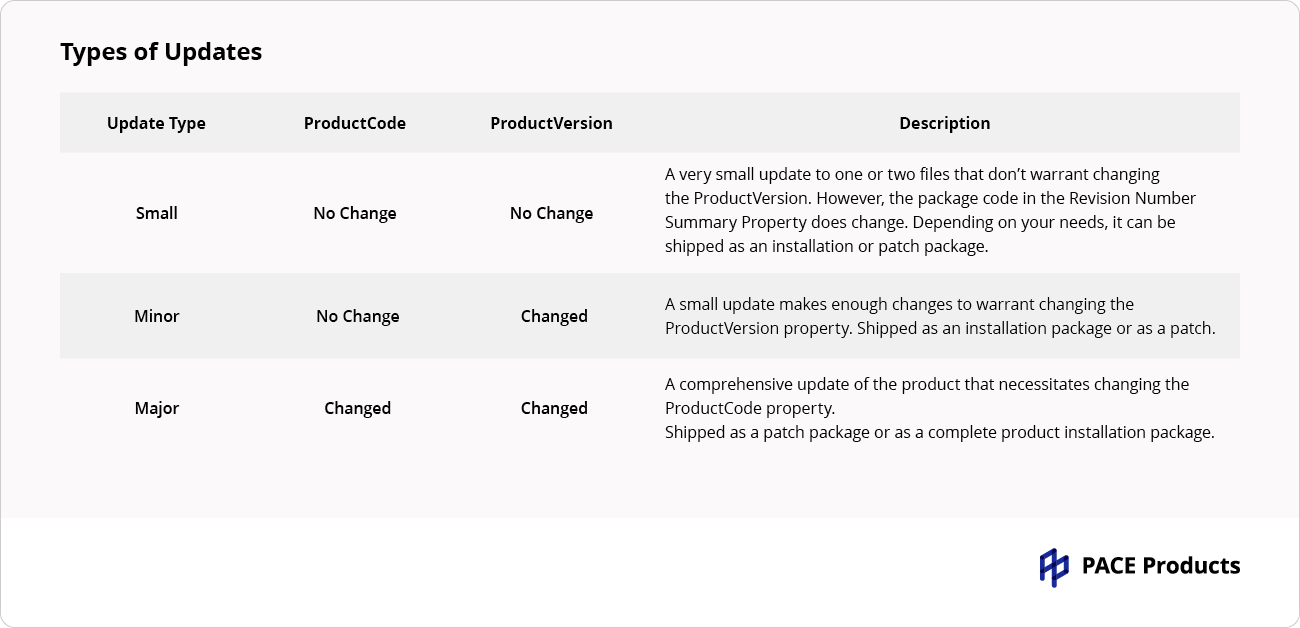
It is important to understand the differences between types of updates before creating an MSP file. The type of update can be determined by the changes it makes to the application’s product code, product version, and package code. Below is a table illustrating the differences between small updates, minor updates, and major updates.
How to Create a Patch from Scratch?
To begin creating a patch from scratch, you need to open an MSI, for which you need to create an MSP in MSI Editor of the PACE Suite.
1. Run MSI Editor either from the Start Menu shortcut or PACE Suite Launcher.

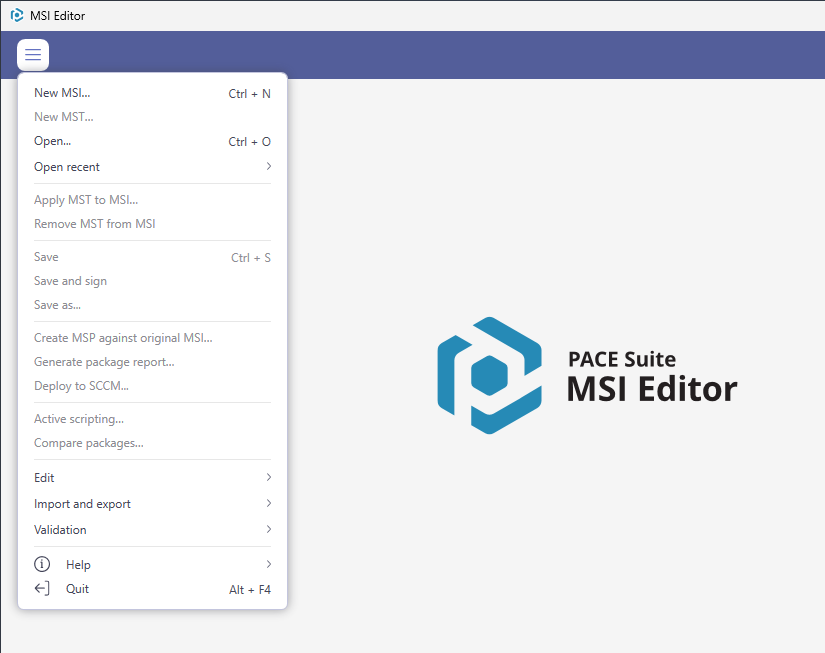
2. Select MENU > Open and choose an MSI package for which you need to create an MSP:
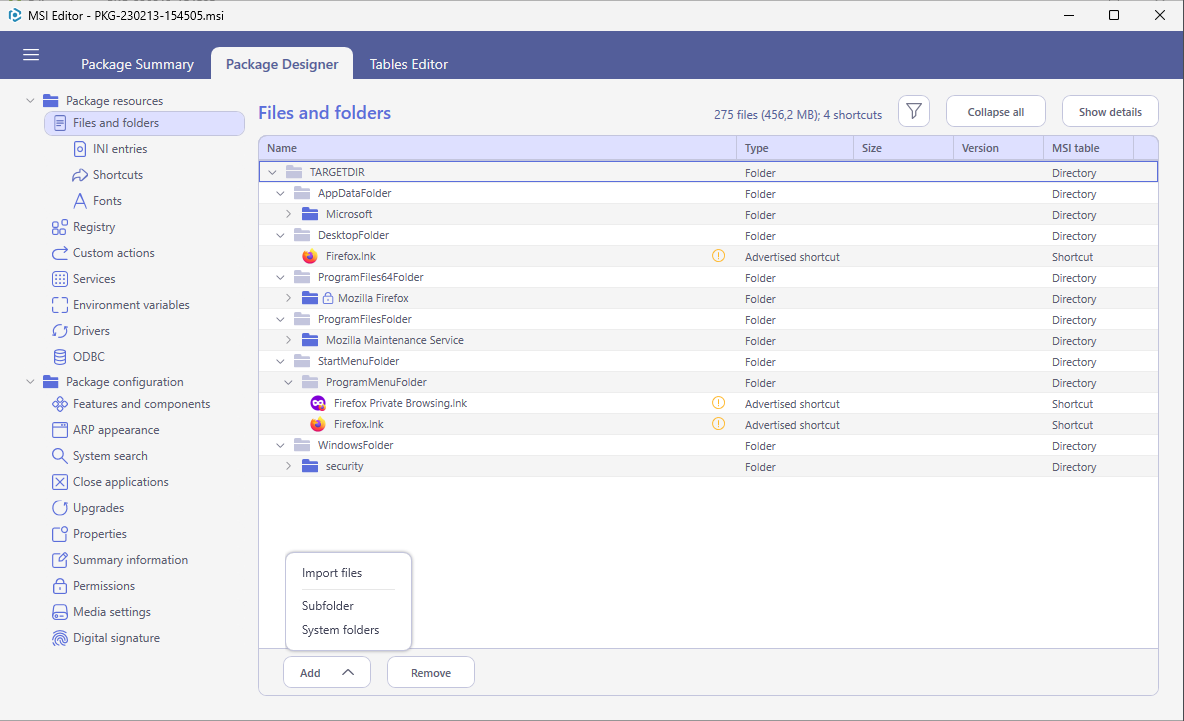
3. Here, perform all the needed modifications to the opened MSI that will later be saved as an MSP.
At this point, you can replace existing files with a newer version and/or import new ones, modify the registry, shortcuts and other application resources. All these changes will be saved to the patch package.
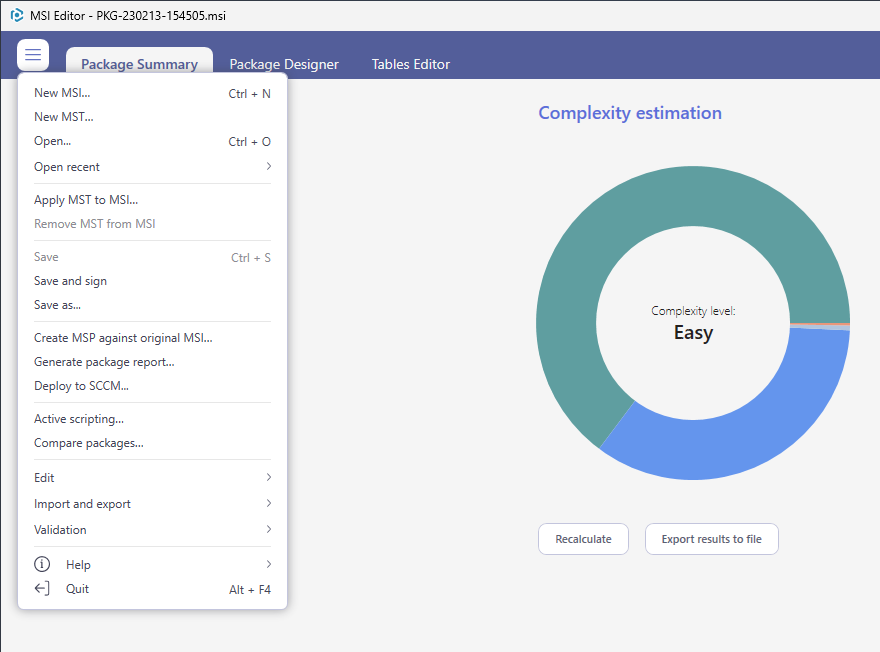
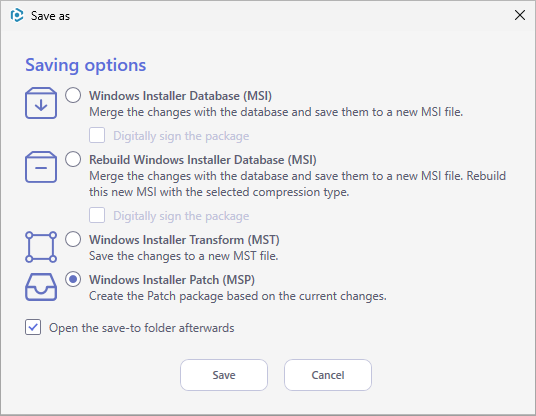
4. To save your changes as MSP, select Save as… from MENU:
5. Choose the Windows Installer Patch (MSP) option and click Save.
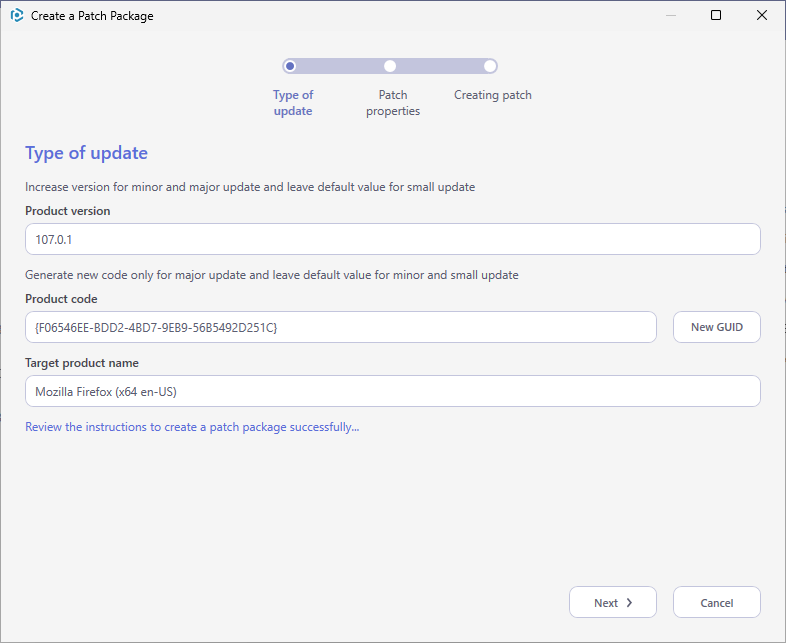
6. Increase the Product version for the minor and major updates and leave default for the small update.
Generate new Product code only for the major update and leave default for the minor and small updates.
If needed, update the Target product name in order to change the Product Name of the updated application. Then, click Next.
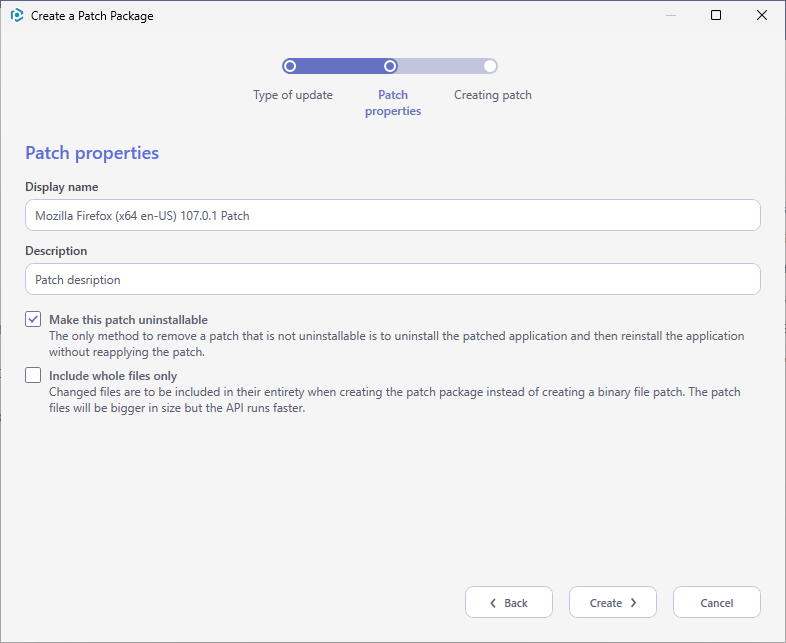
7. Update the Display Name and Description of the Patch package and select the necessary properties.
Click Create to start generating the Patch package.
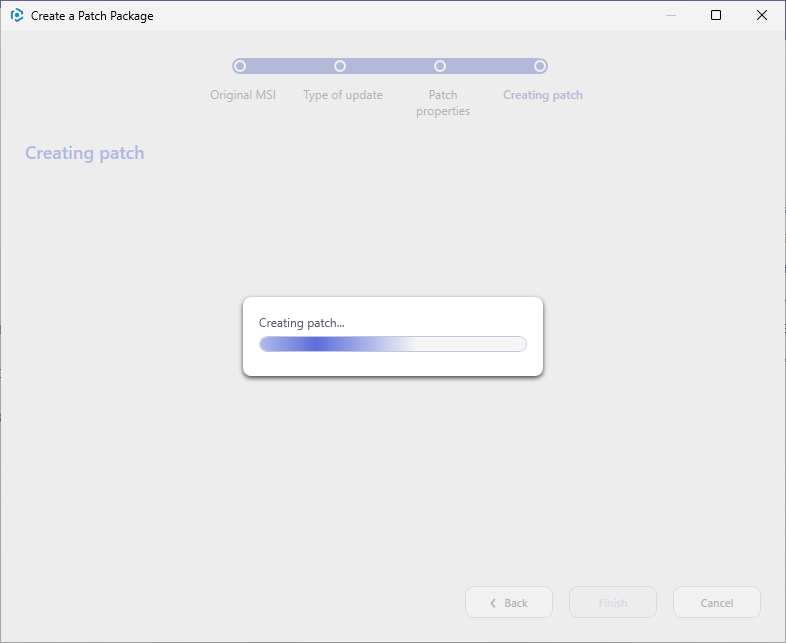
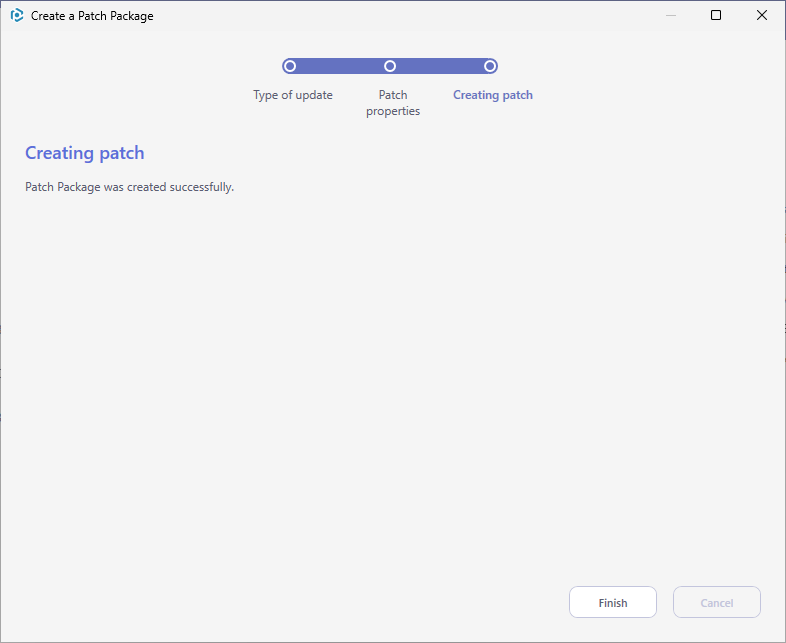
8. Wait while the MSP is being created.
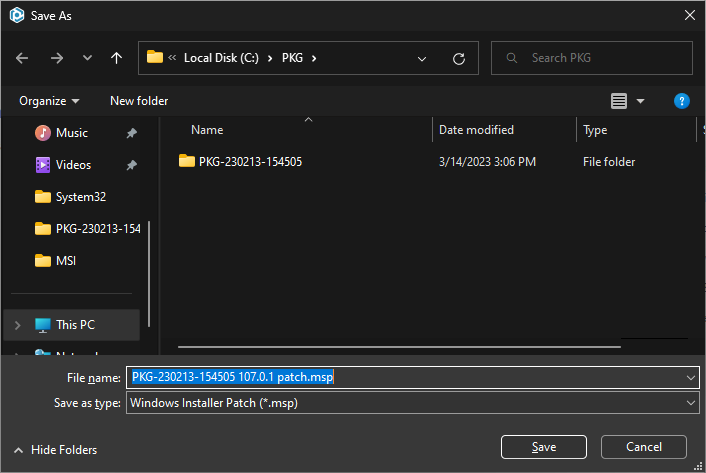
9. Specify the name and destination location of the MSP and click Save.
10. Click Finish to complete.
How to Install a Patch?
You can install the patch via the command line or just double-click on it in Windows Explorer.
An example of a command-line installation of an MSP along with the MSI in silent mode:
msiexec.exe /i package.msi PATCH=”c:\directory\patch.msp” /qn
An example of a command-line installation of an MSP along with the MSI and customization MST in silent mode:
msiexec.exe /i package.msi PATCH=”c:\directory\patch.msp” TRANSFORMS=”c:\directory\transform.mst” /qn
An example of a command-line installation of an MSP in silent mode if the MSI is already installed on the target system:
msiexec.exe /p “c:\directory\patch.msp” /qn
An example of a command-line installation of a sequence of multiple MSP files in silent mode if the MSI is already installed on the target system:
msiexec.exe /p ” c:\directory\patch1.msp;c:\directory\patch2.msp ” /qn


