
Capture System Changes to MST Files: Transforming Notepad++ Deployment
Picture this: your IT department has diligently deployed a minimalistic version of Notepad++ across the organization, serving basic text editing needs. Just when you thought the deployment was smooth, updated requirements land on your desk. Now, you’re tasked with preparing an advanced version for power users.
This case study navigates the complexities of transforming the existing Notepad++ deployment to meet the demands of auto-completion, function list files, preconfigured plugins, and extended localization. The challenge? The base version must coexist seamlessly with the enhanced full version. The flow diagram outlines the process:

To go through all the stages of capturing system changes to MST, you’ll need to use PACE Suite for application packaging.
Understanding MST Files
Microsoft Installer (MSI) is a cornerstone of software deployment on Windows systems. It streamlines the installation, maintenance, and removal of applications. However, there are instances where modifying a vendor’s MSI directly is not feasible. MST files, or transforms — a powerful tool that allows system administrators to customize installations without altering the original package.
1. Definition and Purpose
MST files , short for Microsoft Transform files, serve a crucial role in customizing MSI installations. When faced with vendor MSI files that cannot be modified directly, MST files provide a solution. They act as overlays, allowing administrators to apply changes to the installation process without modifying the underlying MSI.
2. Advantages of Using MST Files
The versatility of MST files becomes apparent when dealing with vendor restrictions. They enable administrators to make specific modifications, such as adding new files or modifying registry entries, without altering the vendor’s original MSI. This not only ensures compliance with licensing agreements but also facilitates seamless updates from the original vendor.
An MST file’s beauty lies in its varied configurations or distinct versions, such as base and extended versions. There’s no need for various MSIs cluttering your deployment strategy. Transforms elegantly solve this issue, offering a streamlined approach to diverse configurations within a single, adaptable package.
Navigating Existing Deployment Challenges
Assessing the Notepad++ Landscape
Before diving into customization, a thorough assessment of the current Notepad++ deployment is essential. Understanding how the minimalistic version is configured, the directories it utilizes, and its registry settings set the stage for effective transformation.
Identifying Customization Needs
With the base version successfully assessed and vendor restrictions acknowledged, the next step is pinpointing the customization needs. When it comes to the minimalistic version, simplicity is key. For the advanced version, considerations include auto-completion, function list files, preconfigured plugins, and extended localization. This phase is critical, laying the foundation for a tailored transformation.
Balancing Base and Full Versions
One of the key challenges is ensuring a balanced coexistence between the base and full versions of Notepad++. The base version should continue to serve its purpose seamlessly, while the full version caters to the advanced needs of power users. MST files become the bridge, allowing us to strike this balance by applying modifications selectively.
Capturing System Changes Directly to MST
Given the existing base version of Notepad++, we aim to elevate its functionality by capturing all extended features and encapsulating them within an MST file. This ensures a seamless integration of advanced capabilities without compromising the integrity of the original application.
System changes can manifest through two primary sources: a source installation or user actions, whether it’s the installation process itself or user-initiated actions like file copying or importing .REG files to the system registry or modify application settings. These changes contribute to the evolution of the Notepad++ deployment.
In our case, we will enhance the basic version with new components: Auto-Completion Files, Function List Files, Plugins, and Localization.

1. Capturing with Package Generator
Following the implementation of system changes, the next step involves capturing these modifications using a Package Generator within PACE Suite, an intuitive and fast application packaging tool. Upon completion, the capturing project opens automatically, presenting a visual representation of the changes made during the system transformation.

A crucial checkpoint in the process is the thorough review of capturing results. It is highly recommended to scrutinize and exclude any resources not aligning with the captured application’s scope. This ensures the precision and relevance of the transformed deployment.
2. Building the MST
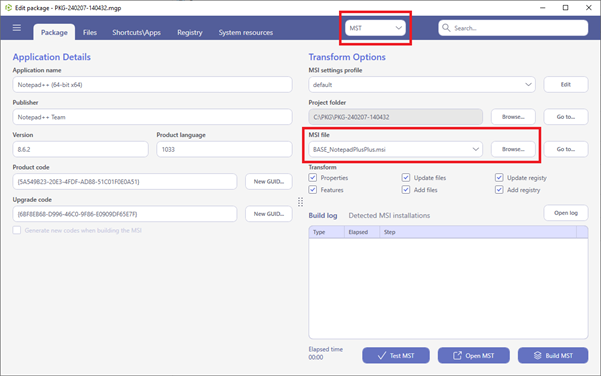
Navigate to the Package tab within Package Generator. Confirm that the MST package format is selected, and then click “Browse…” next to the MSI file field. This step involves selecting the original MSI package to which the transform will be applied.
Then choose the appropriate MSI package and click Open. At this stage, all changes that occurred on the target machine, such as adding localization resources or installing plugins, will be captured into the transform file. In this way, there is no need to install the basic MSI first; you can immediately start capturing the advanced version. The Package Generator will only add resources that are not present in the basic version.
3. Rendering the Transform
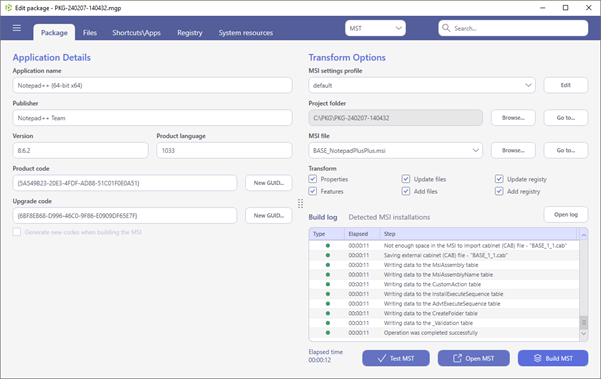
With the MSI package selected, initiate the transformation process by clicking “Build MST.” The generated MST will exclusively contain resources that are absent in the selected MSI package, ensuring a clean and tailored transformation specific to the extended features.
4. Locating the MST File
Retrieve the generated MST file from the “MST” subfolder within the project directory. For easy access, click “Go to…” next to the Project folder field to open the project folder, where the MST file resides.
Note: The meticulous process outlined above guarantees the creation of an MST file that seamlessly integrates advanced features into the Notepad++ deployment, providing a customized and efficient solution for extended functionality.
5. Applying MST During Installation
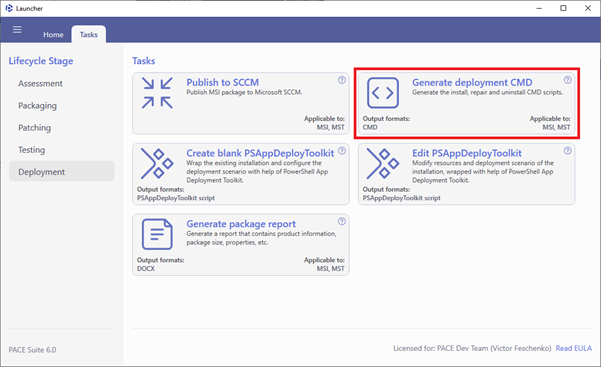
Select “Generate deployment CMD” located in the “Tasks > Deployment” section.
Specify the MSI package you must deploy with the CMD scripts and click Generate. If you need to apply MST to MSI, specify it in the Apply transform field.
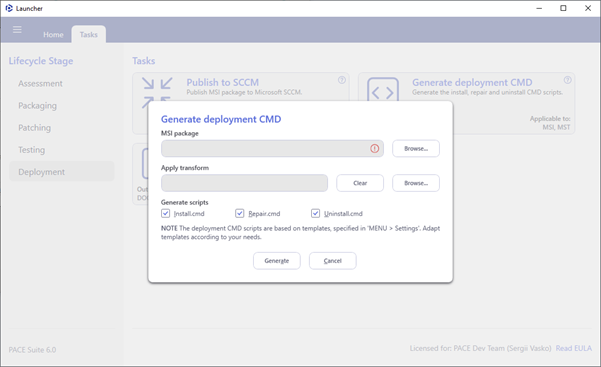
The command line should be as follows for installing an MSI with an MST:
msiexec /i “[Path to MSI]” TRANSFORMS=”[Path to MST]”/qb
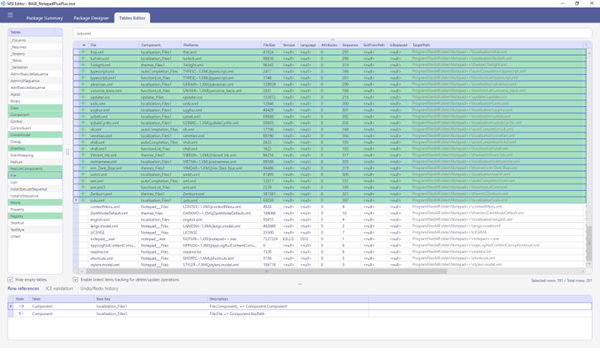
The screenshot above vividly illustrates the number of added files to the base installation, showcasing the flexibility of this method. Thanks to the PACE Suite application repackaging software tool, it becomes effortless to customize existing installations by adding the required resources and expanding the functionality of the utilized software.
This approach is particularly well-suited for routine tasks, where a specific set of resources is updated, and repetitive installation development tasks are involved.