Converting EXE to MSIX
MSIX is the latest packaging format from Microsoft. It brings modern packaging experience to Windows apps and makes the packaging process easier and more streamlined. Use this guide if you want to convert any Win32 application to MSIX.
An application packaging tool PACE Suite offers a number of unique features that make MSIX packaging easier, faster, and more accessible for anyone who is new to packaging.
How to Convert EXE to MSIX with PACE Suite
- Review and modify package logo, application root folder at any time.
- Manage MSIX apps and their appearance settings at any time.
- Generate a self-signed certificate to sign the package/bundle.
- Generate the ‘modification’ package at any time, from the existing project.
- Easily manage supported platforms and versions directly in the interface. No knowledge of editing manifest files required!
- Generate separate packages for all of the specified processor architectures at once.
- Combine the generated packages to bundle, which also could be signed automatically. No need to open the command line!
- Generate the AppInstaller file in one click for the non-Store distribution and auto-update of your app
- Leverage lots of validation rules that allow detect and fix issues before package creation and deployment.
A Step-by-step Guide on Converting EXE to MSIX (watch also this video tutorial)
Repackage your source installation (EXE, MSI, VBS, CMD, etc.) into MSIX package using MSI Generator (a part of PACE Suite).To try everything from this guide, download a free PACE Suite trial.1. Launch MSI Generator and click Capture installation.
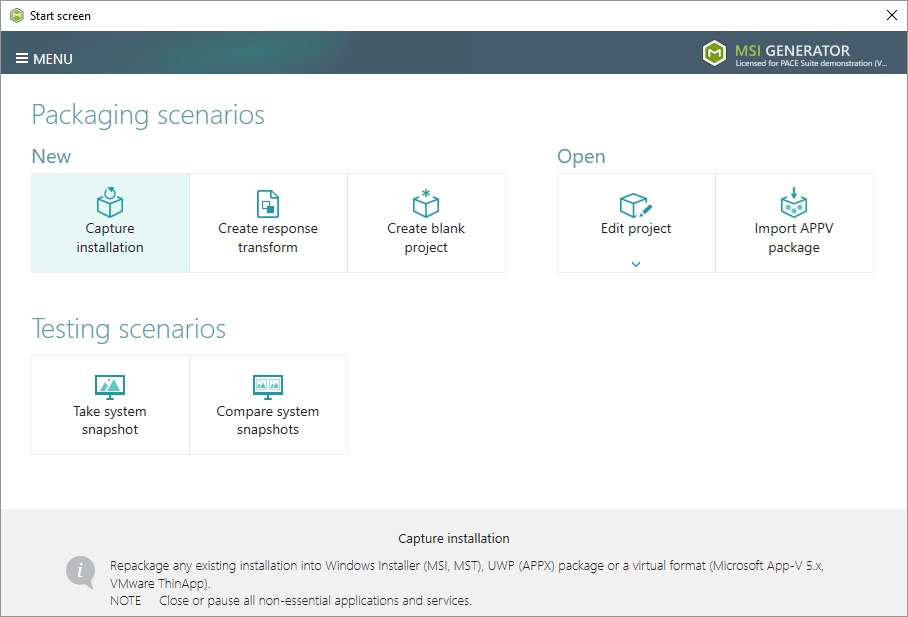
2. Review the issues, which were detected on your system, and try to resolve them by closing the non-essential applications and stopping services. Thereafter, click Next >.
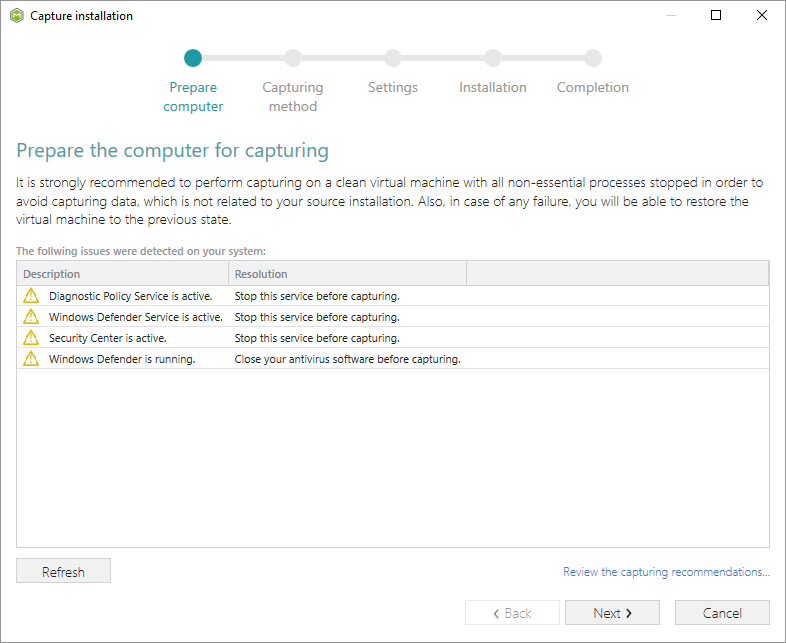
3. Select the Monitoring method for the quicker capturing (or use the Snapshotting one if you need to continue capturing after the system restart) and click Next >.
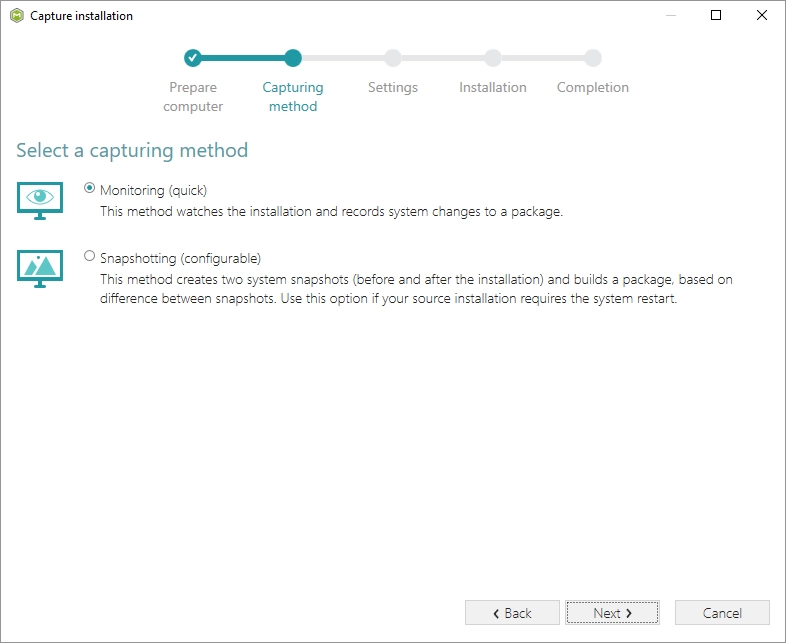
4. Here you can review and update package name, disable needless exclusion filters and scanning areas. Click Next > to start the capturing.
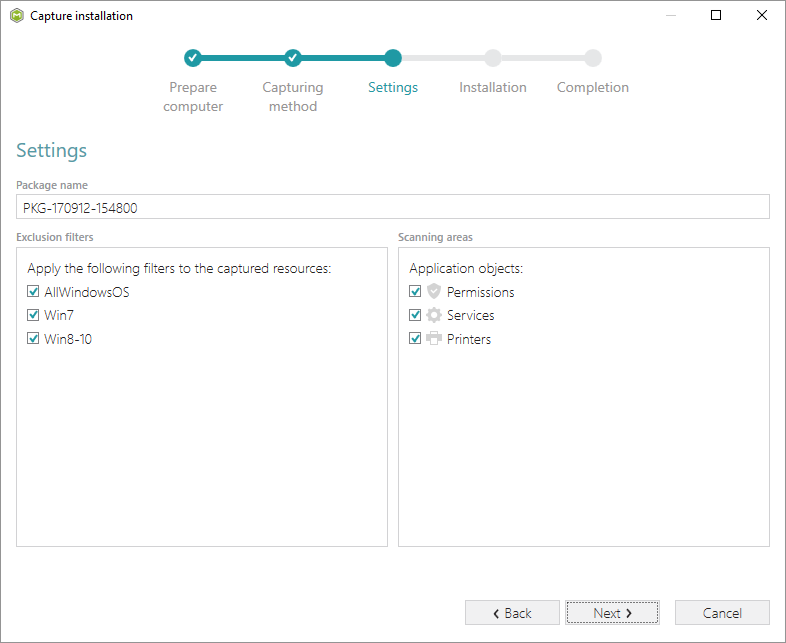
5. Click Select and run… to choose source installation for repackaging.
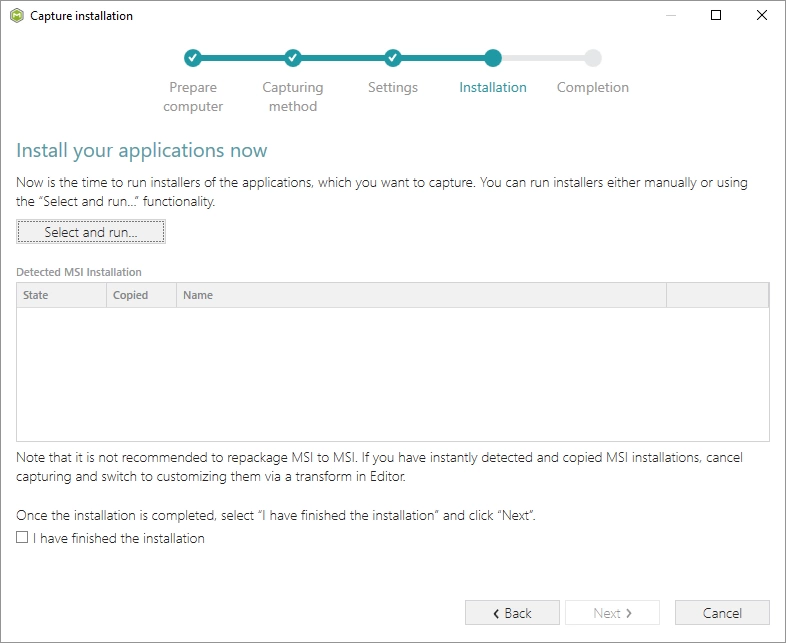
6. Select the installer file (e.g. Firefox Setup.exe) and click Open.
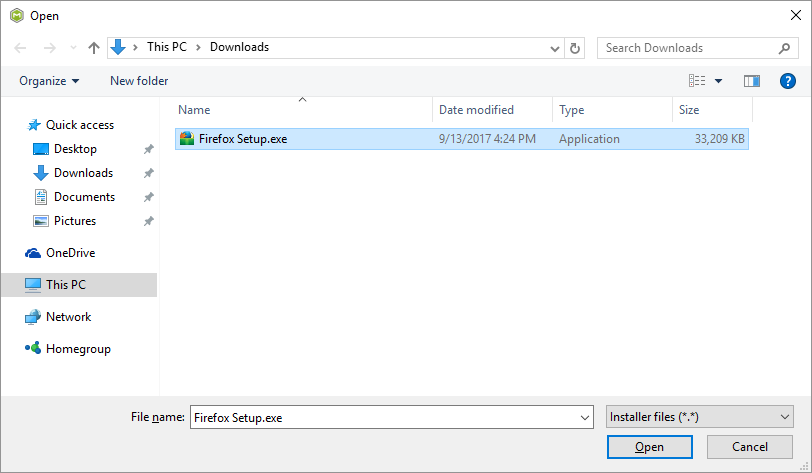
7. Follow the installation dialogs of the launched source installation to complete it.
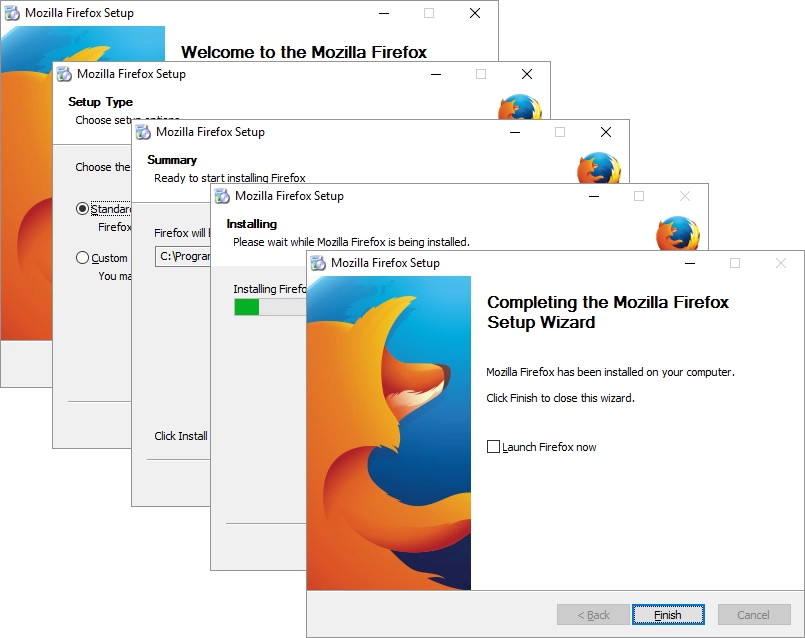
8. Now you can make any additional changes to the file system and registry, which you want to capture and include to the package. For instance, you can create new or copy-paste existing files, import REG file to the system registry, changes permission settings, or launch the installed application in order to capture the necessary application configurations, like disabling updates and so on.
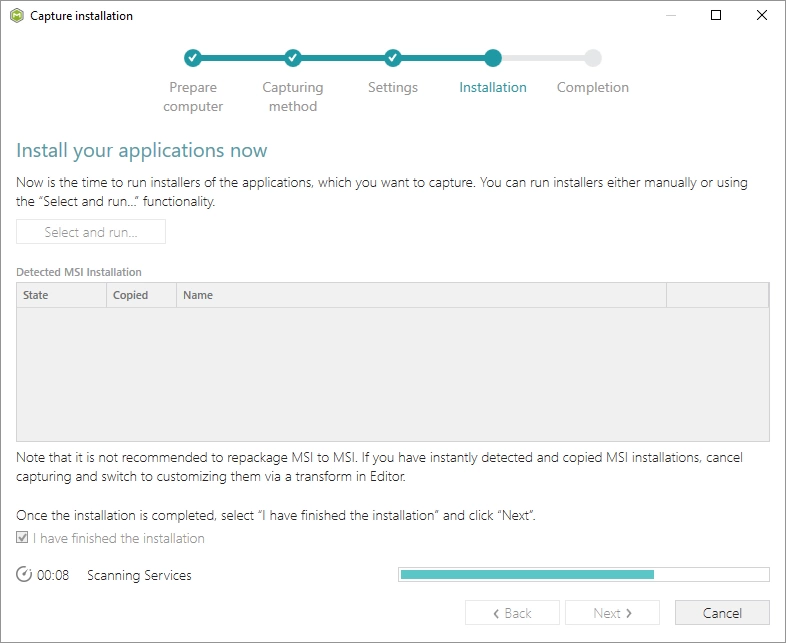
9. Finally, to complete the capturing, select I have finished the installation and click Next >.
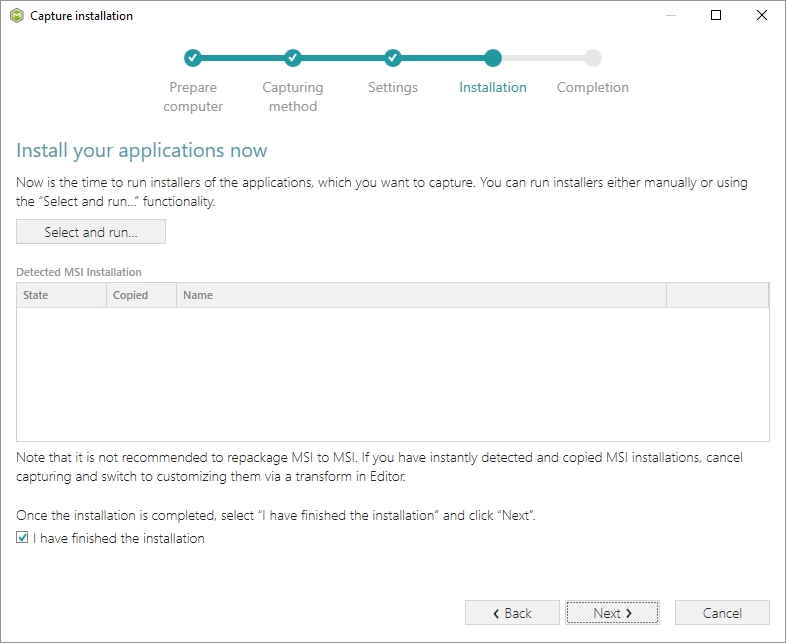
10. Wait a little, while the capturing process is finishing, filtering captured data and creating the project.
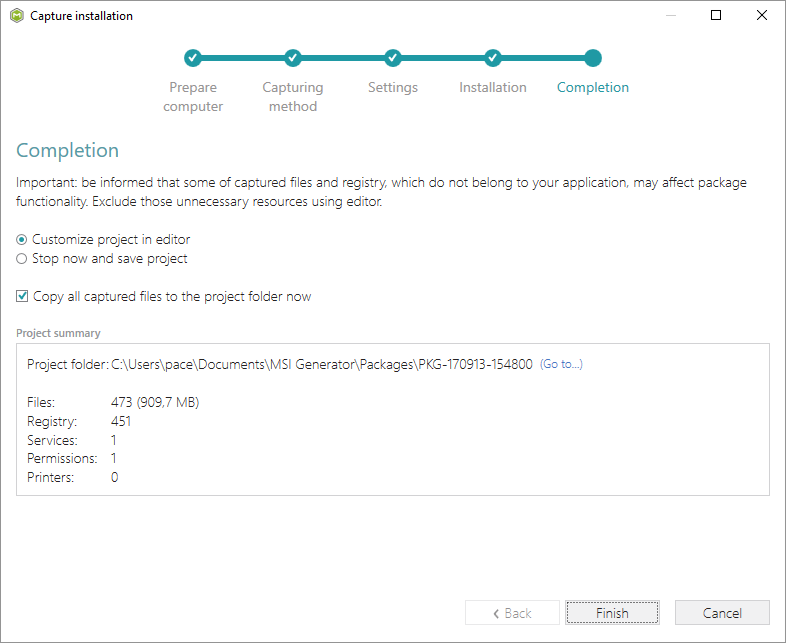
11. Leave both the Customize project in editor and Copy all captured files to the project folder now options selected and click Finish.
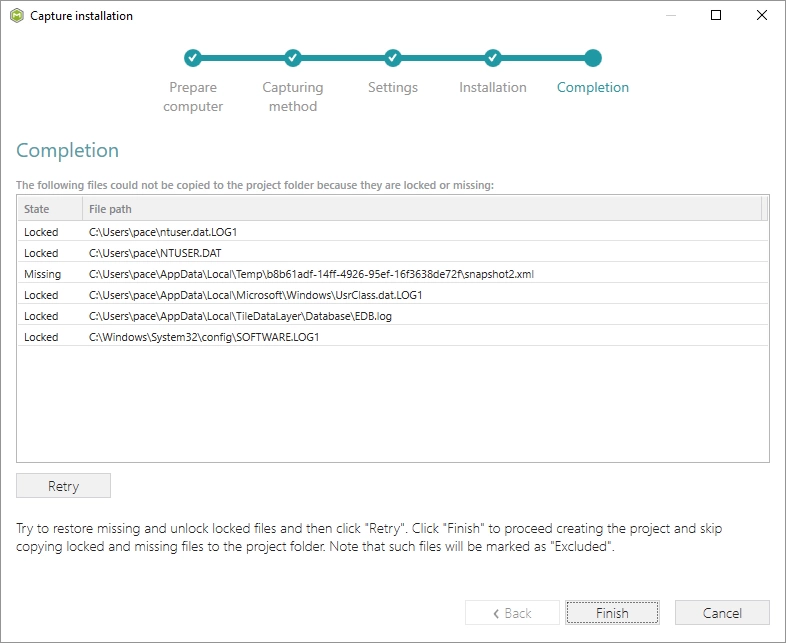
12. If some of the files you captured are locked or missing and as result, they could not be copied to the project folder, they will be displayed as shown below. Usually, the displayed files are system noise and are not related to the captured application. Click Finish to continue with skipping locked and missing files. Note that such files will be automatically marked as ‘Excluded’ in your project.
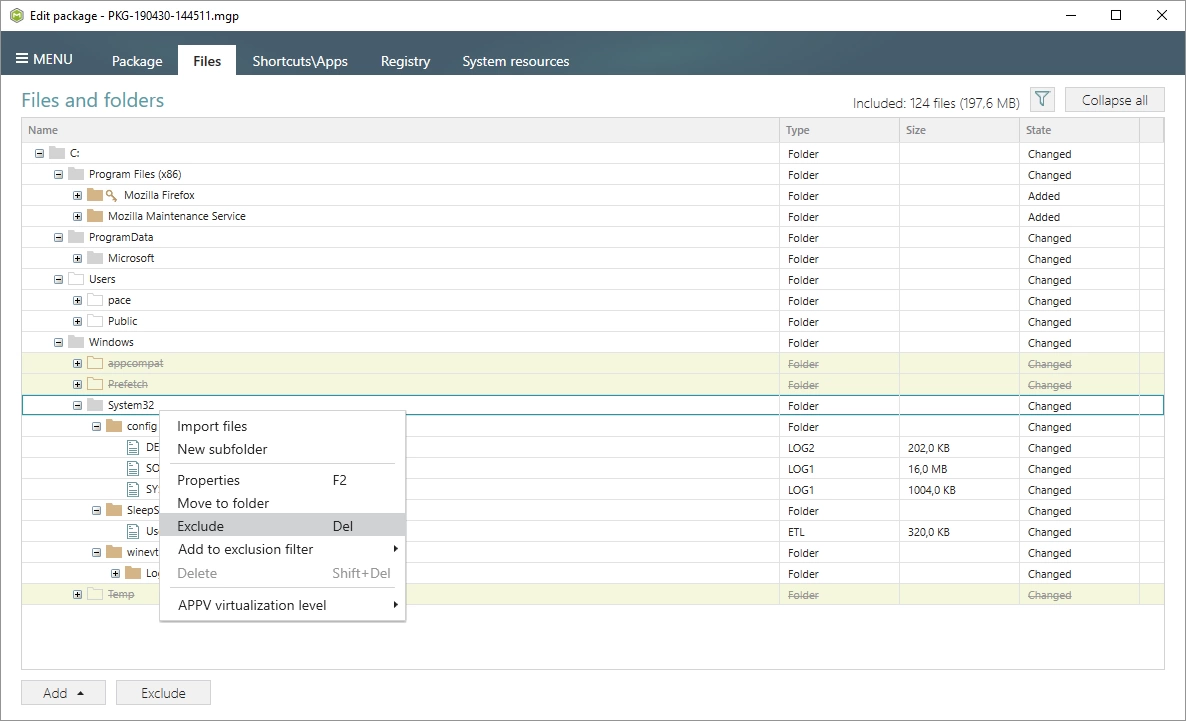
13. Once the project is opened in the project editor, we strongly recommend to review the Files, Shortcuts\Apps and Registry tabs and exclude the accidentally captured resources, which do not belong to the application. Such accidentally captured resources are also called system noise and they could be Windows Updates, search indexing, antivirus software and so on.
14. In order to review the captured files and folders and exclude unnecessary ones, go to the Files tab, and select
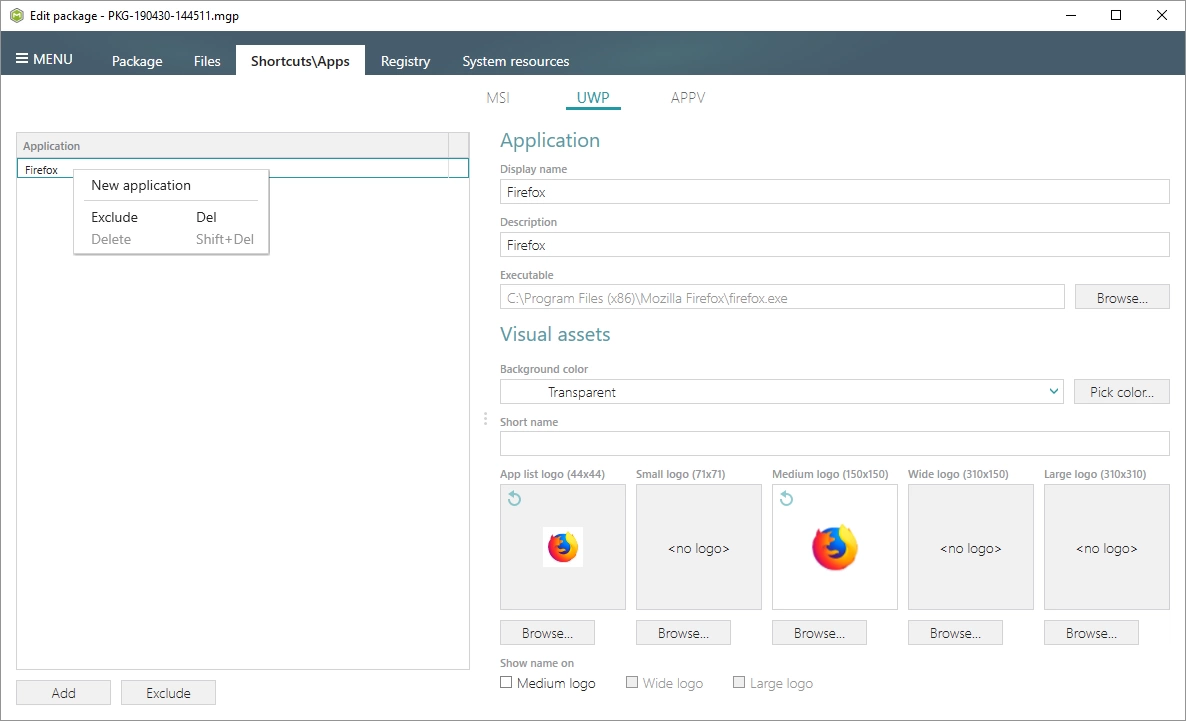
15. To review the captured MSIX apps and exclude unnecessary ones, go to the Shortcuts\Apps -> UWP tab, and select Exclude from the context menu of an item, which you want to exclude. In addition, using the details pane, you can update the app display name, description, logos and so on.
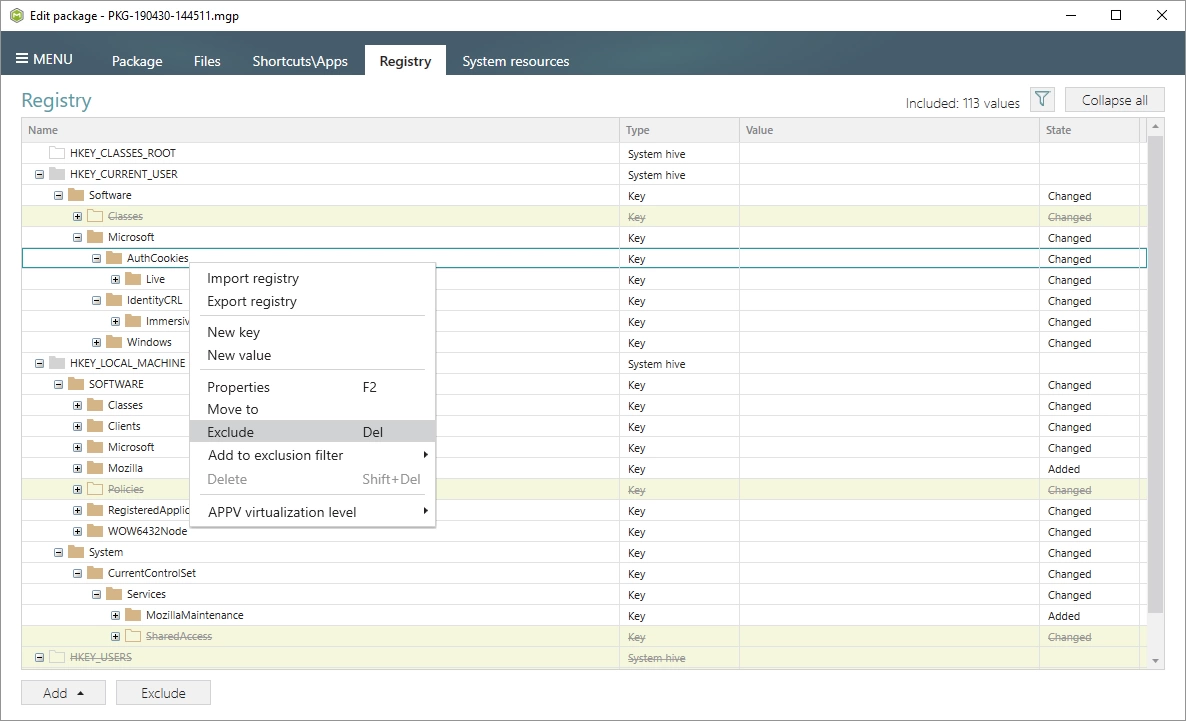
16. To review the captured registry keys and values and exclude unnecessary ones, go to the Registry tab, and select Exclude from the context menu of an item, which you want to exclude. .
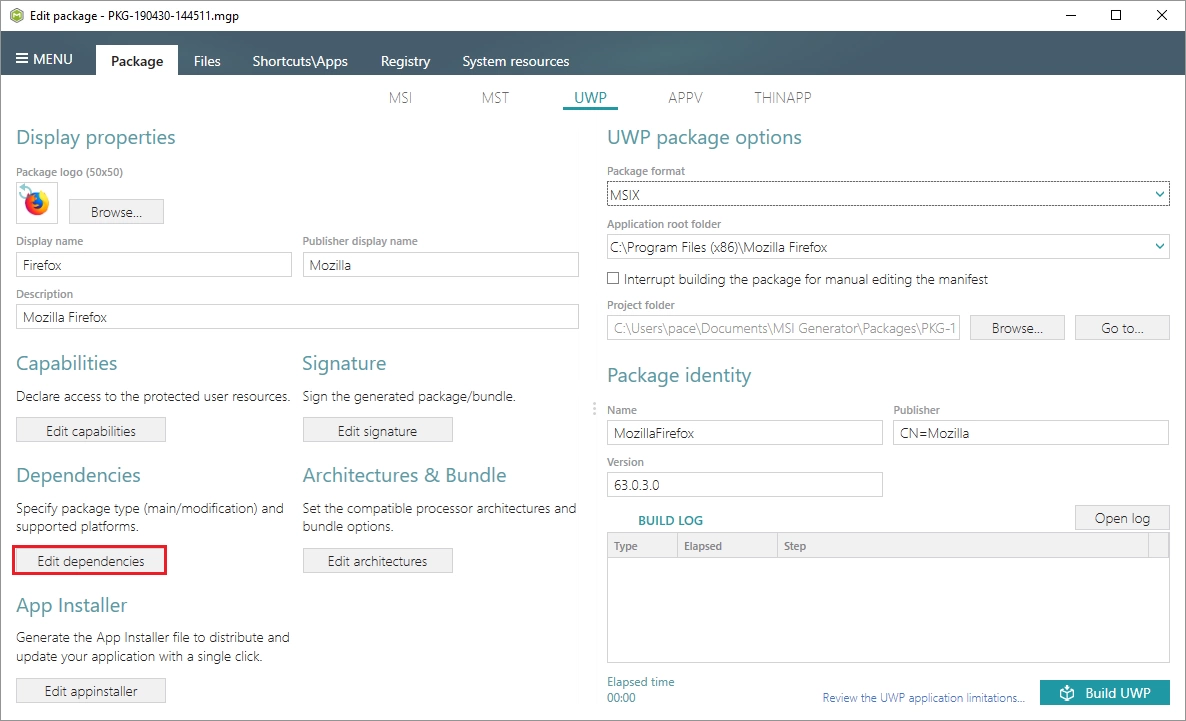
17. To manage MSIX package settings such as display and identity properties, capabilities, signature, dependencies, bundle, AppInstaller, navigate to the Package -> UWP tab.

17.1. First, define a type of your package. It could be a ‘main’ – usual app package, or ‘modification’ – used to customize the settings of the app, installed by the ‘main’ package. For information, see MSIX modification packages on Windows 10 version 1809 and MSIX modification packages on Windows 10 Insider Preview Build 18312 and later. By default, the ‘main’ package type is selected.
17.1.1. To define your package as ‘modification’, click Edit dependencies.
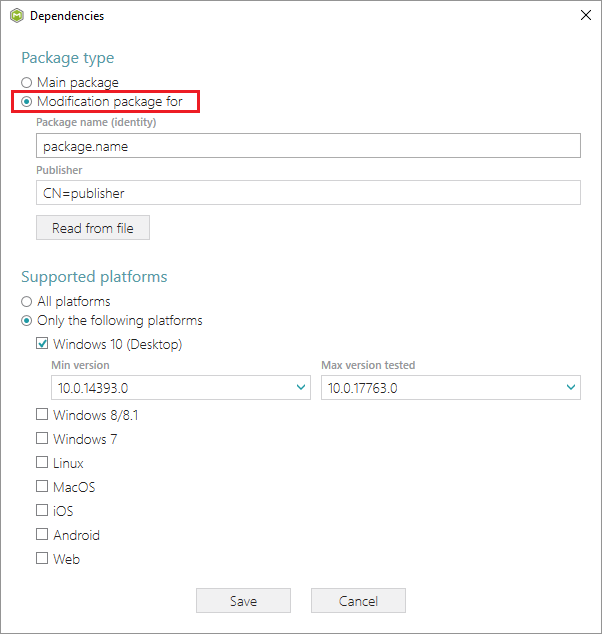
17.1.2. Select the Modification package for option and either enter a package identity name and publisher of the main package manually or click Read from file to get the necessary identity information from the main package automatically. Afterwards, click Save. NOTE The modification package could not declare capabilities and contain apps, therefore they will be automatically skipped.
17.2. Control how your MSIX package will be displayed during the installation and in the list of installed apps. Set a new icon, display name, publisher display name and description of the MSIX package in the Display properties section.
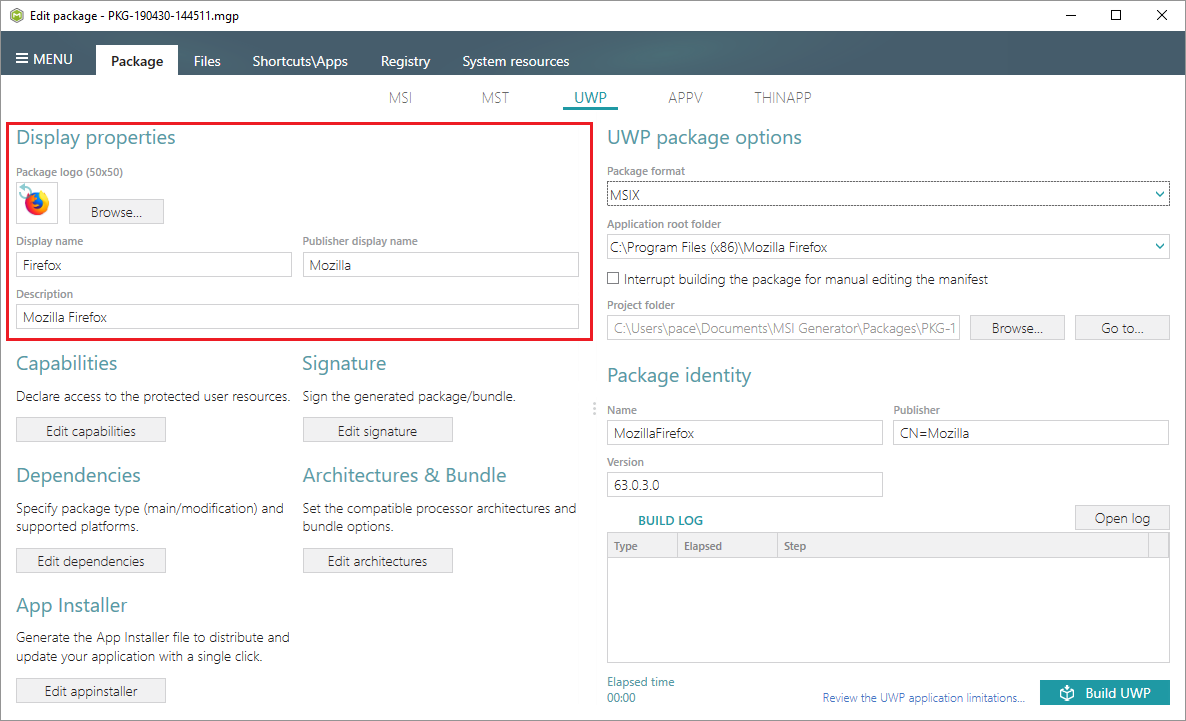
17.3. Define a globally unique identifier of your MSIX package. Update attributes of the Package identity section.

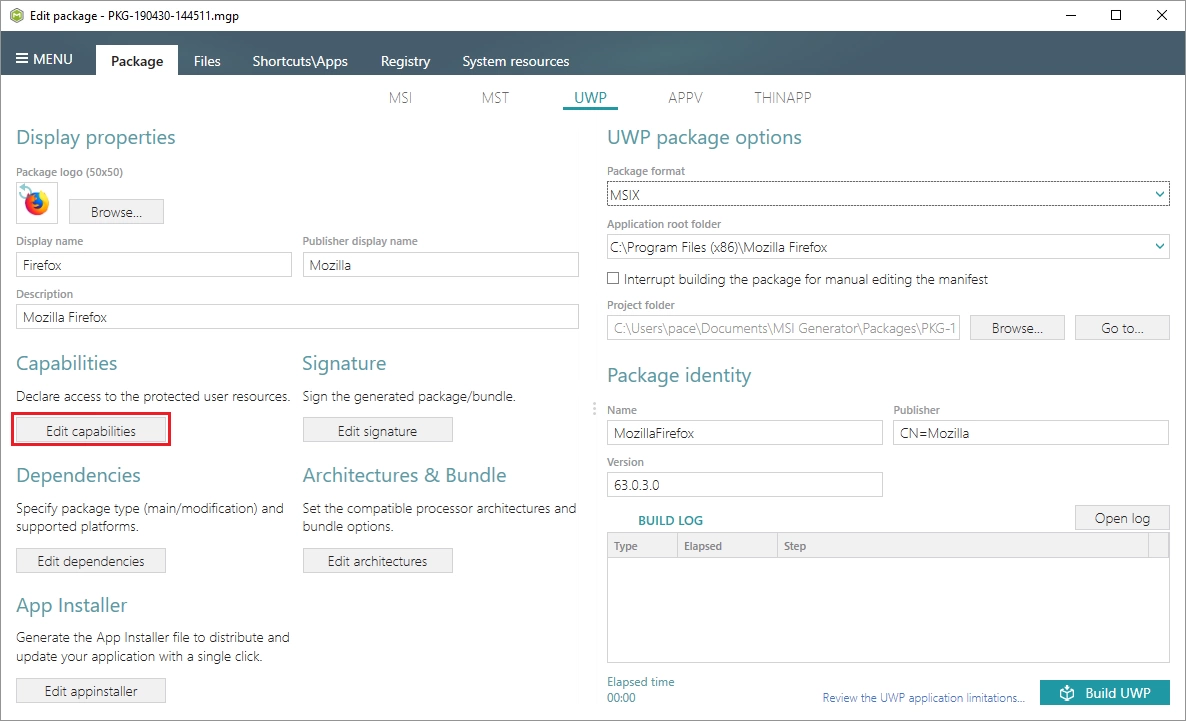
17.4. Declare the access to protected user resources that the package requires.
17.4.1. Click Edit capabilities.
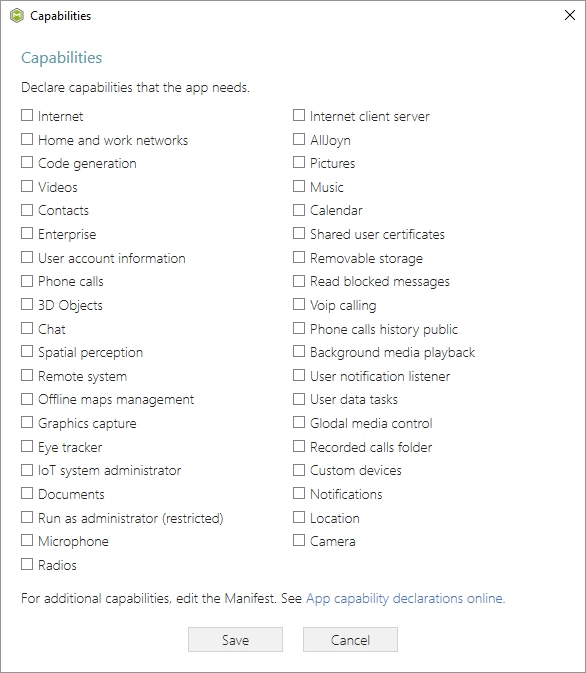
17.4.2. Select the necessary capabilities and click Save. NOTE The modification package could not declare capabilities.
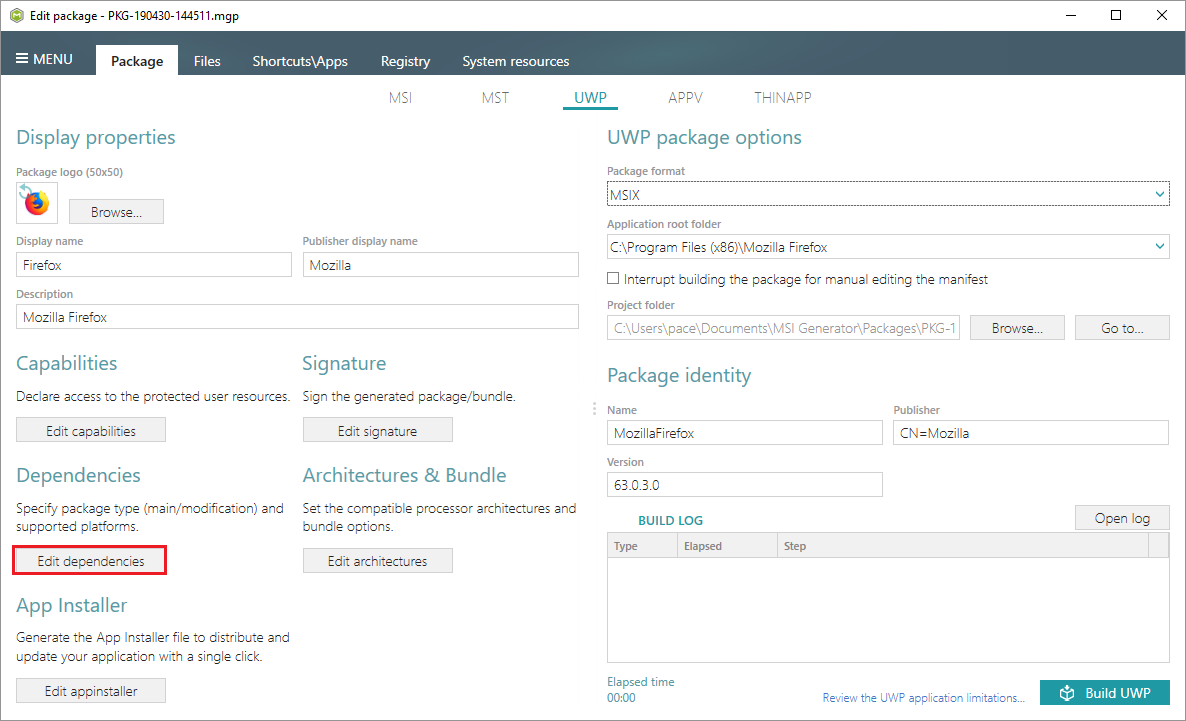
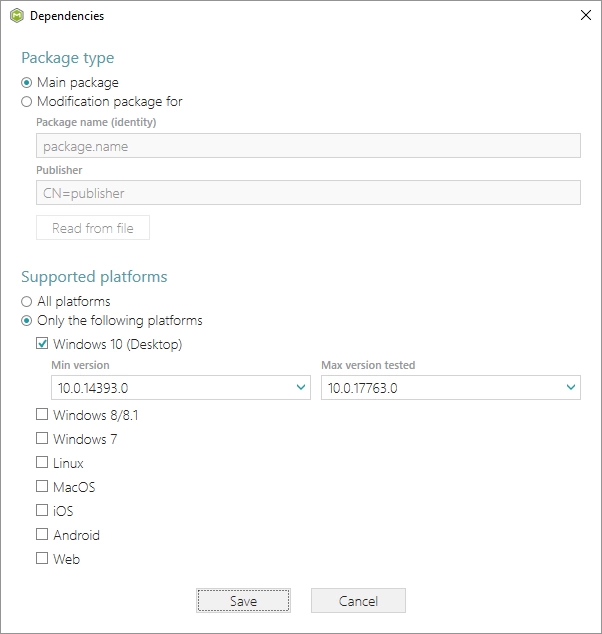
17.5. Set the supported platforms (target device families) on which, your MSIX package could be run. For information, see Use the MSIX SDK to build a package for cross-platform use.
17.5.1. Click Edit dependencies.
17.5.2. Select the necessary supported platforms and click Save. NOTE Only on Windows 10 platforms, the package will only be deployed on OS versions greater than the MinVersion.
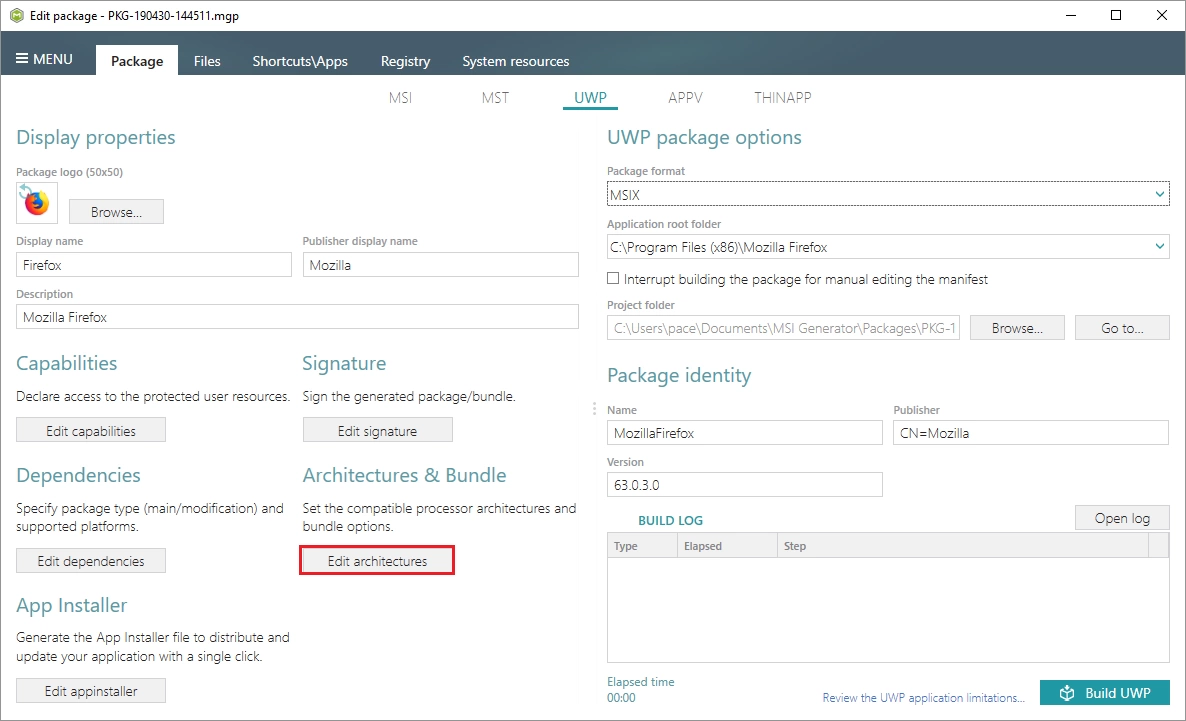
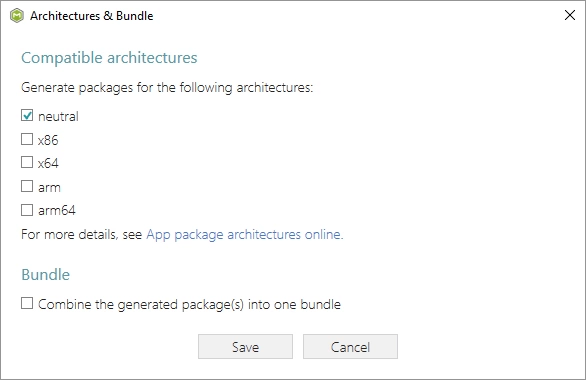
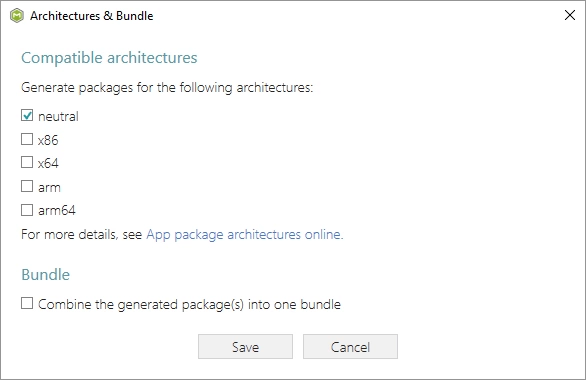
17.6. Select the processor architectures (x86, x64, ARM) on which you want to run your MSIX package. For each selected processor architecture, a separate package will be created. For information, see App package architectures.
17.6.1. Click Edit architectures.
17.6.2. Select the necessary processor architectures and click Save.
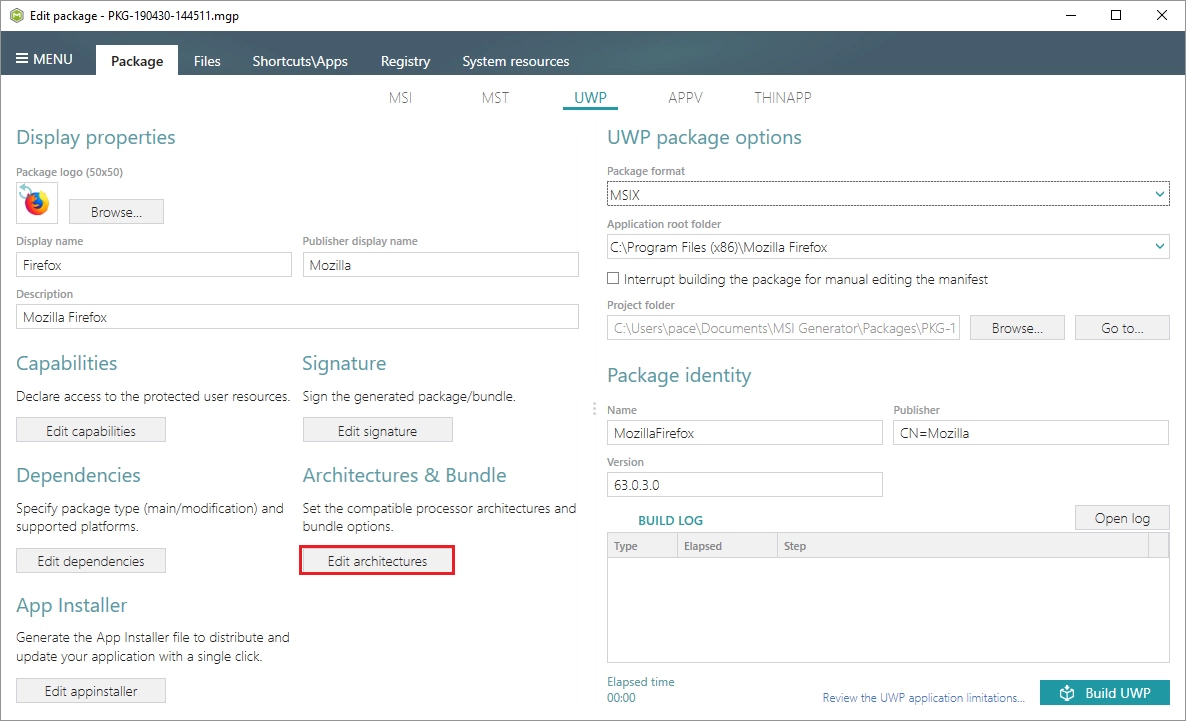
17.7. Combine the generated MSIX packages into one single bundle. By bundling packages of different processor architectures into one entity, only the bundle needs to be uploaded to the Store or another distribution location. The Windows 10 deployment platform is aware of the bundle package type and will only download the files that are applicable for your device’s architecture. Keep in mind that if you decide to distribute a bundle for a particular app, you cannot revert back to distributing just an UWP package.
17.7.1. Click Edit architectures.
17.7.2. Select the Combine the generated package(s) into one bundle option and click Save.
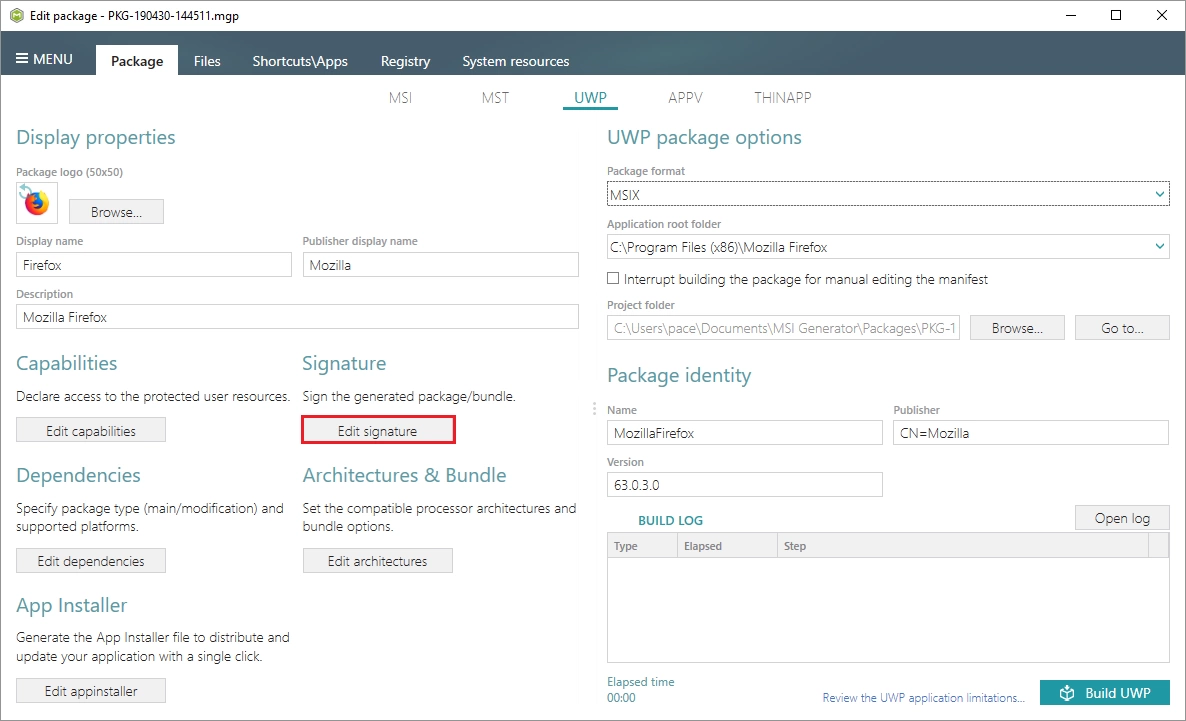
17.8. Sign the generated MSIX package(s) or bundle with a certificate for the testing purposes or distribution. Signing an app package provides the user with verification that the app’s data have not been modified after it was signed while also confirming the identity of the user or company that signed it.
17.8.1. Click Edit signature.
17.8.2. Select the necessary signature option and click Save.
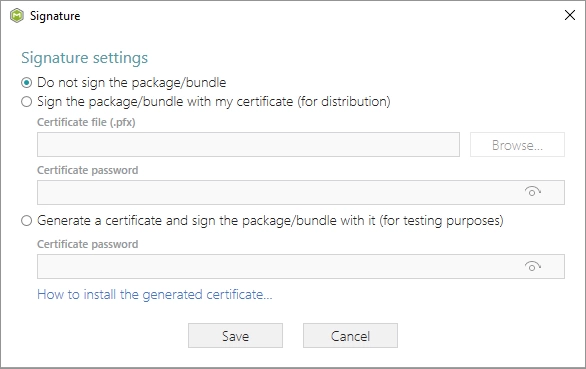
17.8.3. To install the generated MSIX package, (1) enable the Developer Mode or Sideloading apps on the target system and (2) ensure that the certificate, used for signing, is trusted on that system. If you are using the self-signed certificate, install it manually to the Trusted People or Trusted Publishers local machine certificate store. By adding a certificate to local machine certificate stores, you affect the certificate trust of all users on the computer. It is recommended that you remove those certificates when they are no longer necessary to prevent them from being used to compromise system trust.
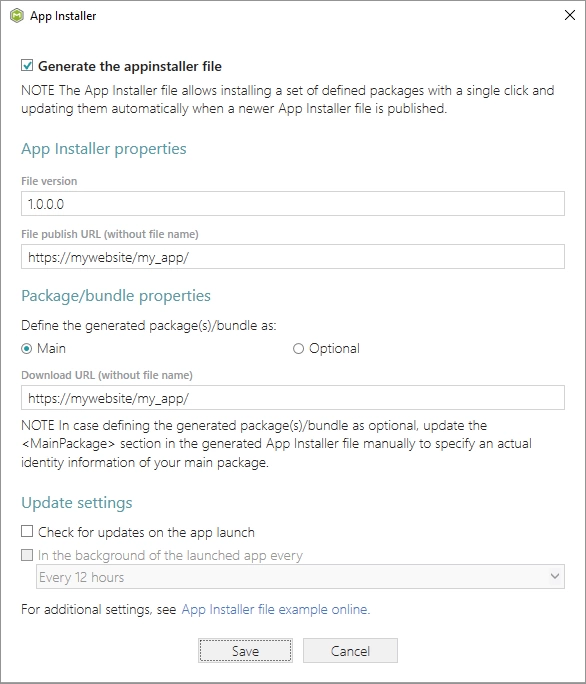
17.9. If you want you can generate the AppInstaller with one click for the non-Store distribution and automatic update of your UWP package. For information, see Install UWP apps with App Installer.
17.9.1. Click Edit appinstaller.
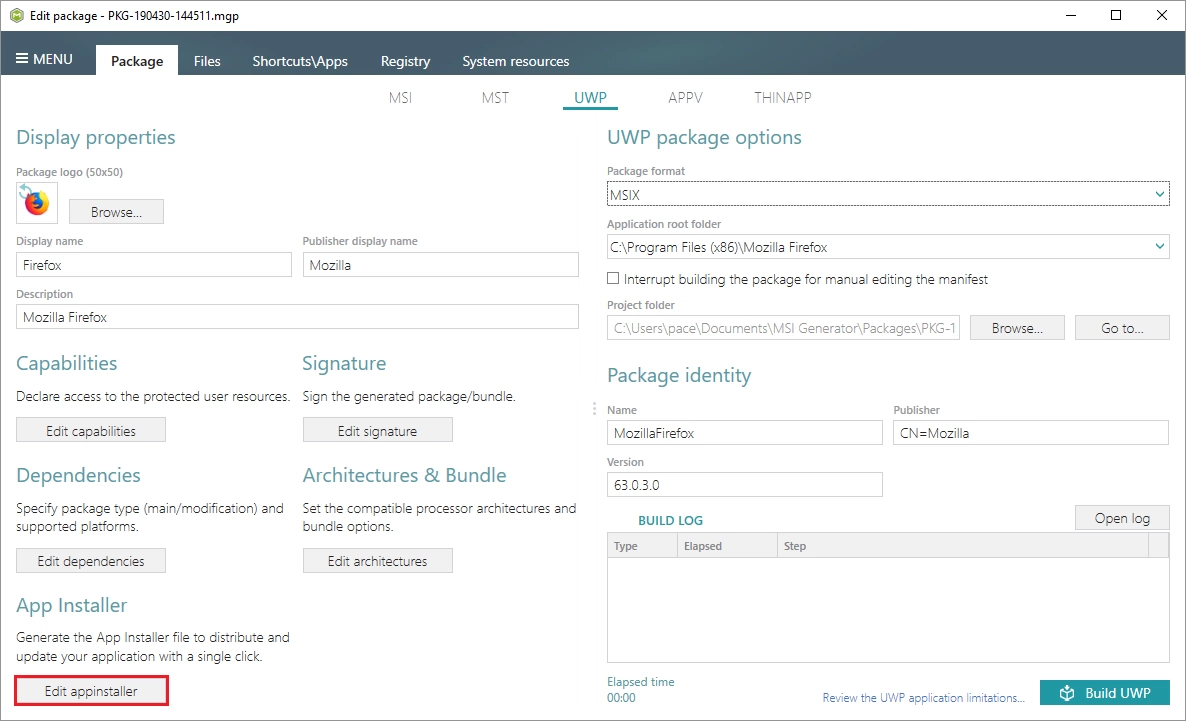
17.9.2. Tick the Generate the appinstaller file option, specify a file version (increase version for each new file), URL where this AppInstaller file will be published. Also, specify the generated package/bundle as main or as optional, and the URL, where this package/bundle will be available for download. Select the desired package update settings and click Save. For manual editing, see App Installer file (.appinstaller) schema reference. NOTE The generated AppInstaller file will work only if you launch it from the specified URL.
17.9.3. To install the generated UWP package with the AppInstaller file, (1) enable the Developer Mode or Sideloading apps on the target system and (2) ensure that the certificate, used for signing, is trusted on that system. If you are using the self signed certificate, install it manually to the Trusted People or Trusted Publishers local machine certificate store. By adding a certificate to local machine certificate stores, you affect the certificate trust of all users on the computer. It is recommended that you remove those certificates when they are no longer necessary to prevent them from being used to compromise system trust.
17.9.4. For troubleshooting, see Troubleshoot installation issues with the App Installer file.
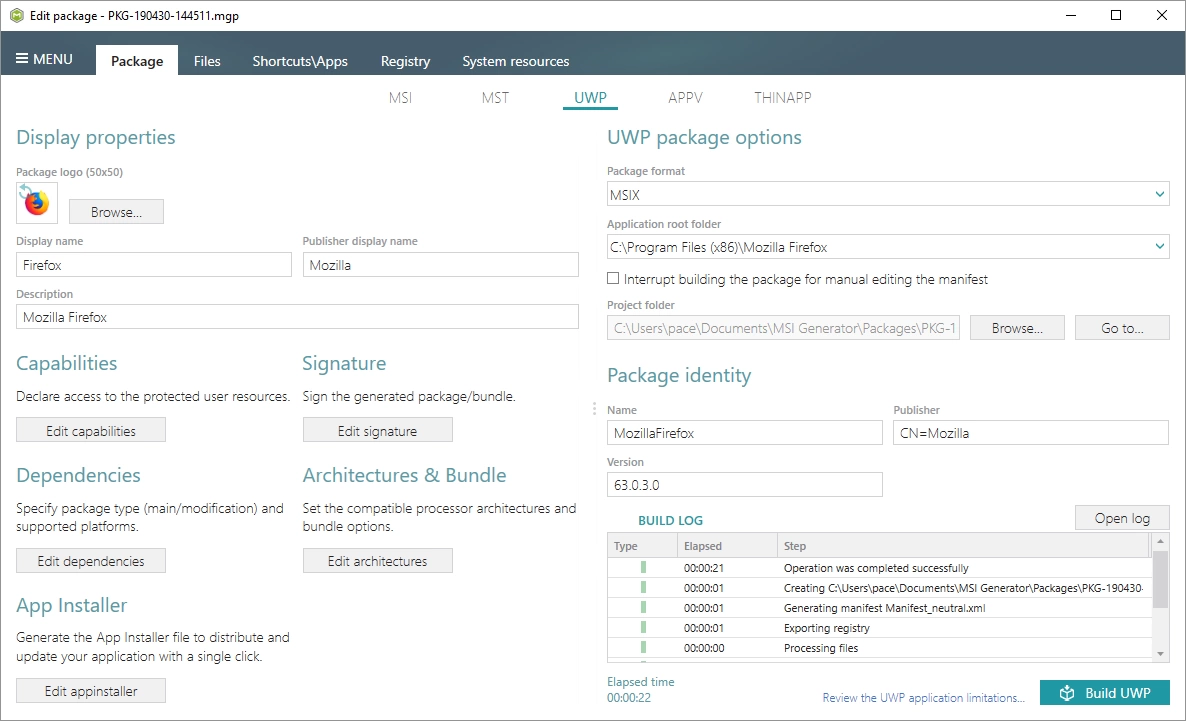
18. Finally, to generate an MSIX package, click Build UWP on the Package -> UWP tab.
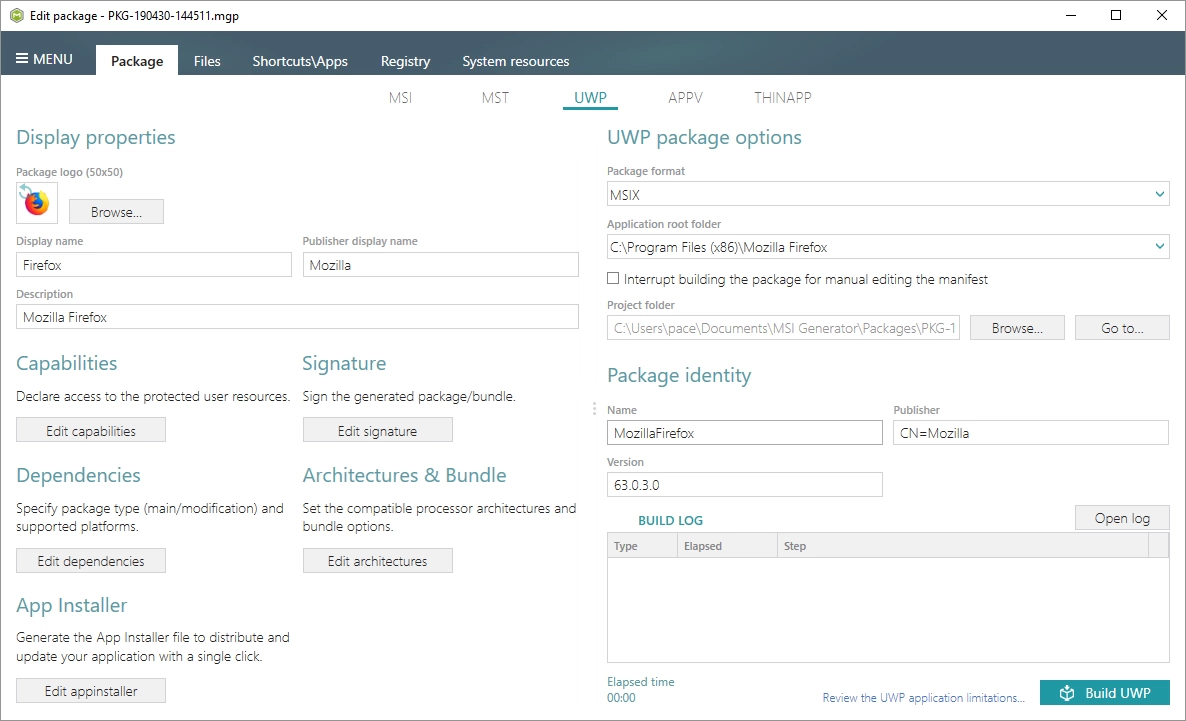
19. Once the package is built, click Go to…, located next to the Project folder field, to open the MSIX/APPX project folder in Windows Explorer. Find your package in the “Output” subfolder.
20. To install the generated MSIX package, (1) enable the Developer Mode or Sideloading apps on the target system and (2) ensure that the certificate, used for signing, is trusted on that system. If you are using the self signed certificate, install it manually to the Trusted People or Trusted Publishers local machine certificate store. By adding a certificate to local machine certificate stores, you affect the certificate trust of all users on the computer. It is recommended that you remove those certificates when they are no longer necessary to prevent them from being used to compromise system trust.
That is all you need to do to convert EXE to MSIX package using PACE Suite. Download a free PACE Suite trial now to try creating MSIX packages yourself and contact our support in case you have any questions.

