Note
You are not reading the most recent version of this documentation. See the latest version available.
Getting Started as Supervisor
Get started with PACE Packager Hub as Supervisor.
Important
Precondition: Open and Sign In on Web Portal of PACE Packager Hub.
List of Steps:
Step 1 - Create Project
Create a new project.
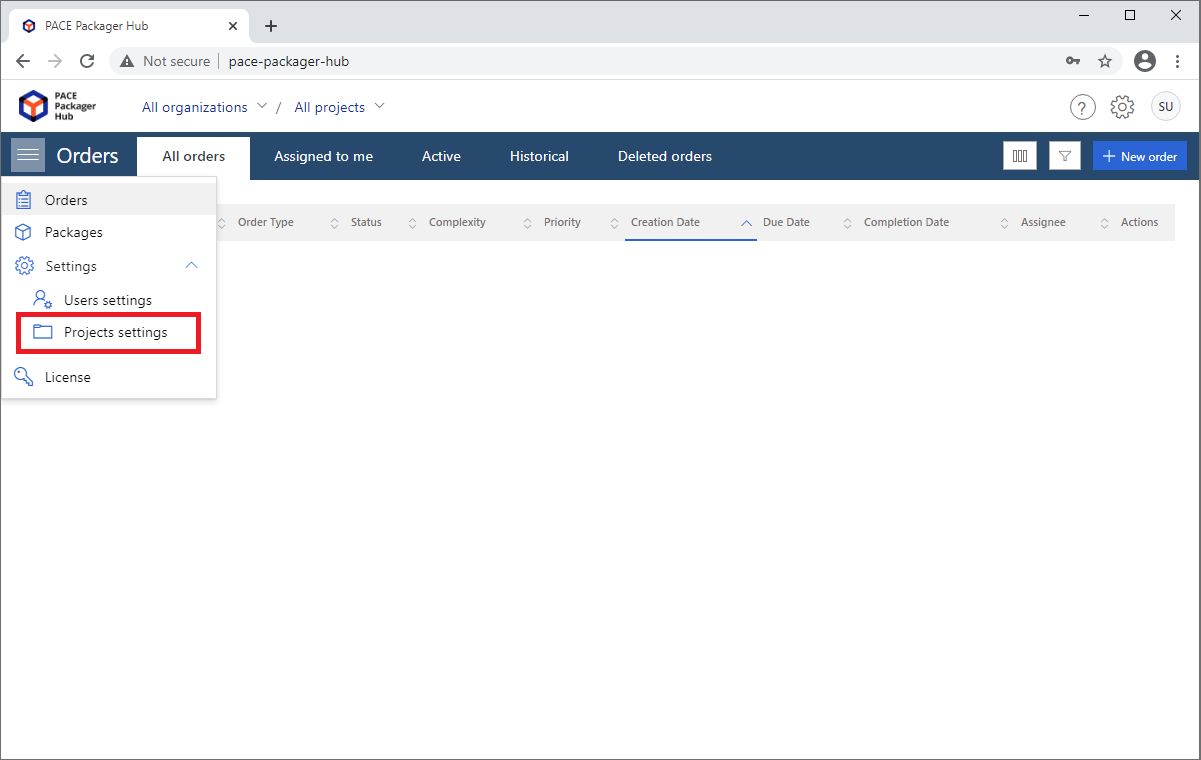
- In the top-left corner, select
 > Project settings.
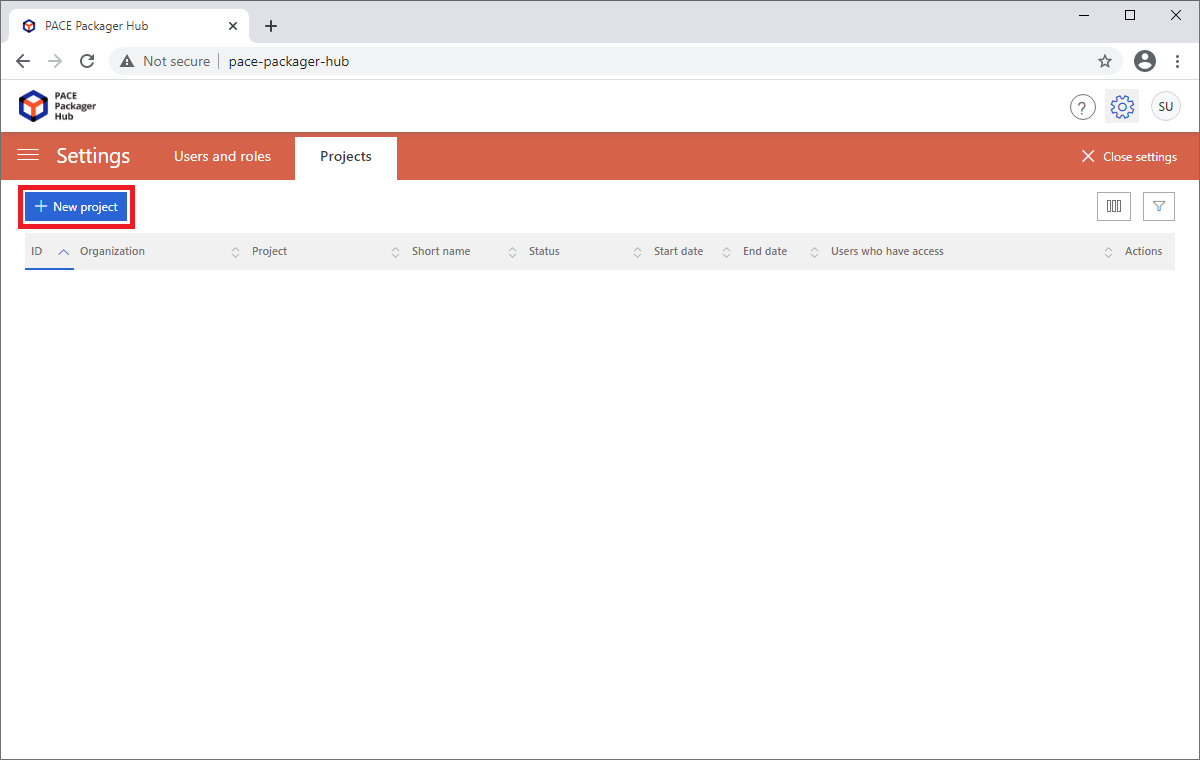
- Click New project.
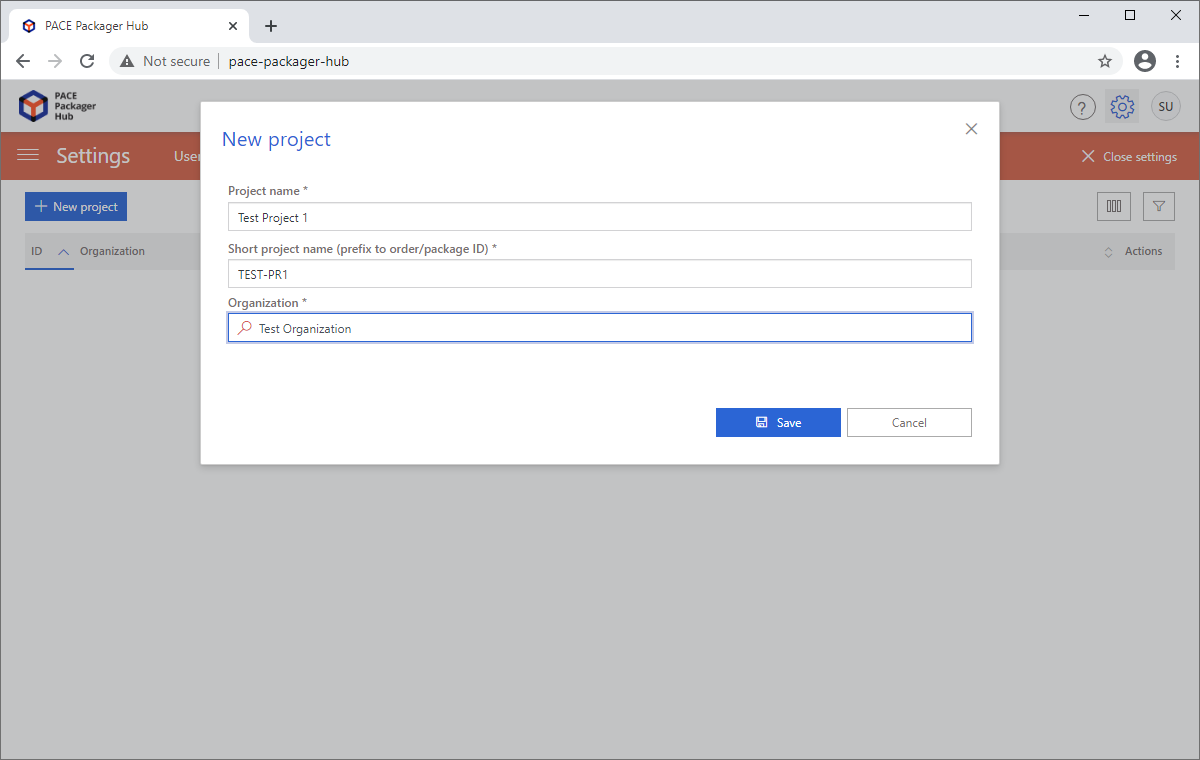
- Enter a Project name, Project short name, Organization (used to group projects) and click Save.
Step 2 - Configure Project
Make the minimum project configuration to start the work.
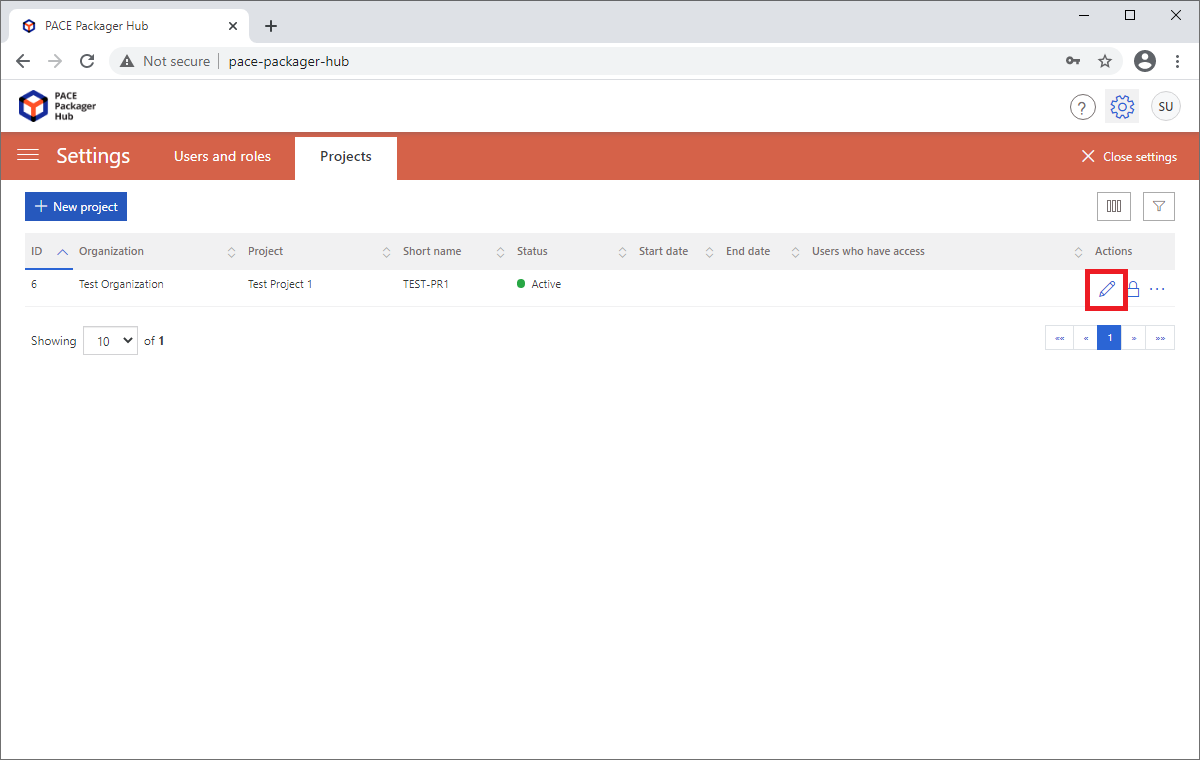
- The just created project is automatically opened for editing. If it is your case, skip this step. Otherwise, click Edit
 in the Actions column of the project that
you need to configure.
- As PACE Packager Hub product consits of two modules, choose what module you need to configure.
For more information, see product Modules
Configure MODULE: Repository Manager
Configure MODULE: Task Manager
MODULE: Repository Manager
Specify settings, required for functionality of the Repository Manager module. You need to configure a location where all packages of the project will be stored and the package delivery settings.
- First, configure a location where all packages of this project will be stored. For this, switch to the Main operational repository tab under the Package Settings section and click New server.
Note
Only the Network Share server type is currently supported for the Main Operational repository. If you want to add support for any other type, Contact support
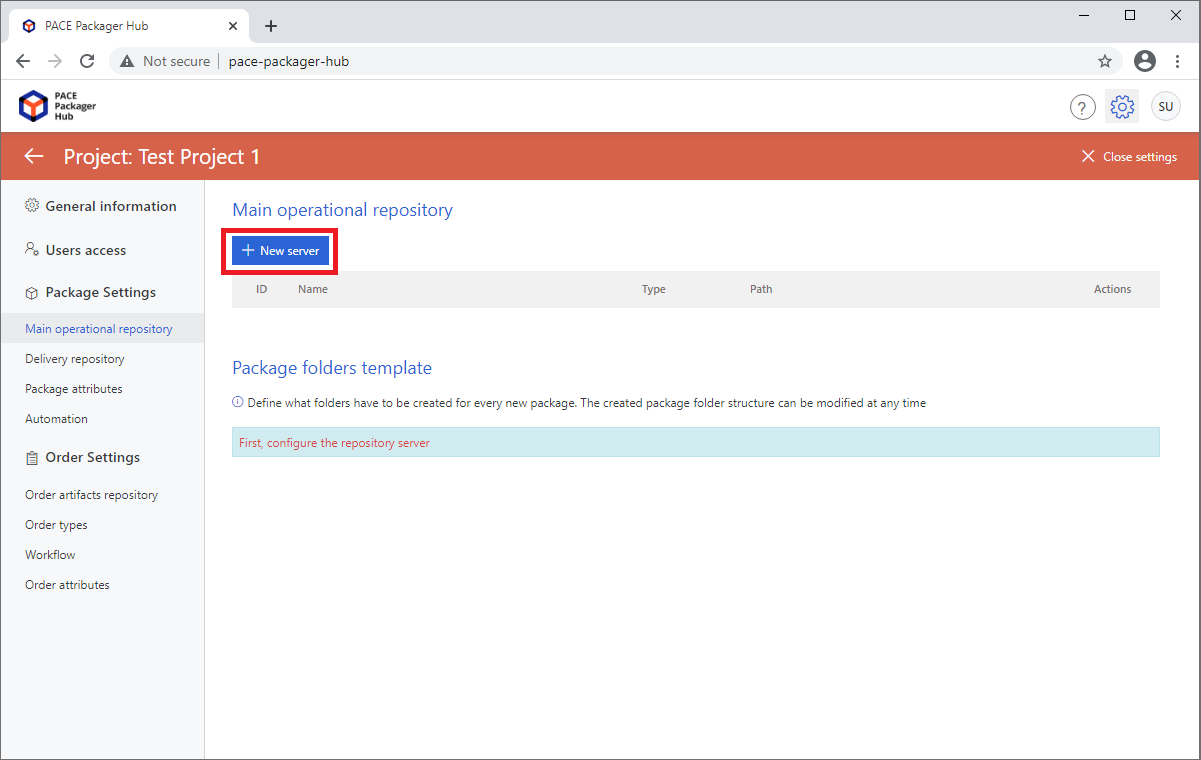
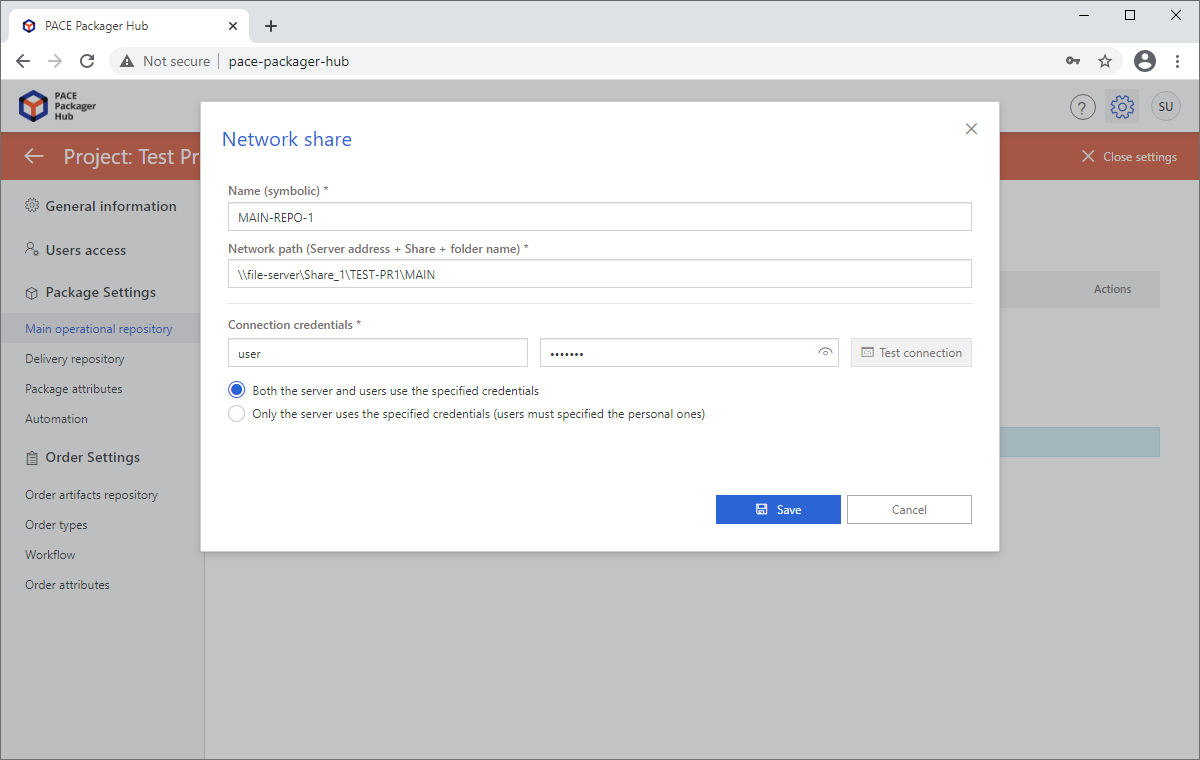
- Specify the symbolic server Name, its Network path, and the Connection credentials. See table below to choose who will use the specified credentials. Then, click Save.
Note
The specified Connection credentials are stored in the database in encrypted form.
Warning
Check that you are connected to PACE Packager Hub using HTTPS to ensure that your data and the specified Connection credentials are transmitted securely.
Parameter
Description
Both the server and users use the specified credentialsMeans that both (1) PACE Packager Hub server and (2) users of the desktop client will use the specified credentials to connect to this repository server.
Only the server uses the specified credentialsMeans that only PACE Packager Hub server will use the specified credentials to connect to this repository server. Users of the desktop client will be prompted to enter personal credentials. Their credentials will not be saved.
- Then, define what folders structure has to be created for every new package. Click New root folder to define the package root folder.
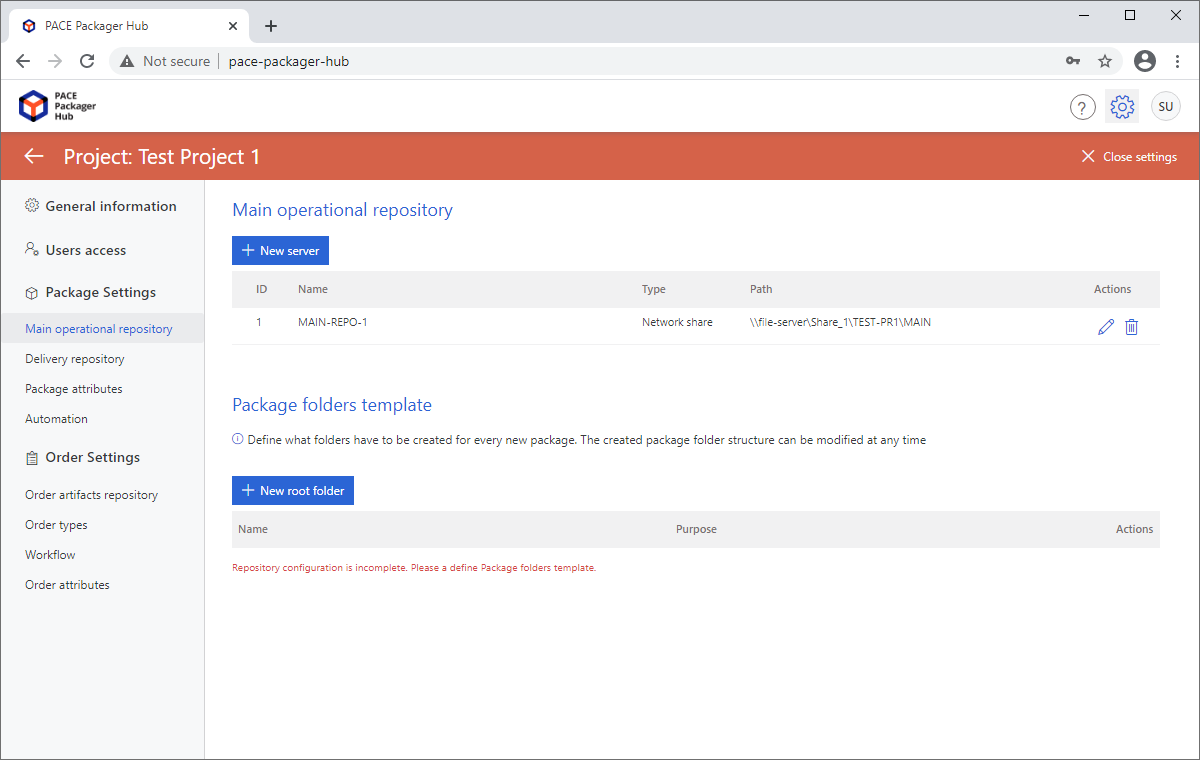
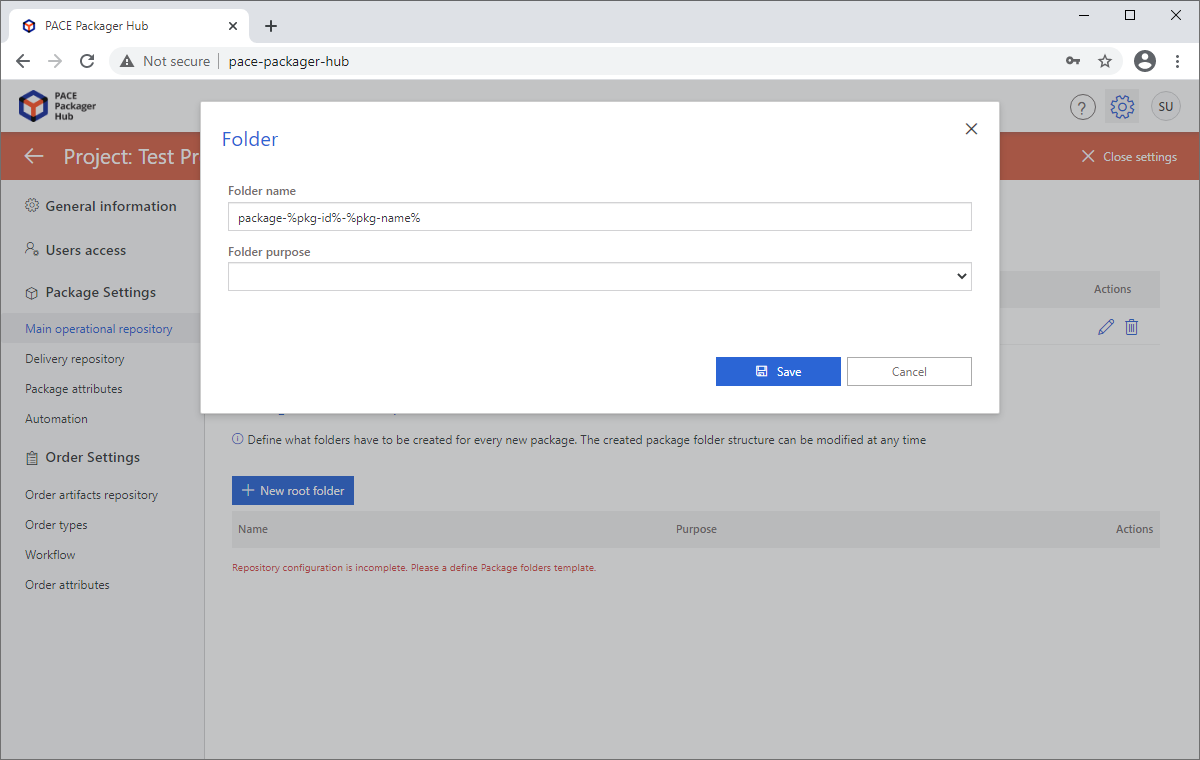
- If needed, update the default Folder name (as on screenshot) and click Save.
A folder name can be a combination of a static name and multiple variables. However, a name of the package root folder must contain at least one variable that is used to unify the name among other folders in the repository. See the table of supported variables below.
Variable
Description
%pkg-name%A value of the Package Name attribute of the Package.
%pkg-id%An ID of the Package.
%pkg-tech%A value of the Packaging technology attribute (e.g. MSI, MSIX, APPX, APPV, etc.) of the Package.
%pkg-arch%A value of the Architecture attribute (e.g. x86, x64) of the Package.
%pkg-creation-date%A value of the Creation Date attribute in format YYYYMMDD-HHMMSS.
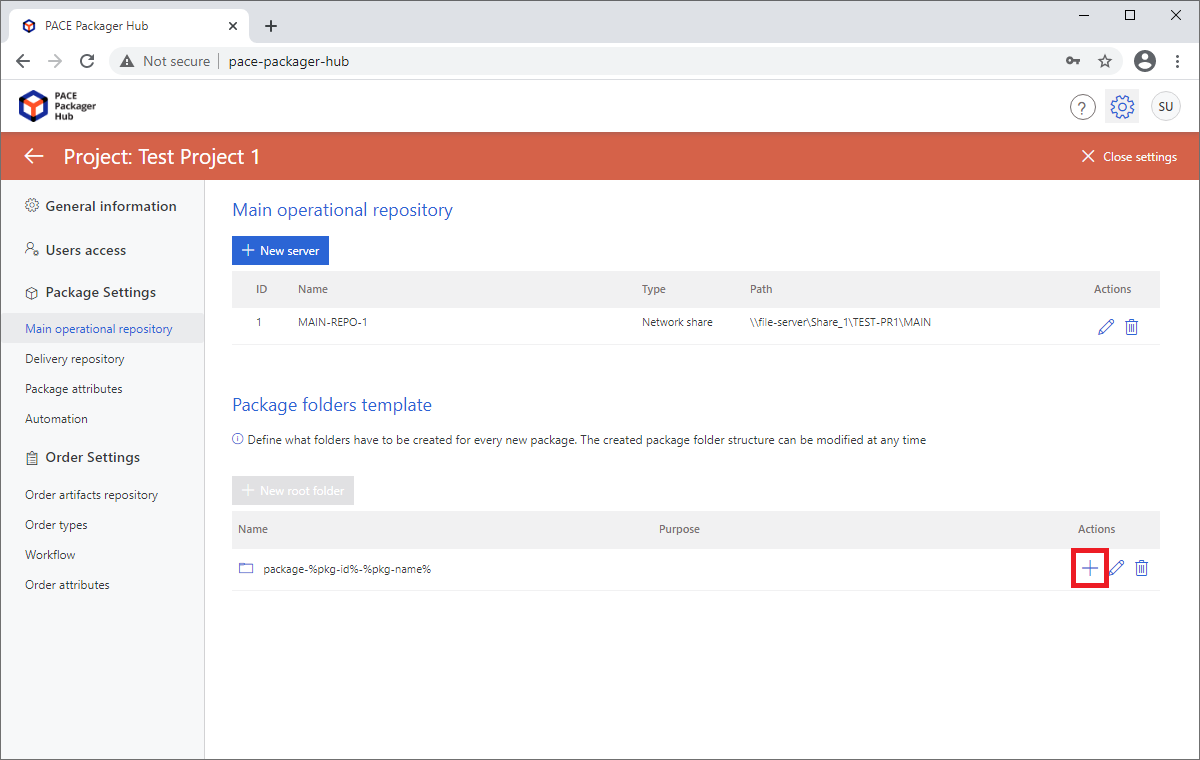
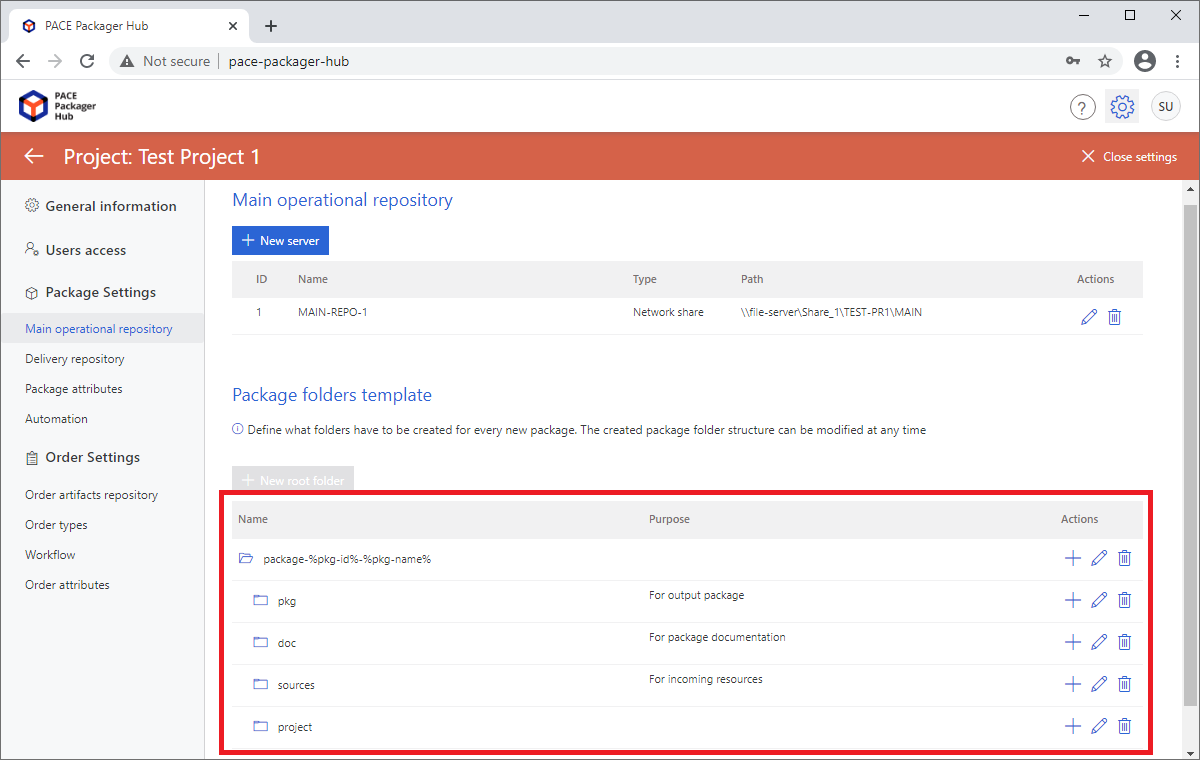
- Then, define subfolders that should be created under the root package folder. For instance, create three subfolders: (1) for package; (2) for documentation; and (3) for incoming resources.
To add a subfolder, click Add subfolder
 .
.
- Specify a Name of the subfolder, (optional) select its Purpose, and click Save.
The purpose flag is used by automation to get a path to these folders:
Output package folderPackage documentation folderIncoming resources folder
Note
A folder can have one or none purpose flags. One purpose flag can only be used once.
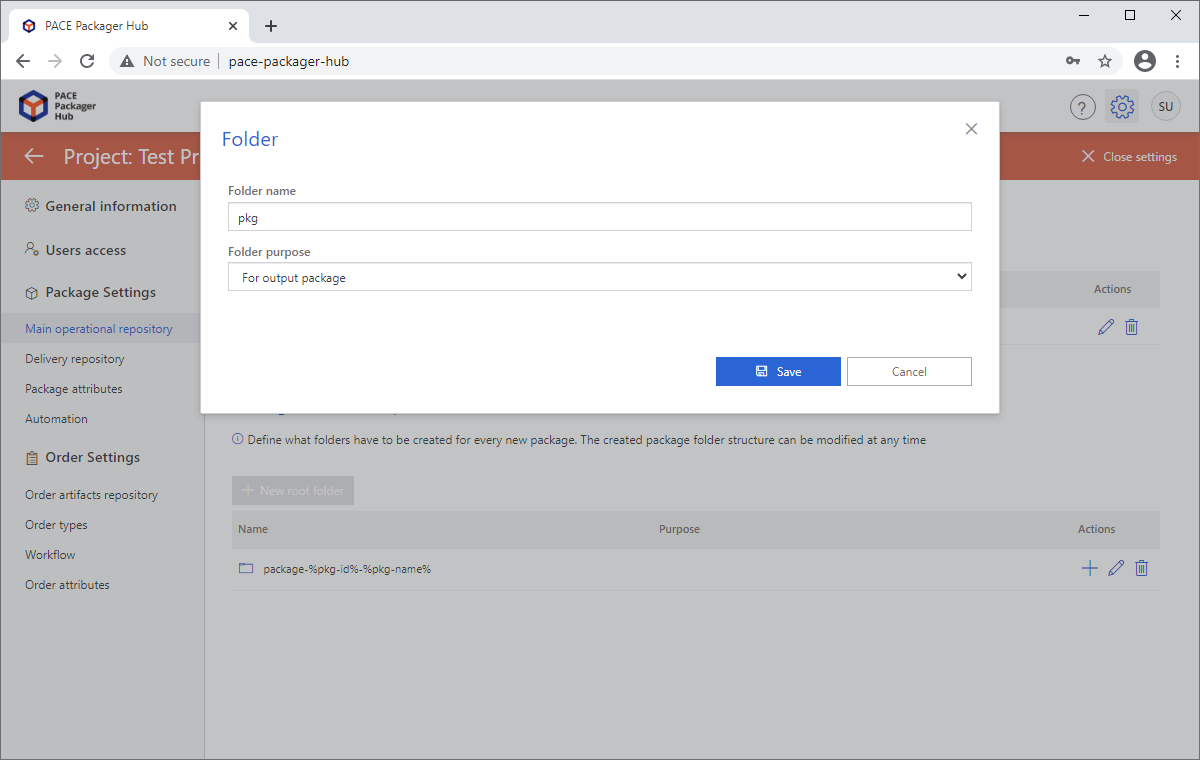
- Repeat the previous two steps to define the required folder structure that will be automatically created for each new package. As a result, you will get something like this:
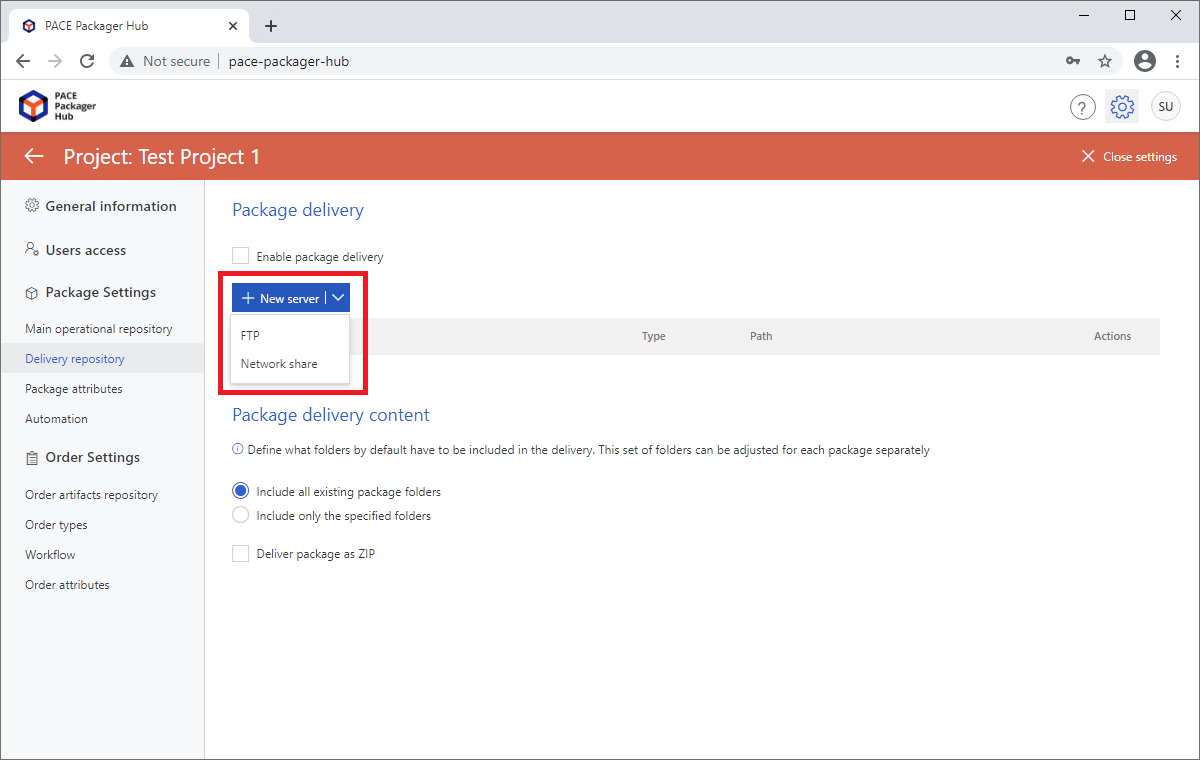
- Finally, to start working with the Repository Manager module, configure the package delivery settings. For this, go to the Delivery repository tab under the Package Settings section and click New server > FTP or New server > Network Share.
Note
Only the Network Share and FTP server types are currently supported for the Delivery repository. If you want to add support for any other type, Contact support
- Specify the symbolic server Name, its Network path, and the Connection credentials. See table below to choose who will use the specified credentials. Then, click Save.
Note
The specified Connection credentials are stored in the database in encrypted form.
Warning
Check that you are connected to PACE Packager Hub using HTTPS to ensure that your data and the specified Connection credentials are transmitted securely.
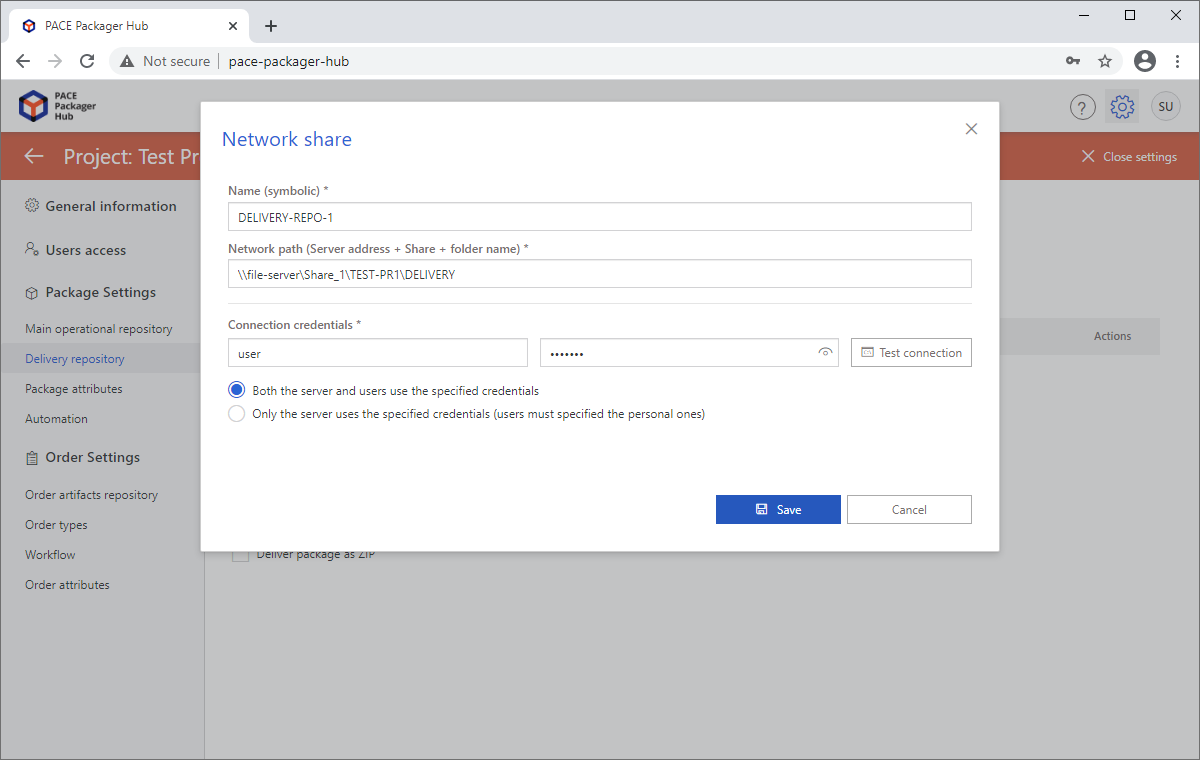
Parameter
Description
Both the server and users use the specified credentialsMeans that both (1) PACE Packager Hub server and (2) users of the desktop client will use the specified credentials to connect to this repository server.
Only the server uses the specified credentialsMeans that only PACE Packager Hub server will use the specified credentials to connect to this repository server. Users of the desktop client will be prompted to enter personal credentials. Their credentials will not be saved.
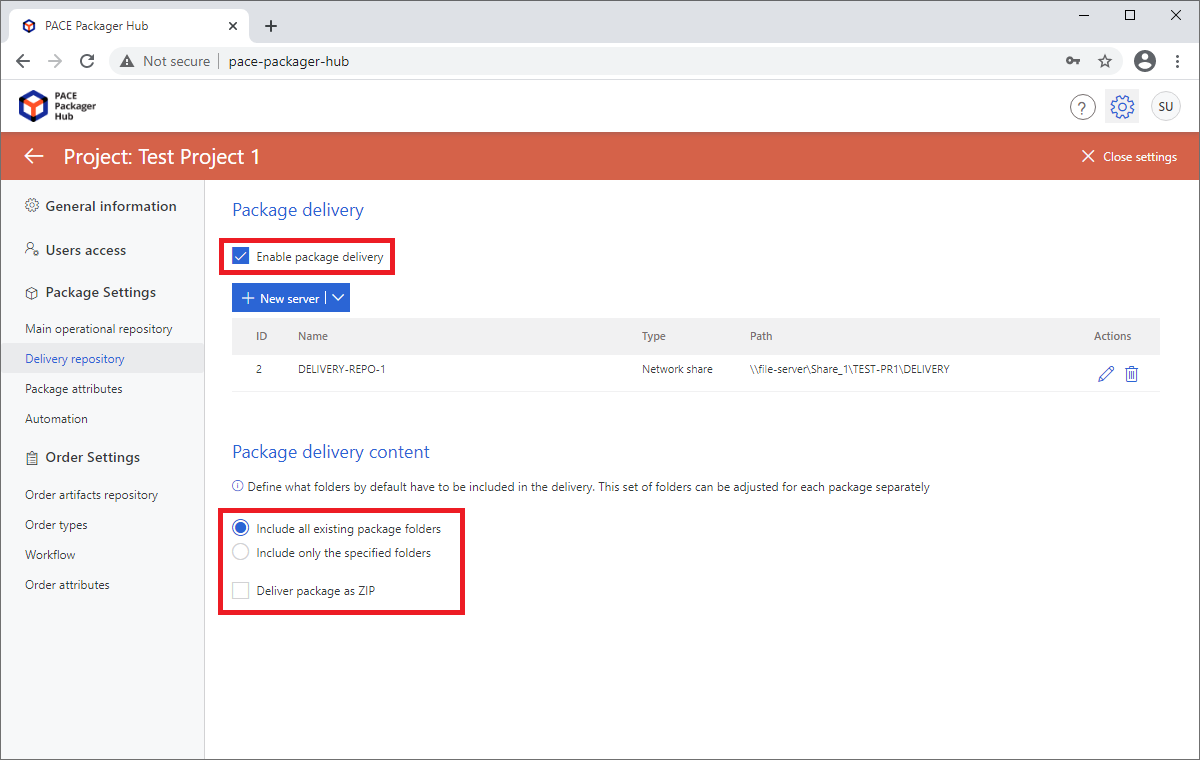
- Tick the Enable package delivery checkbox to allow users to deliver the package and, if needed, change the default Package delivery content settings. These settings can be re-defined for each package separately during delivery.
MODULE: Task Manager
Specify settings, required for functionality of the Task Manager module. You need to configure a location where the uploaded order artifacts (files) will be stored.
For more information, see product Modules
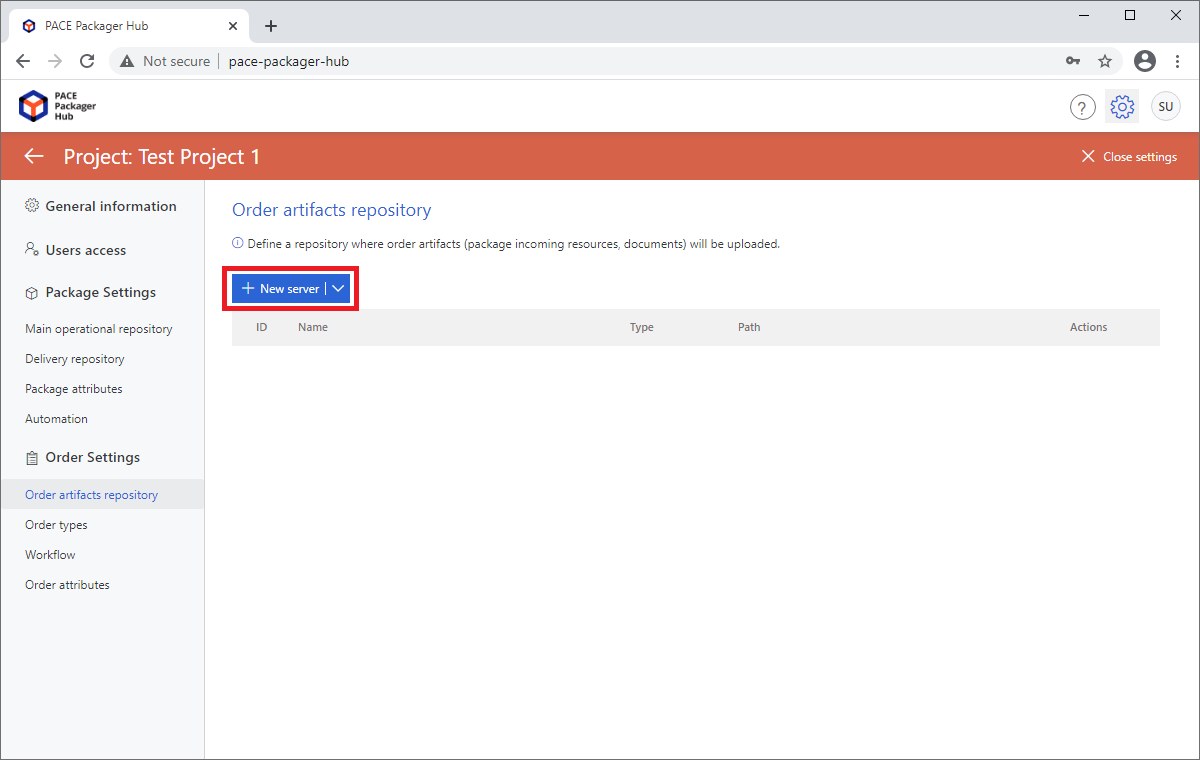
- To configure a location where the uploaded order artifacts (files) will be stored, go to the Order artifacts repository tab under the Order Settings section and click New server.
Note
Only the Network Share server type is currently supported for the Order artifacts repository. If you want to add support for any other type, Contact support
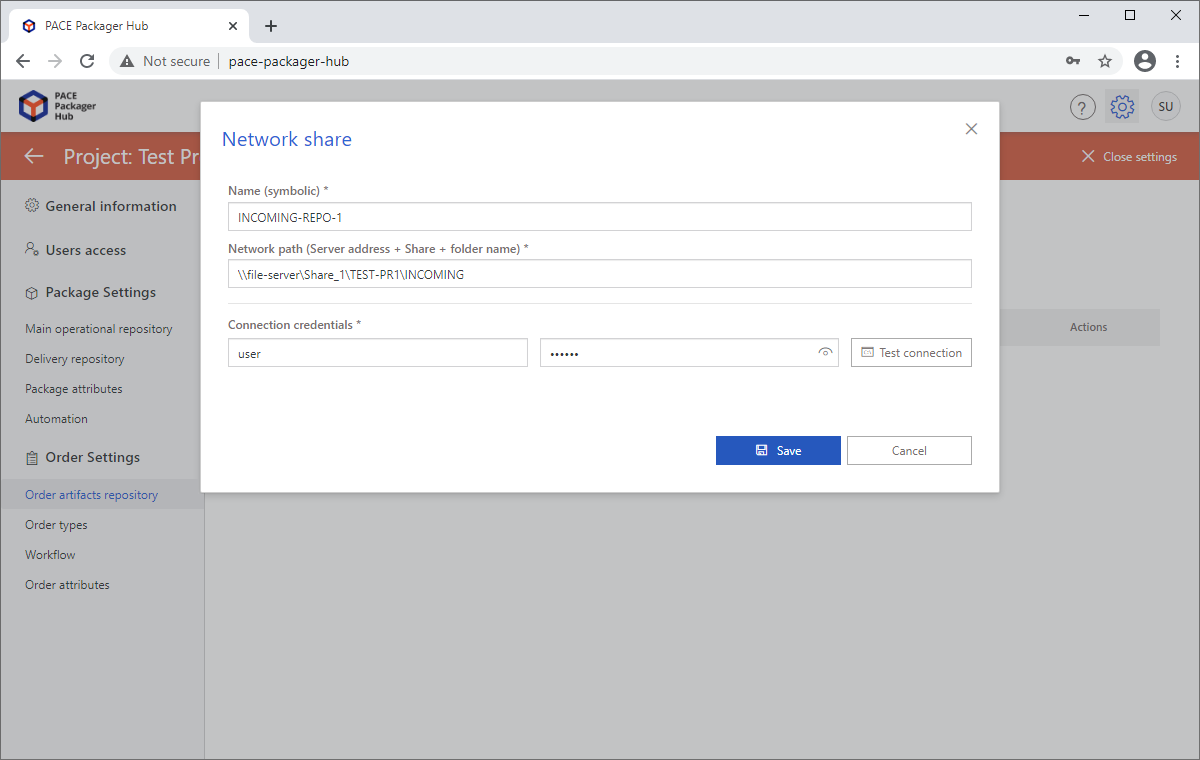
- Specify the symbolic server Name, its Network path, and the Connection credentials. Then, click Save.
Note
The specified Connection credentials are stored in the database in encrypted form.
Warning
Check that you are connected to PACE Packager Hub using HTTPS to ensure that your data and the specified Connection credentials are transmitted securely.
Step 3 - Invite Stakeholders
Invite your team and customers to the project.
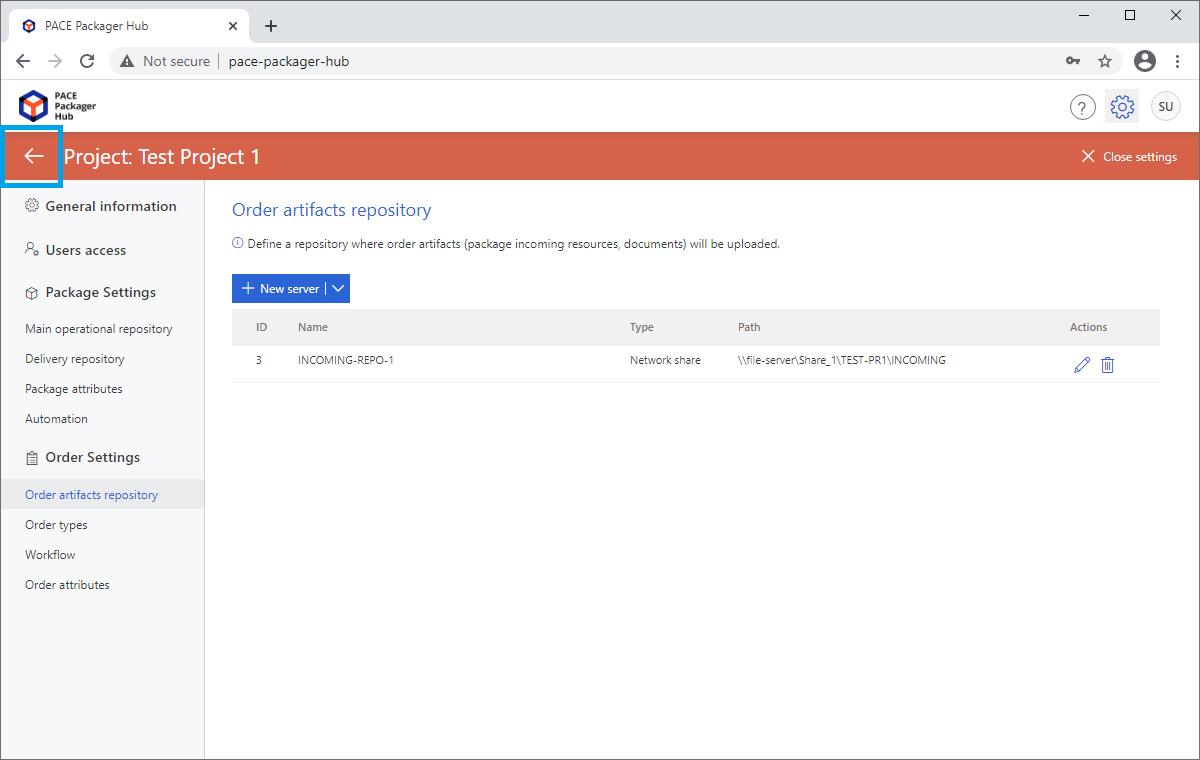
- First, create user accounts for your team and customers. For this, click Back
 in the top-left corner.
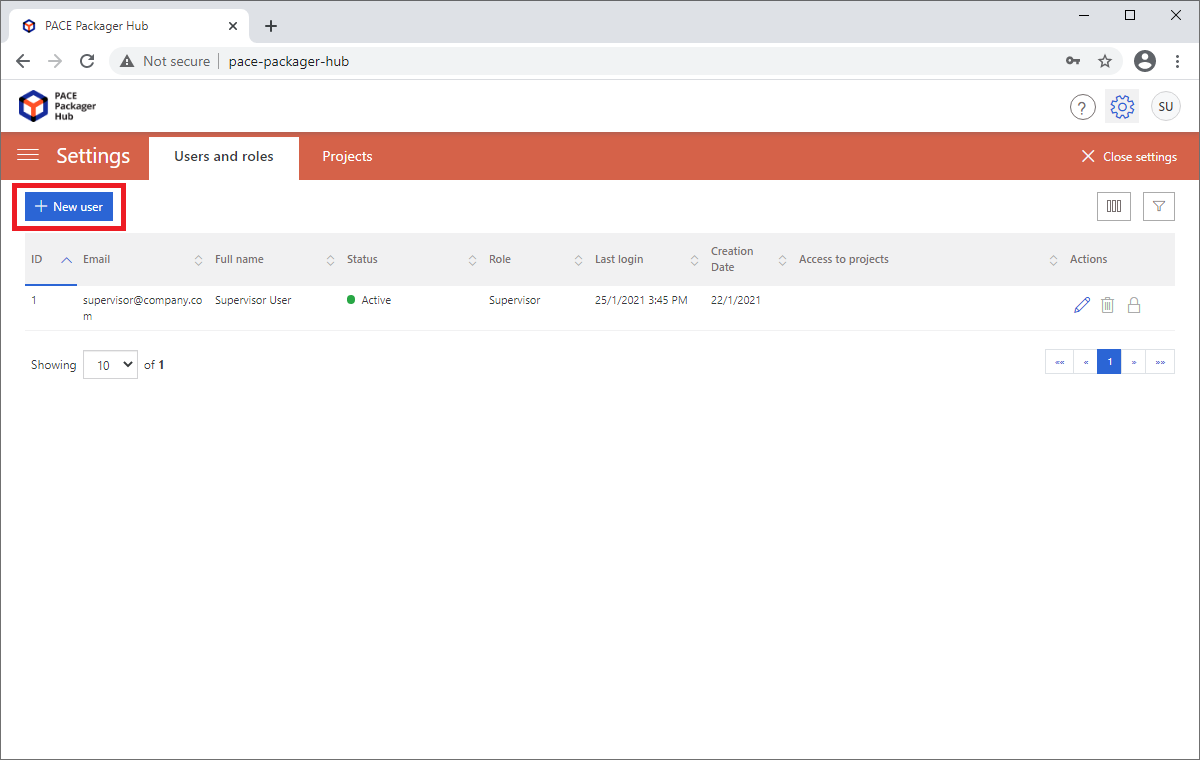
- Navigate to the Users and roles tab in the system settings and click New user.
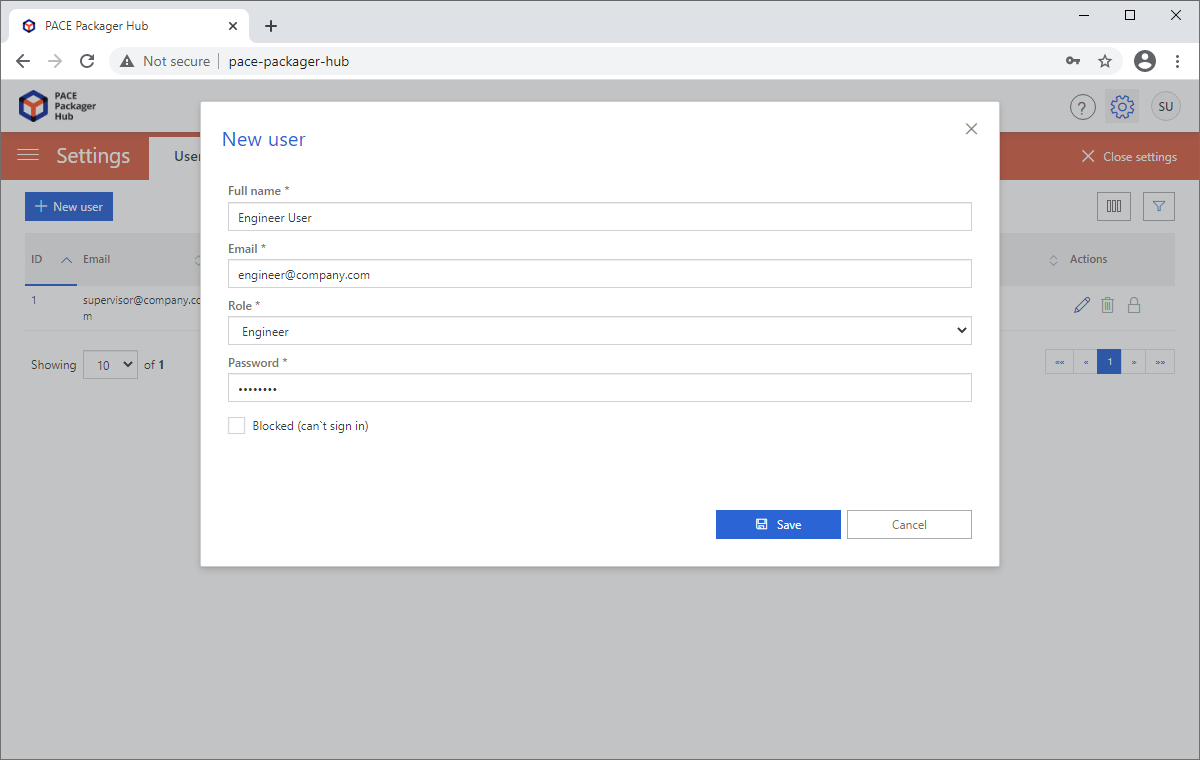
- Enter the user Full name, Email, a temporary Password and select its Role. Then, click Save.
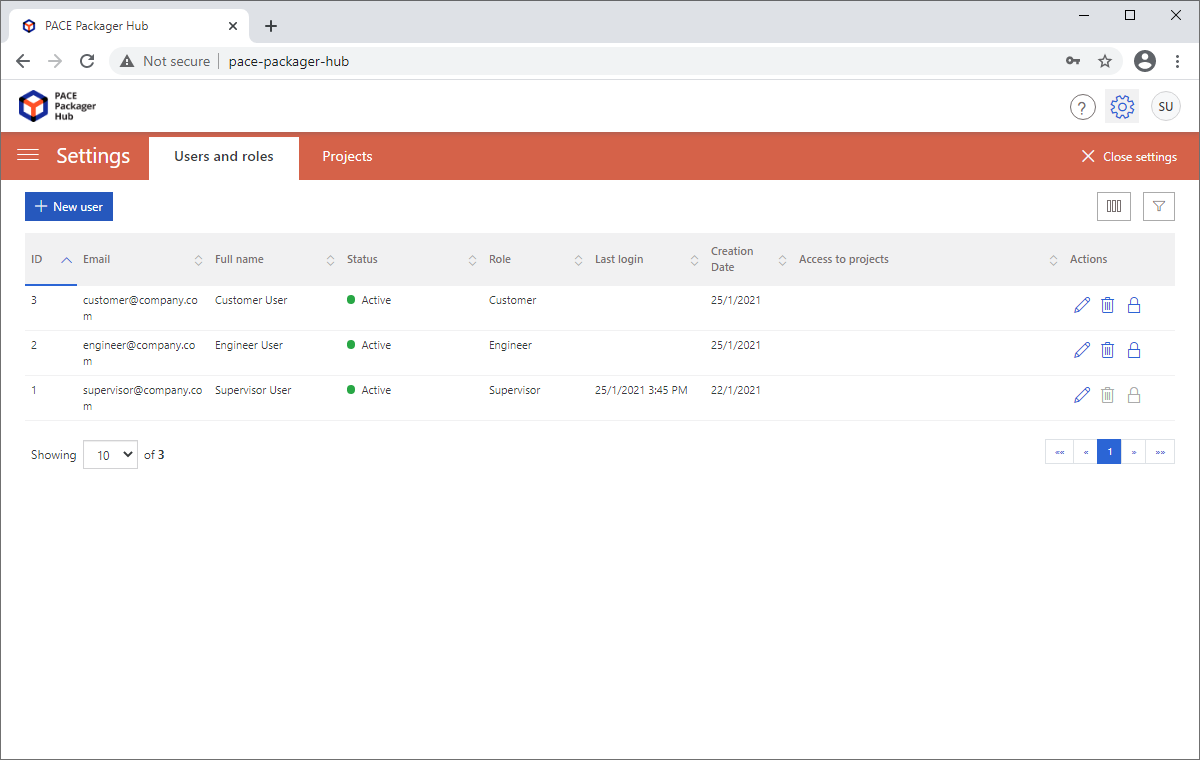
- Repeat two previous steps to create the necessary user accounts in the system.
- Then, assign users to the project. For this, swith back to the Projects tab of the system setting and click Edit
 in the
Actions column of the project.
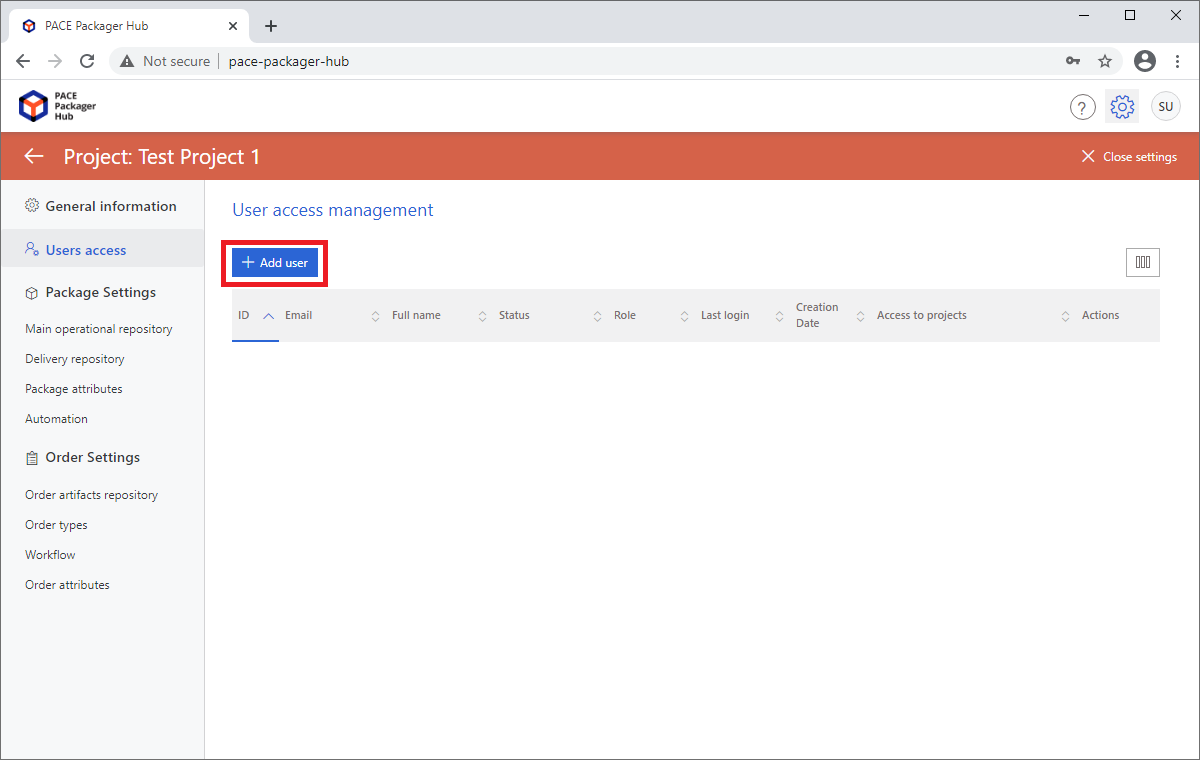
- Go to the User access tab and click Add user.
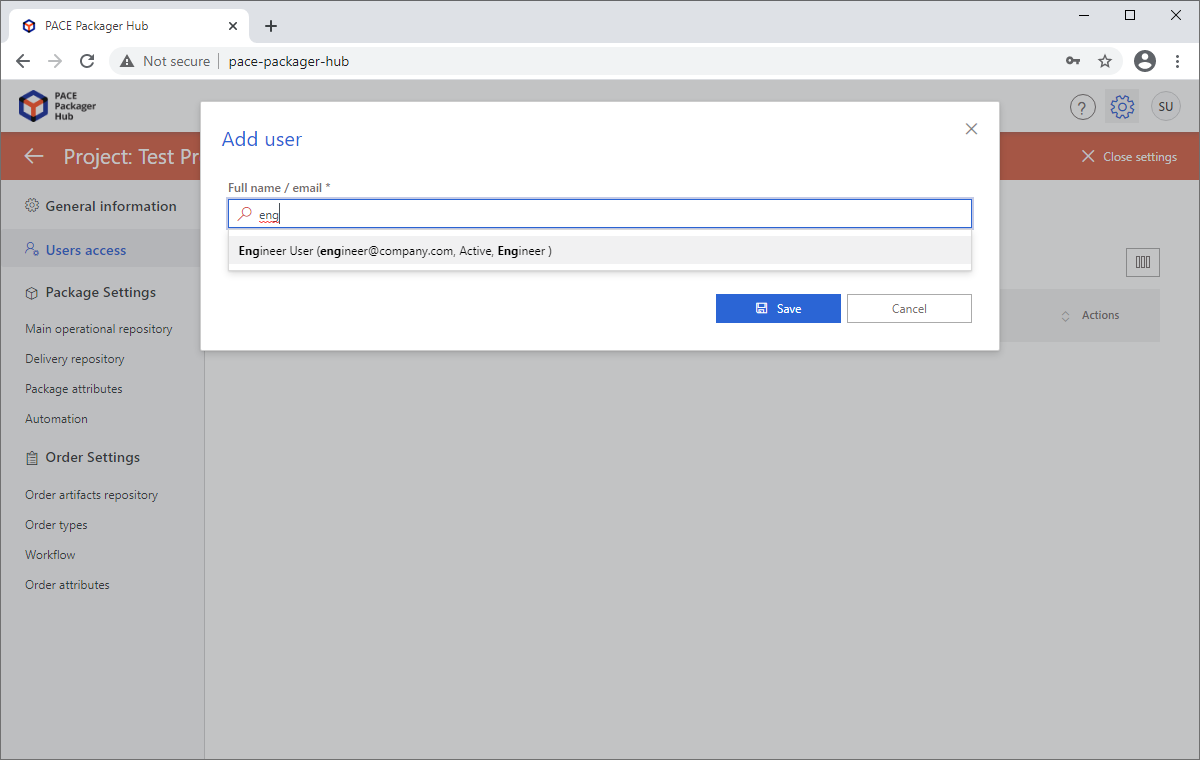
- Start typing a user full name or its email to find the necessary user. Once the user is found, select it from the list and click Save.
Note
Only the registered users can be assigned to the project.
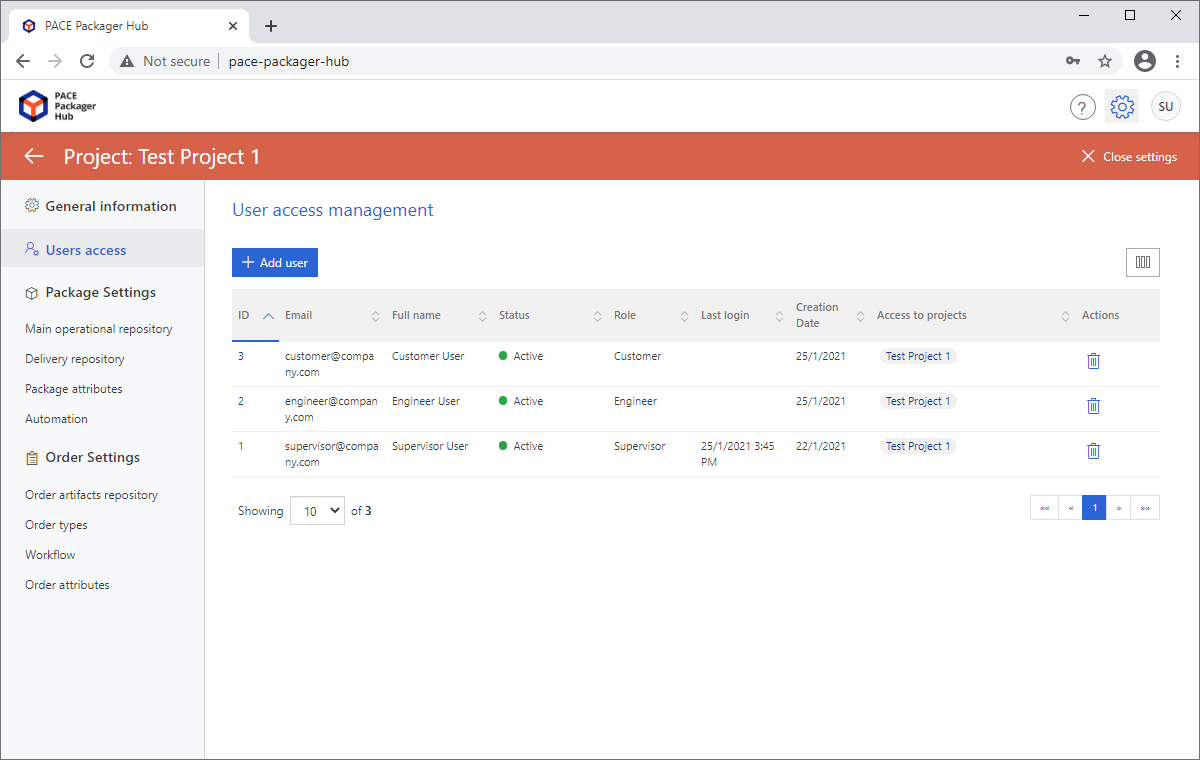
- Repeat the last step to assign the necessary users to the project.
Note
PACE Packager Hub PACE Packager Hub is an end-to-end ecosystem that is fully dedicated to customer servicing, teamwork, and management of packaging tasks in teams of any size - learn more.
Try PACE Packager Hub for free - 21 days no obligations unlimited trial with all functions unlocked.
