Note
You are not reading the most recent version of this documentation. See the latest version available.
Getting Started as Customer
Get started with PACE Packager Hub as Customer.
Important
Precondition: Open and Sign In on Web Portal of PACE Packager Hub.
List of Steps:
Step 1 - Create Order
Create a new packaging order.
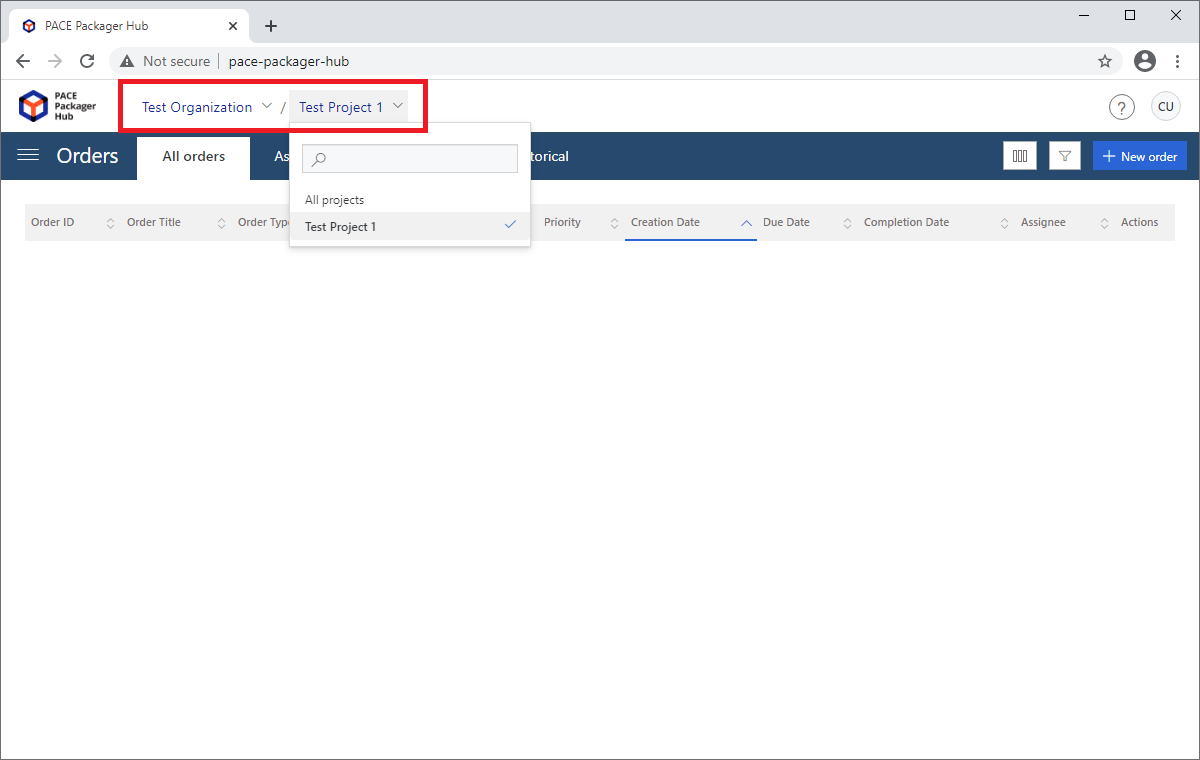
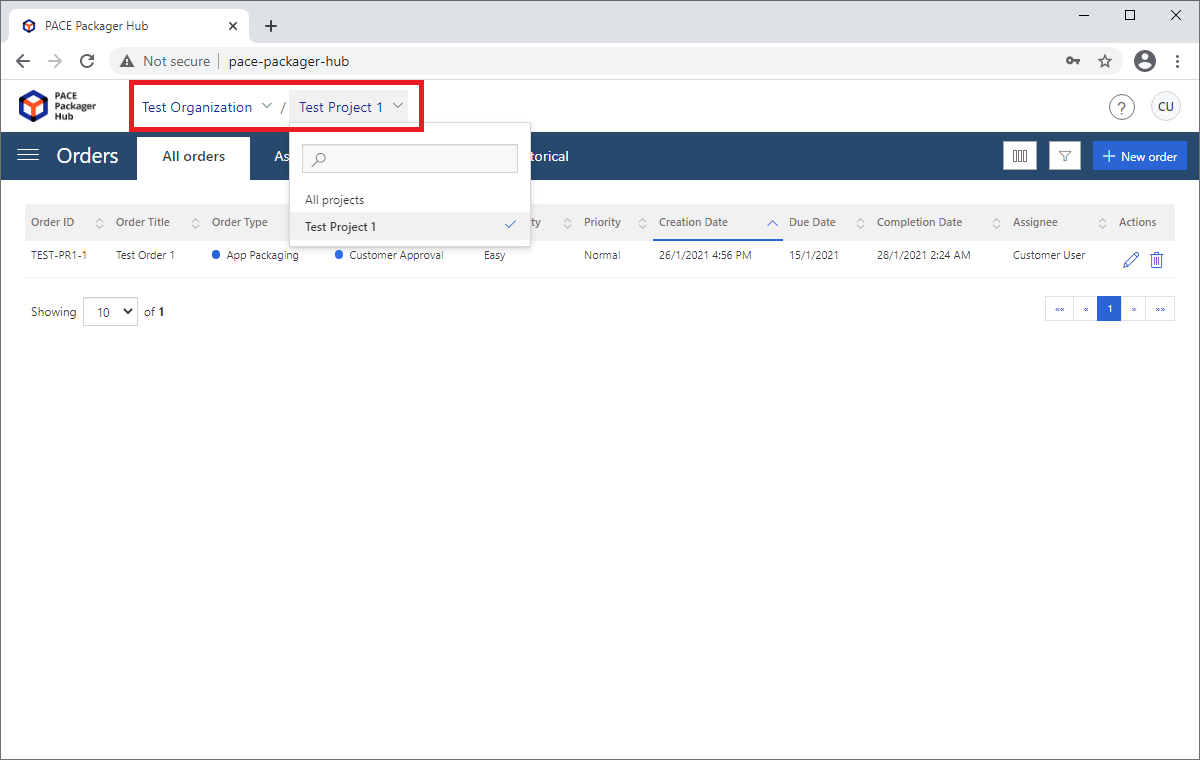
- First, choose an Organization and Project in the top-left corner you will work with. The list shows only those projects that you have access to.
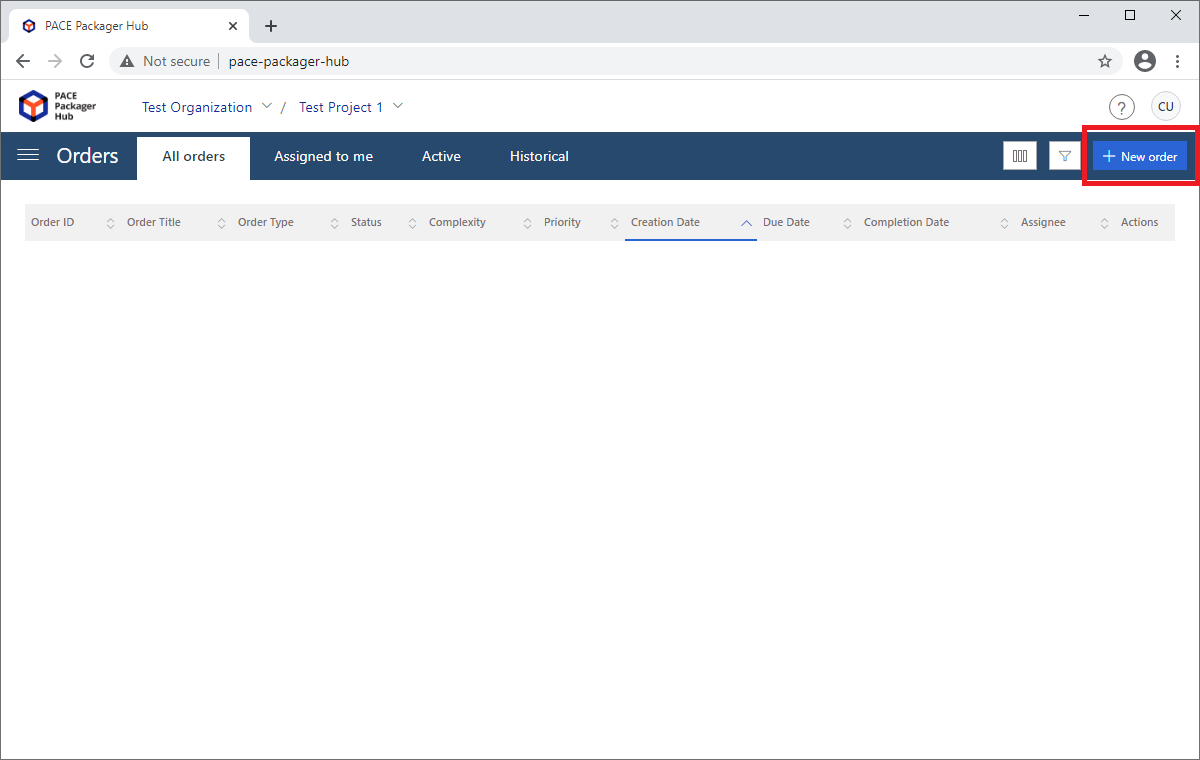
- Click New order in the top-right corner.
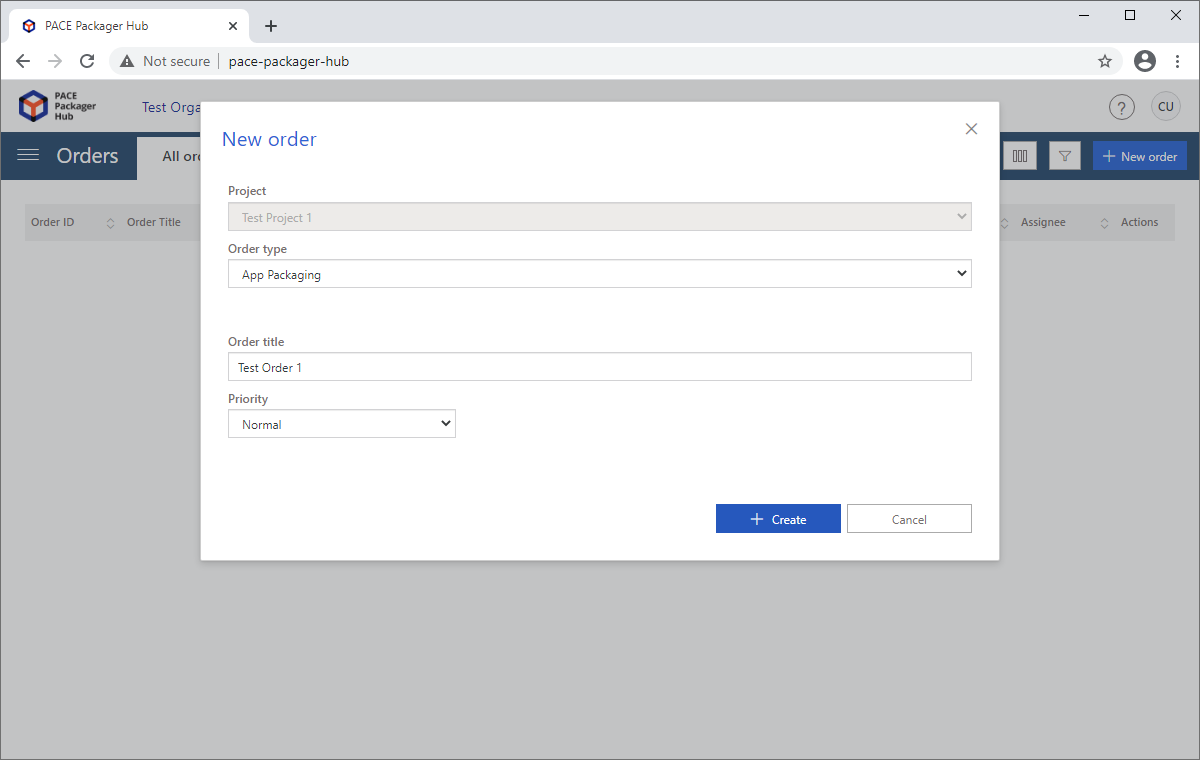
- Select an Order type (it defines the order workflow and a set of attributes) and fill-in the displayed order attributes such as Order title and others. The set of these attributes is defined in project settings. The dialog of order creation shows only the required attributes. Afterwards, click Create.
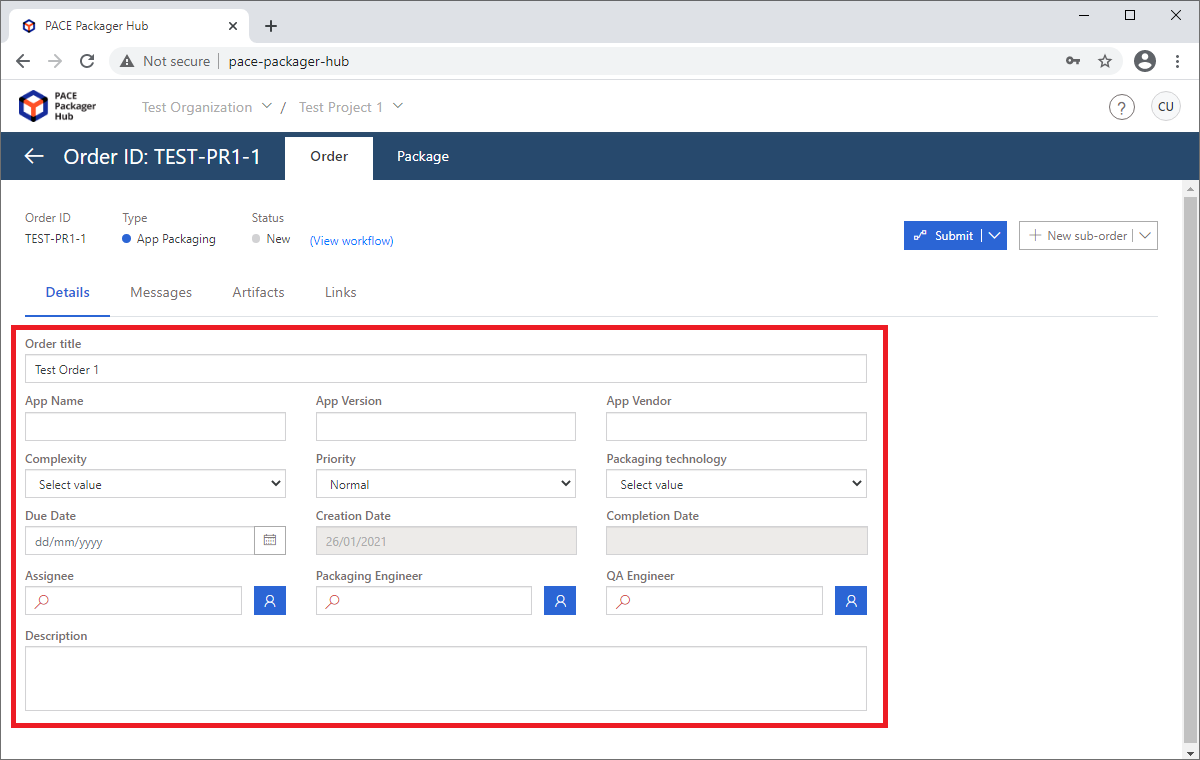
- The newly created order is automatically opened for editing. Specify values for the rest of attributes on the Details tab to describe the order. To assign the order to the packaging engineer, type his/her full name or email in the Assignee field.
Note
The changed/entered field value is automatically saved on focus lost.
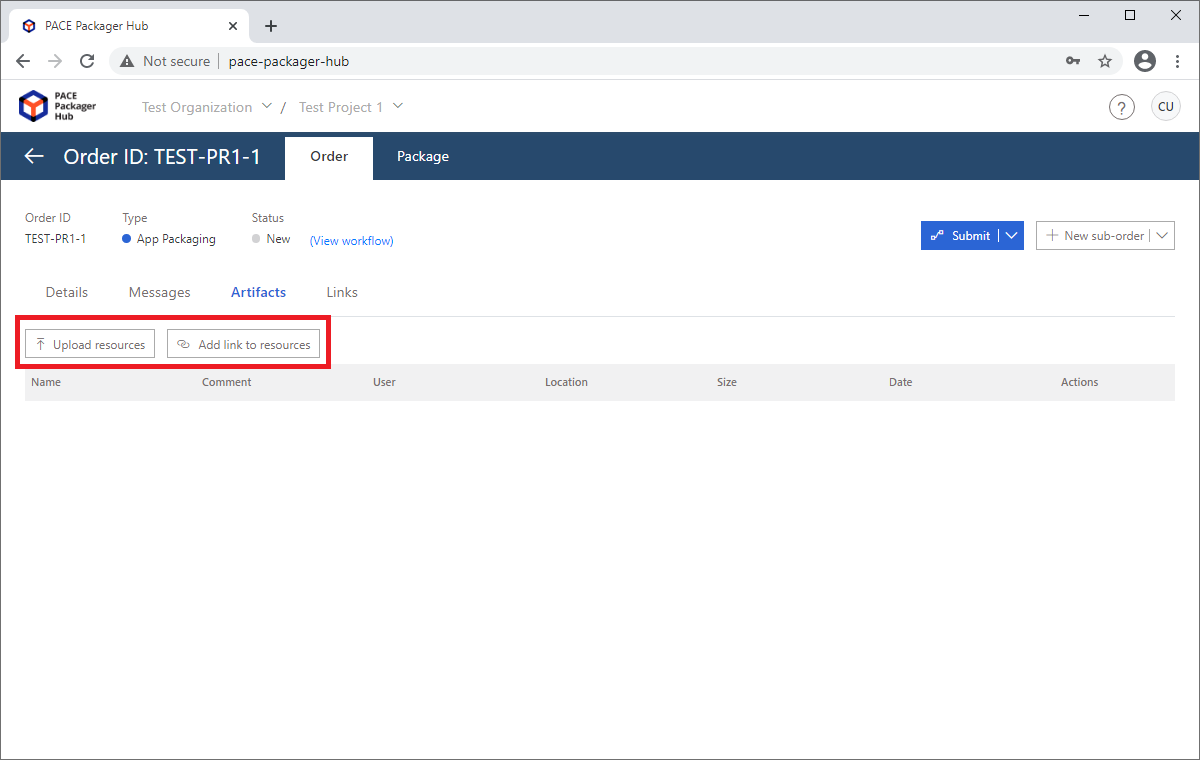
- To attach documentation, source installation and other files to the order, navigate to the Artifacts tab. Click Upload resources to upload files to the internal repository or Add link to resources to add a URL to the resource. The following steps illustrate the file upload.
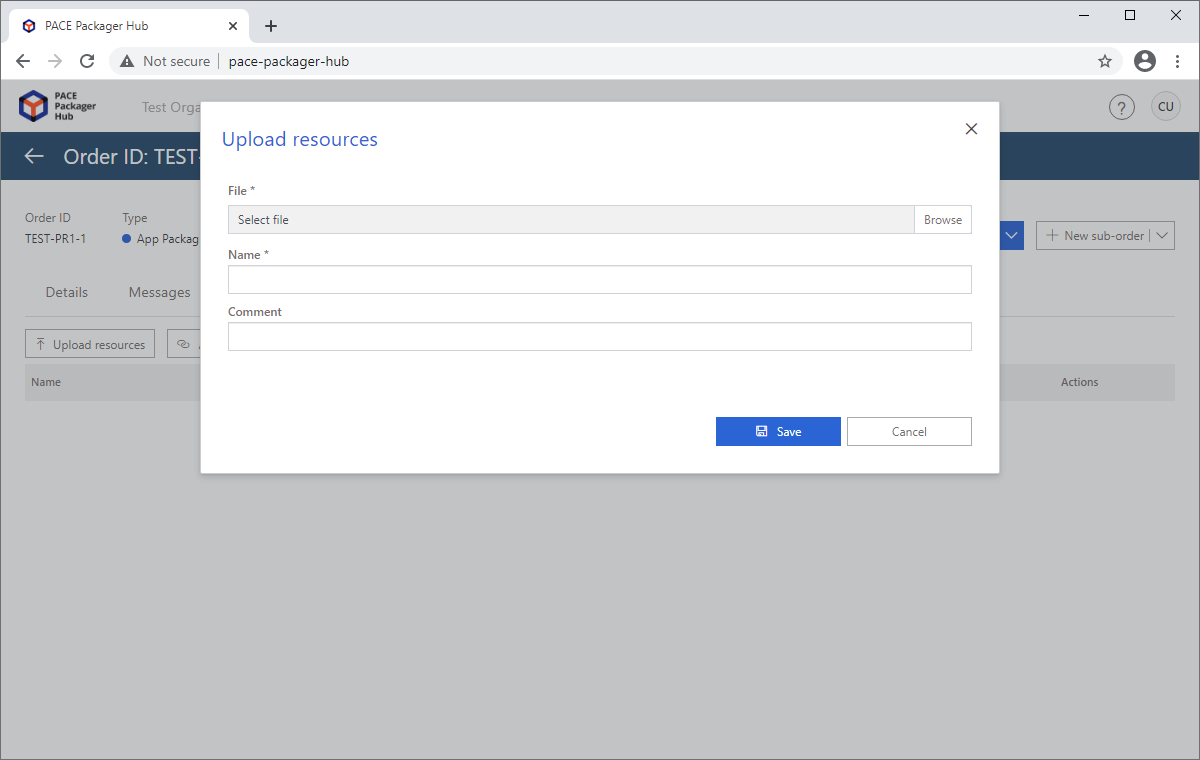
- In the opened dialog, click Browse and choose the file you need to upload. Then, specify the symbolic resource Name to be displayed in the list and, if needed, provide any additional information in the Comment field. Finally, click Save to upload the file.
Note
The maximum size of a file is determined by the Web Server individually. For Microsoft IIS Web Server the maximum file size can be set to 4 GB.
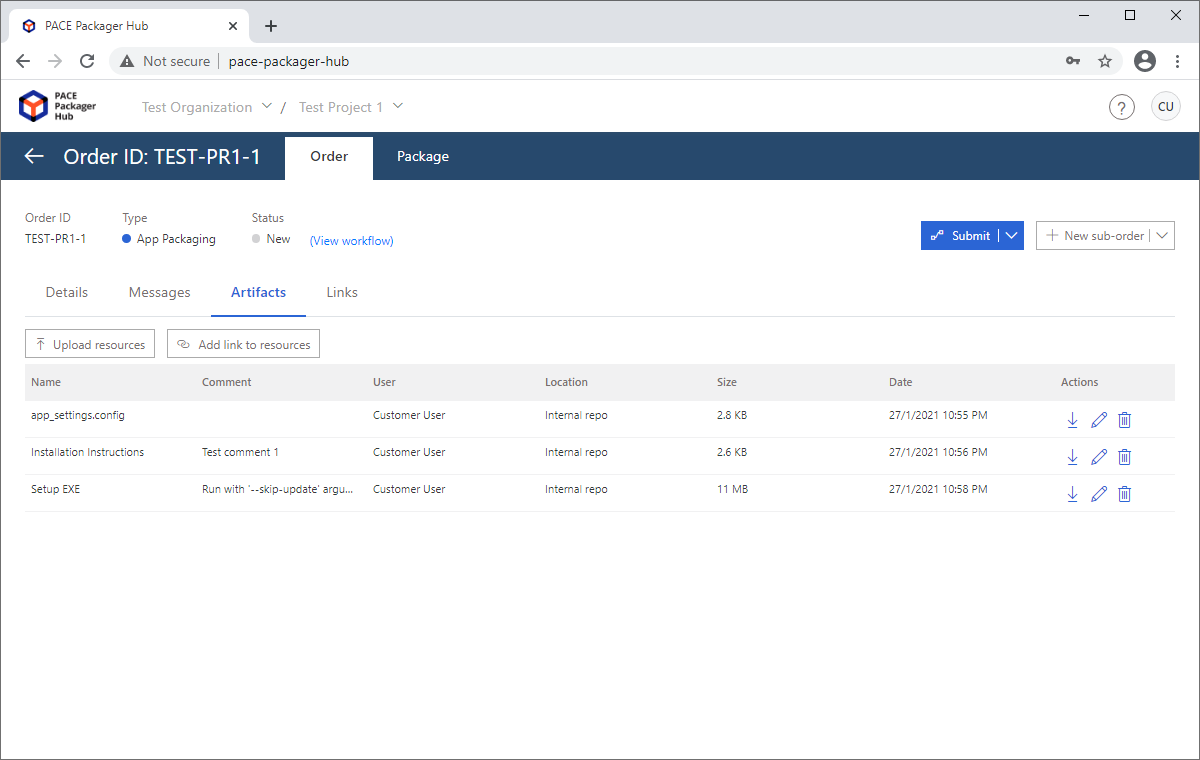
- Find the attached order artifacts in the list. If needed, update these resources or remove the unnecessary ones.
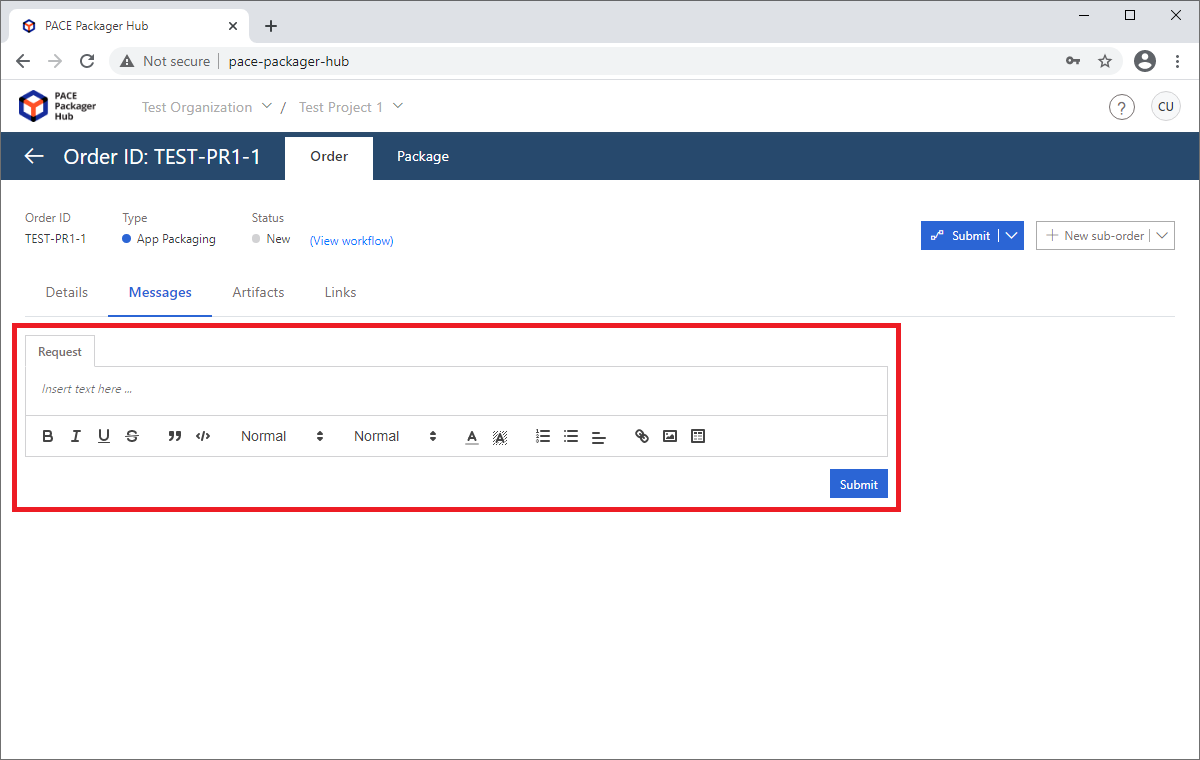
- To leave a message for the packaging team, switch to the Messages tab, type the message and click Submit. The body of the message can contain images, tables and other elements.
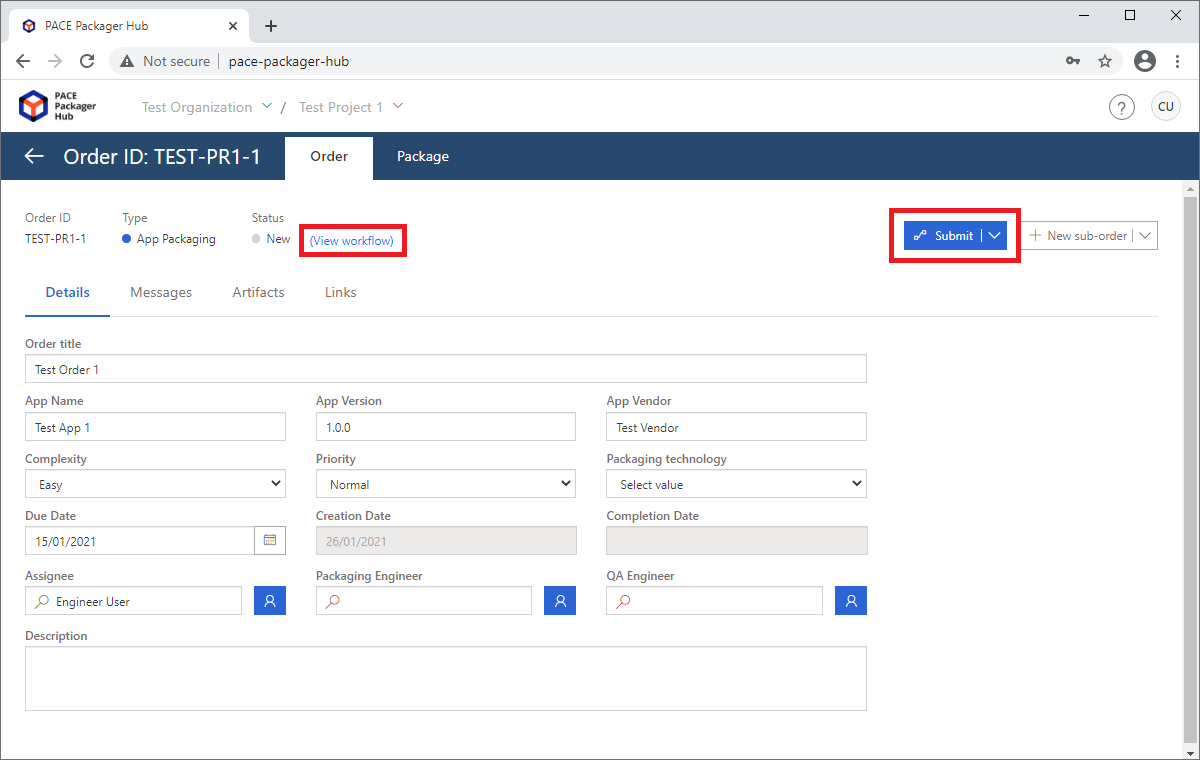
- Finally, let the packaging team know that the order is ready for packaging. For this, run the transition (e.g. Submit) to move the order by workflow to the next agreed status (e.g.
Ready for Packaging).Note
Transition names and statuses can differ in your case and it depends on the project settings. To review, the current order workflow, click View workflow.
Step 2 - Track Order
Track the order state.
- First, choose an Organization and Project in the top-left corner you will work with. The list shows only those projects that you have access to.
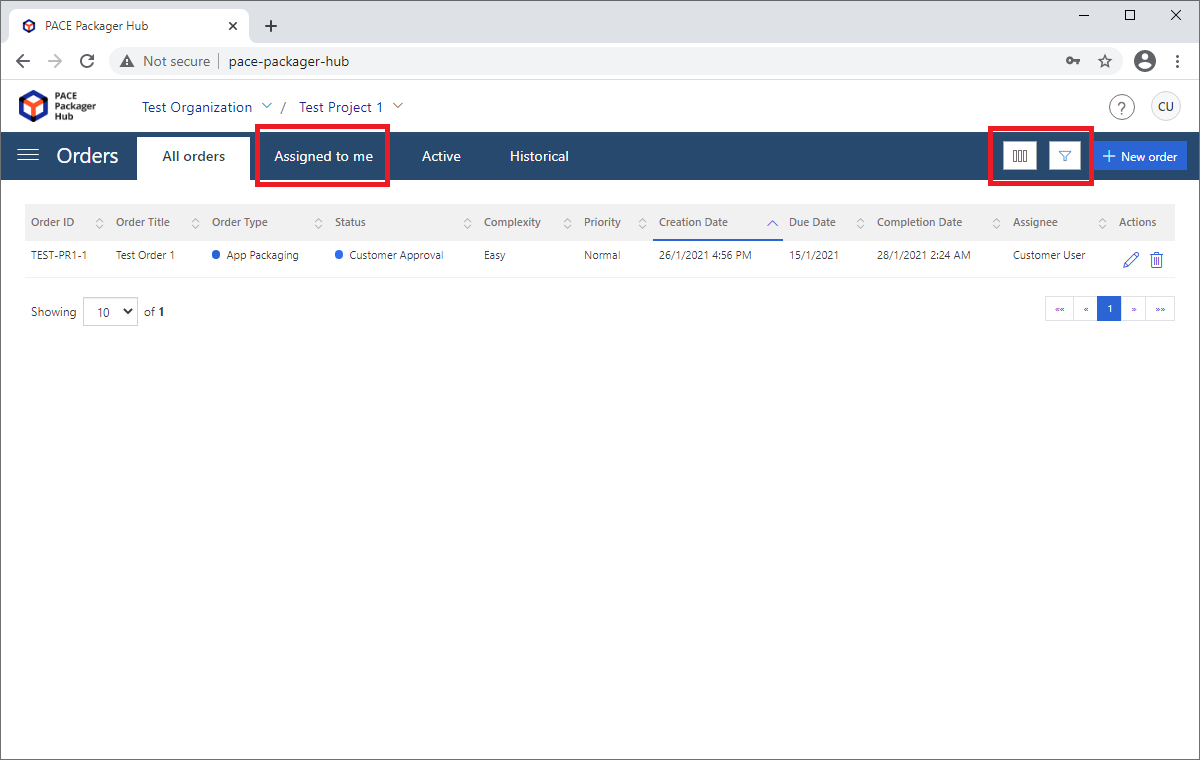
- To find and track your order you may find useful:
Apply filters
 to view orders in the specific status (e.g.
Customer Approval).Configure the list columns
 and sort by column to view
orders in specific order.
and sort by column to view
orders in specific order.Open the Assigned to me tab to view orders that are currently assigned to you.
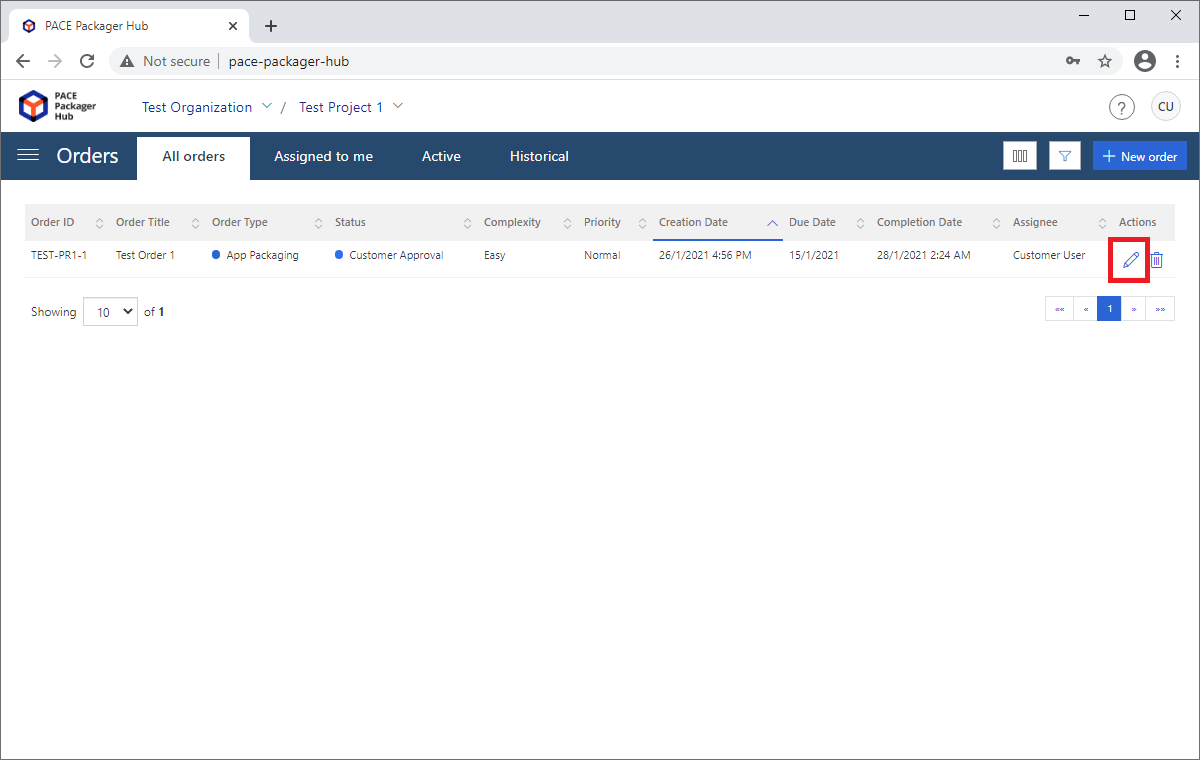
- Click Edit
 to open the necessary order to view order
details and read messages.
Step 3 - Download Delivered Package
Get the ordered package.
- First, find the necessary packaging order and click Edit
 to open it.
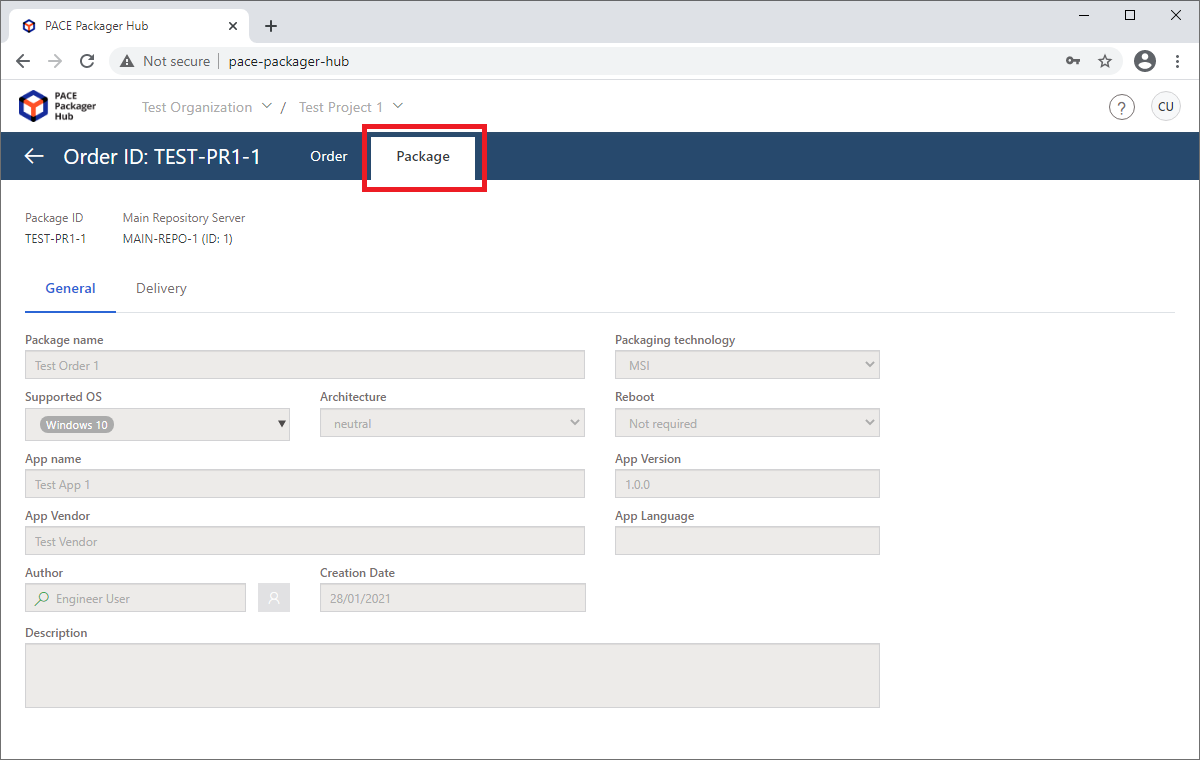
- Switch to the Package tab. Here, on the General subview you can review package details.
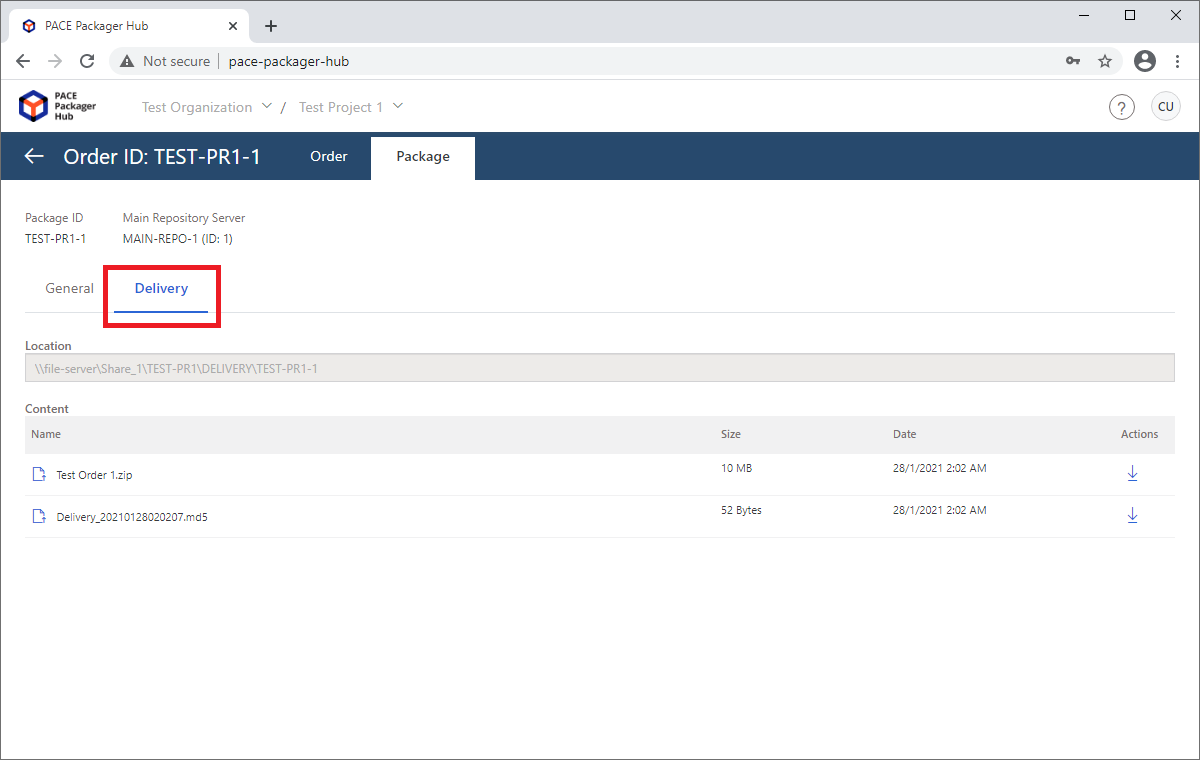
- To download the delivered package, open the Delivery subview and click Download
 next to the file you want to download.
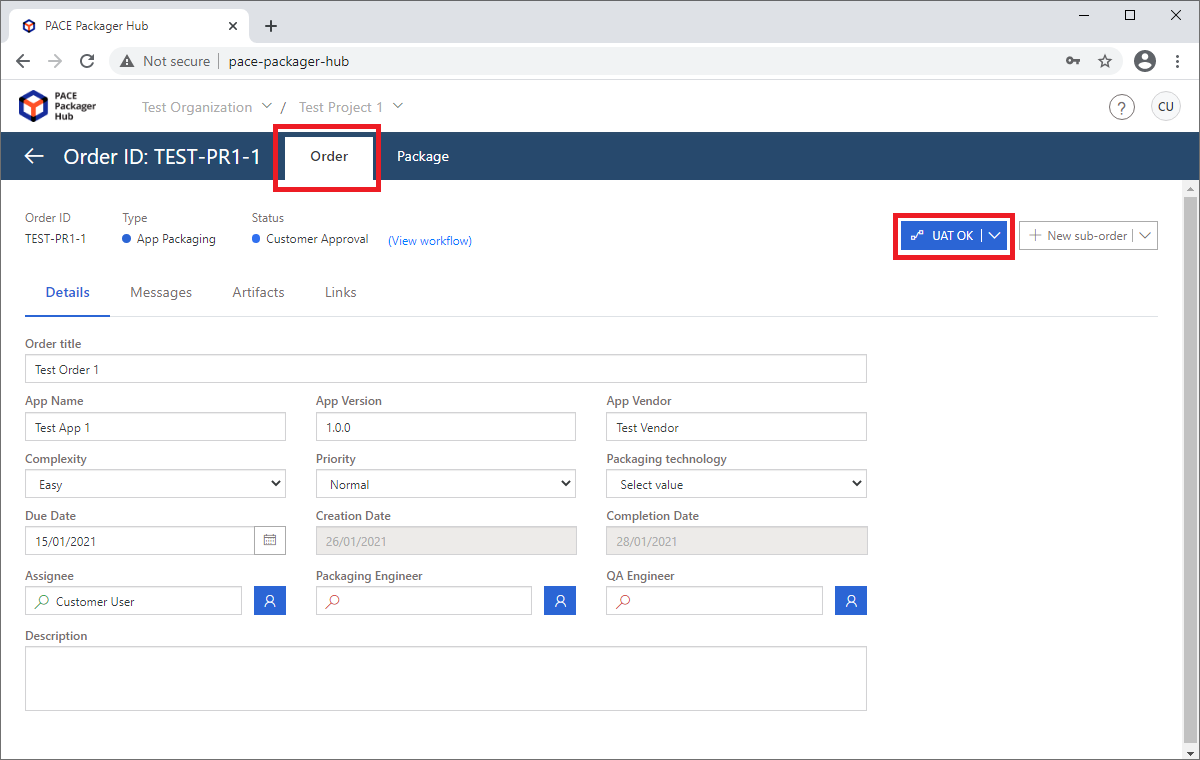
- After testing the downloaded package, let the packaging team know that the package is accepted. For this, swtich to the Order tab and run the respective transition (e.g.
UAT OK) to move the order by workflow to the necessary status (e.g.Closed).Note
Transition names and statuses can differ in your case and it depends on the project settings. To review, the current order workflow, click View workflow.
Note
PACE Packager Hub PACE Packager Hub is an end-to-end ecosystem that is fully dedicated to customer servicing, teamwork, and management of packaging tasks in teams of any size - learn more.
Try PACE Packager Hub for free - 21 days no obligations unlimited trial with all functions unlocked.
