Note
You are not reading the most recent version of this documentation. See the latest version available.
Getting Started as Engineer
Get started with PACE Packager Hub as Engineer.
Important
Precondition: Open and Sign In on Web Portal of PACE Packager Hub.
List of Steps:
Step 1 - Take Order
Find a new packaging order to start working on it.
- First, choose an Organization and Project in the top-left corner you will work with. The list shows only those projects that you have access to.
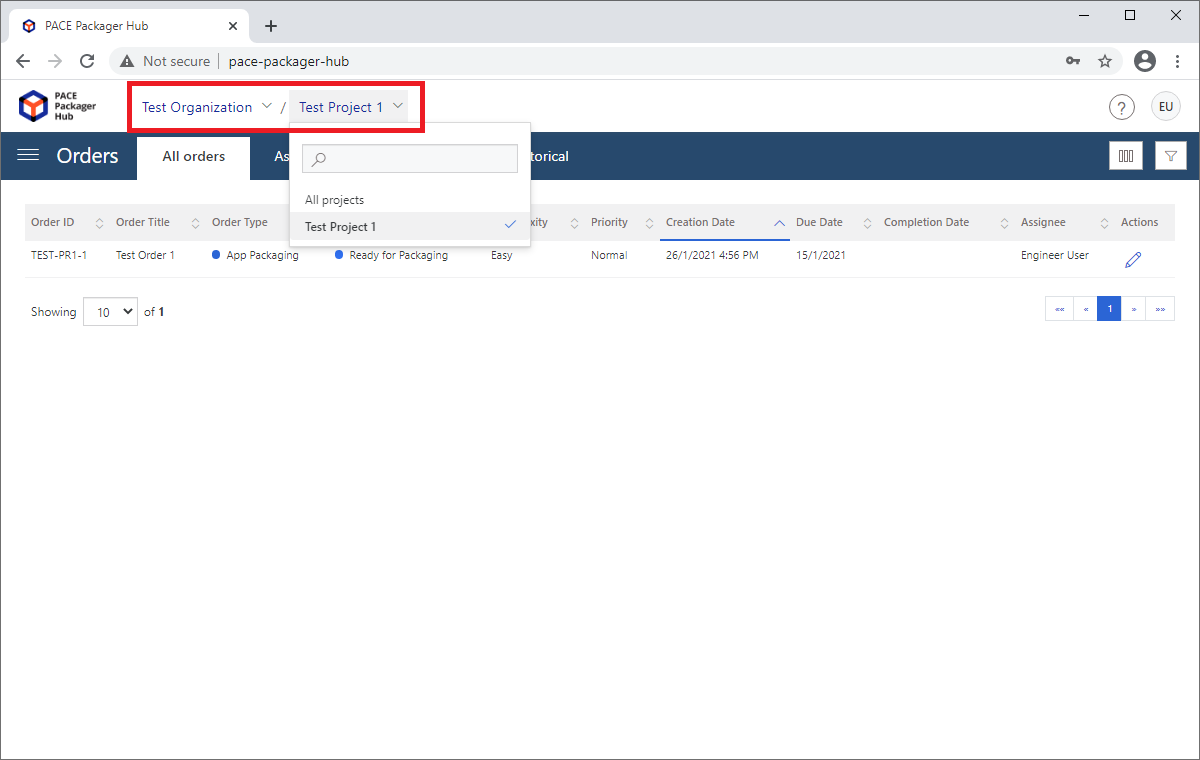
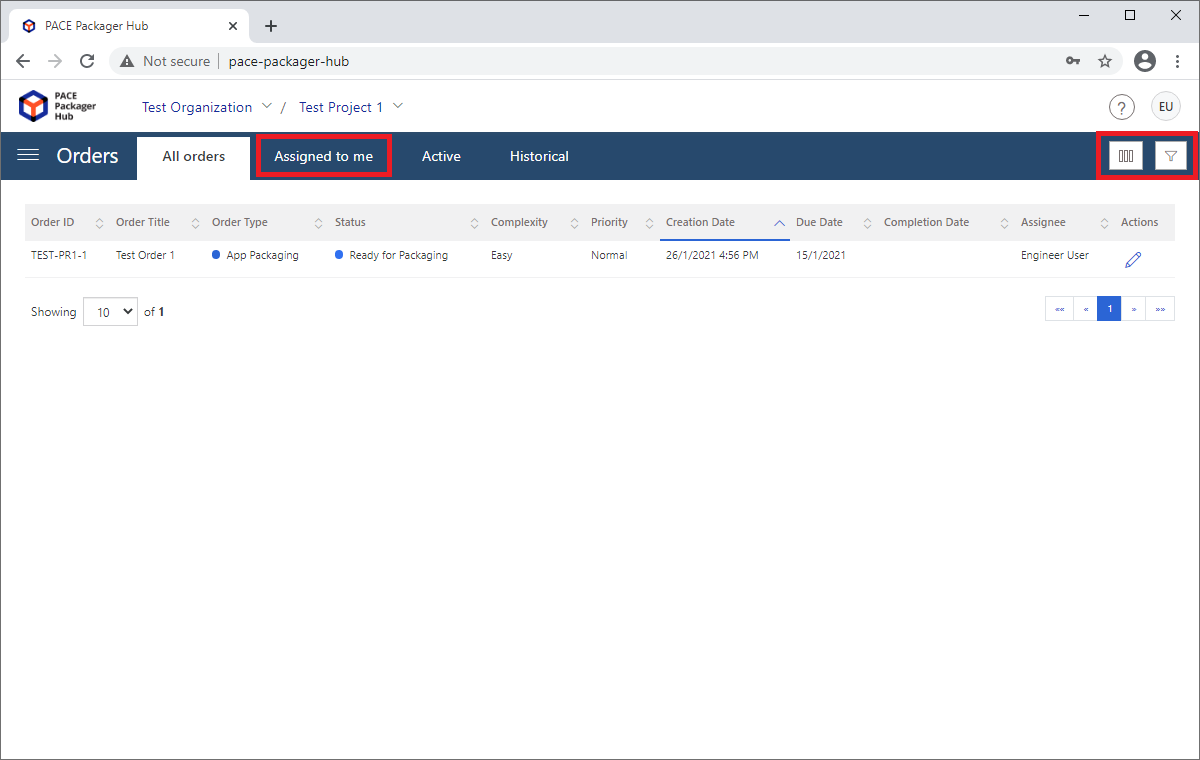
- Find a new order that is ready for packaging. Depending on the circumstances and project agreements, you can do this in the following ways:
Apply filters
 to view orders in the specific status (e.g.
Ready for Packaging).Configure the list columns
 and sort by column to view
orders in specific order.
and sort by column to view
orders in specific order.Open the Assigned to me tab to view orders that are currently assigned to you.
- Click Edit
 to open the necessary order (e.g. an order
in the
 Ready for Packagingstatus that is assigned to you).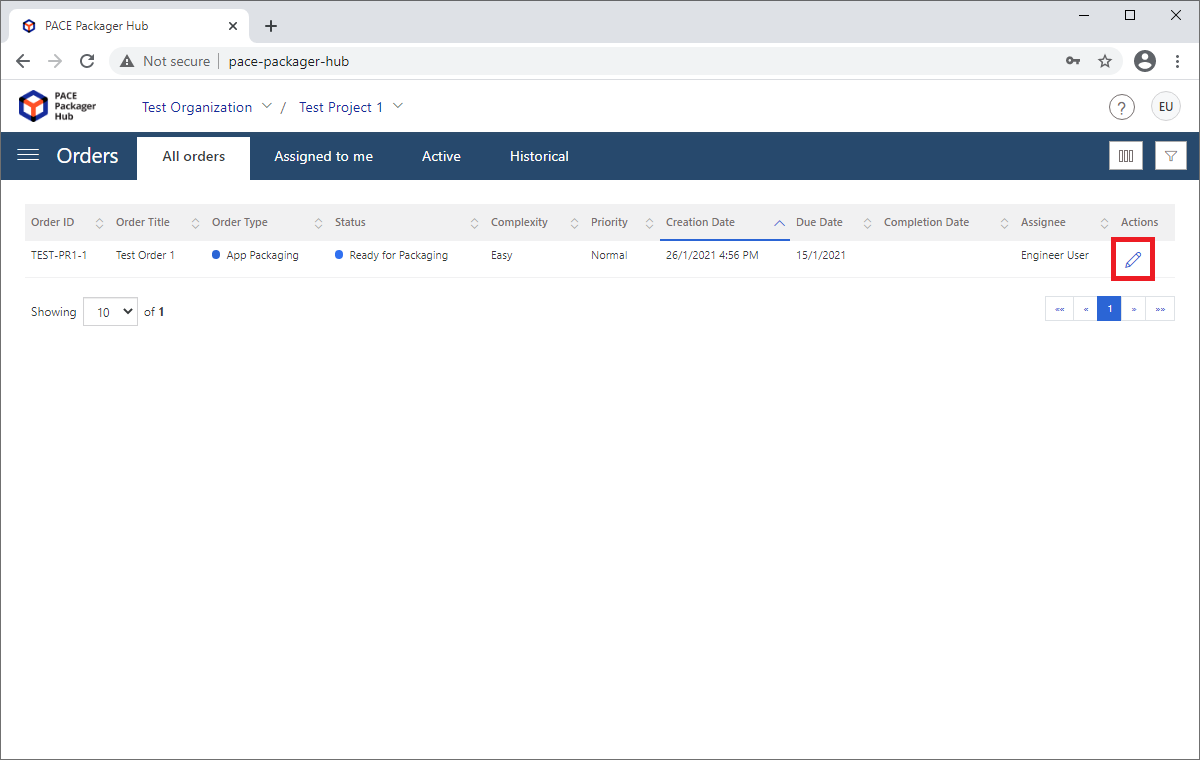
- Let your team and customer know that you have started working on the order. For this, run the transition (e.g. Start Incoming Check) to move the order by workflow to the next agreed status (e.g.
Incoming Check).Note
Transition names and statuses can differ in your case and it depends on the project settings. To review, the current order workflow, click View workflow.
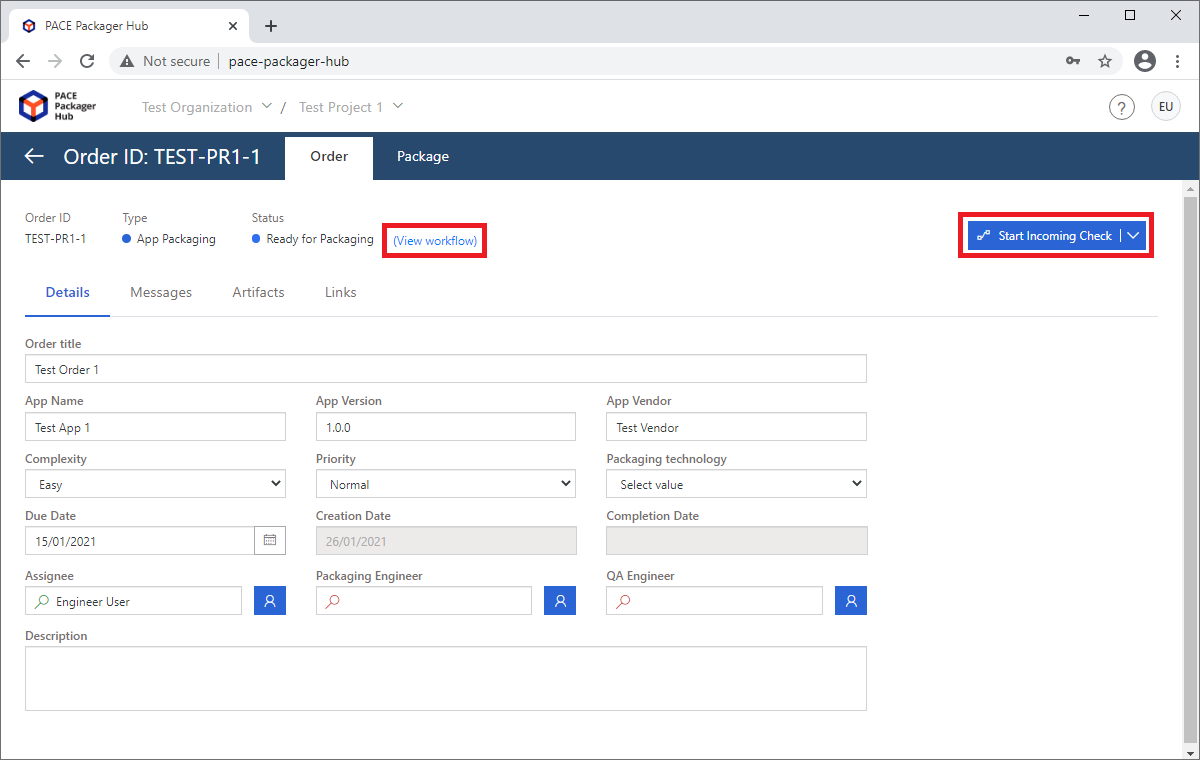
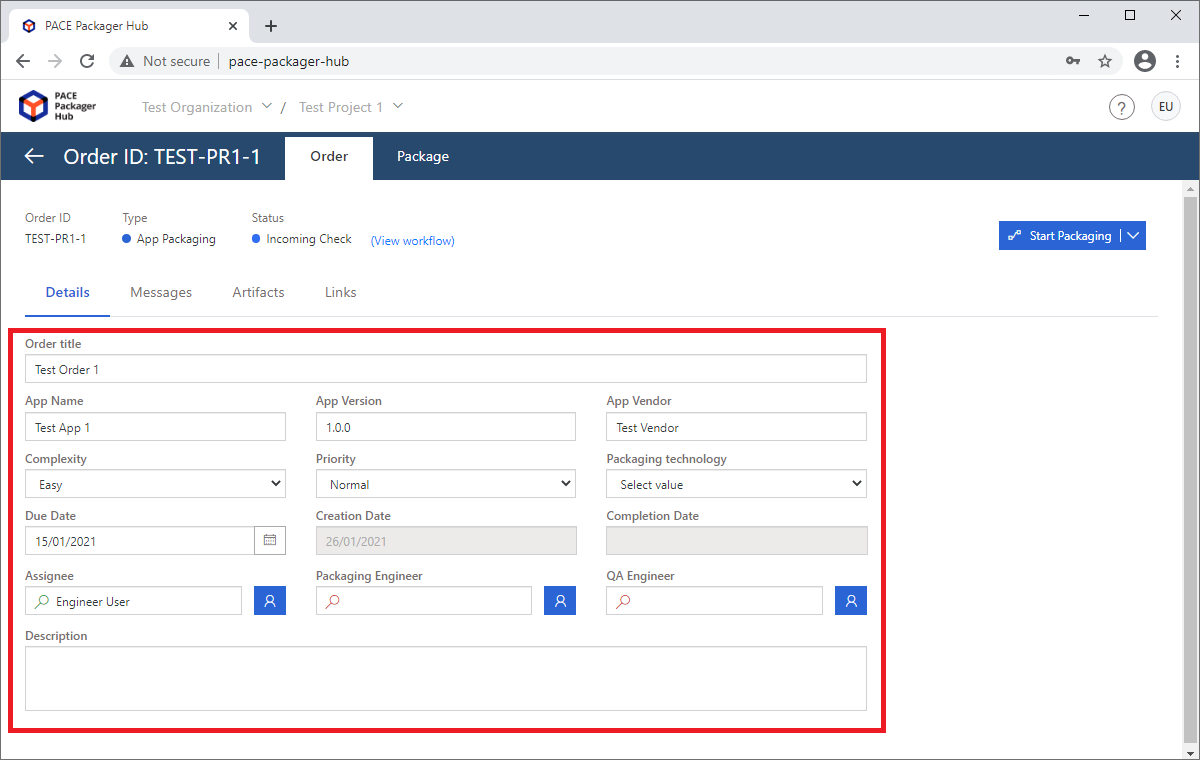
- Get acquainted with the order details, presented on the Details tab, and update the necessary ones. To specify yourself as the Packaging Engineer of this order, click Assign to me
 next to this
field.
next to this
field.Note
The changed/entered field value is automatically saved on focus lost.
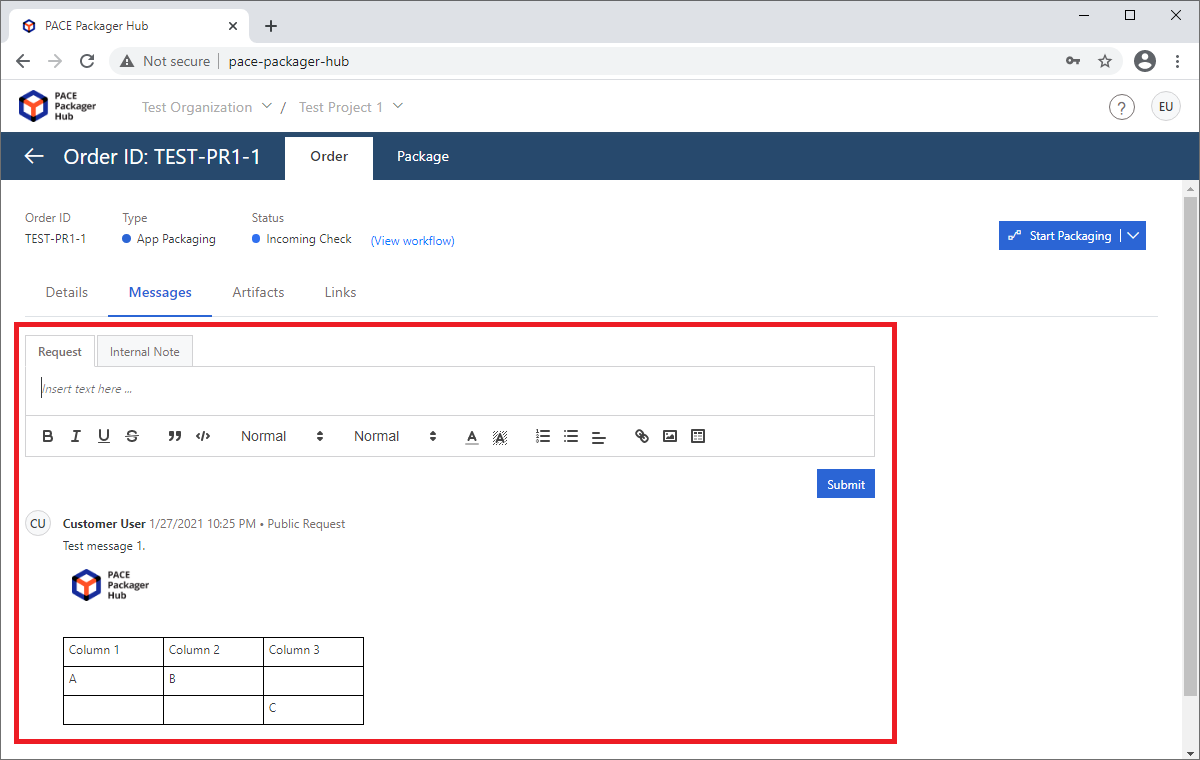
- Next, check text messages from customer on the Messages tab. To write a response or ask a question about the order, type the message and click Submit. The body of the message can contain images, tables and other elements.
Message types:
Request - a public message that is visible to customer and packaging team;
Internal Note - a message that is visible only to packaging team.
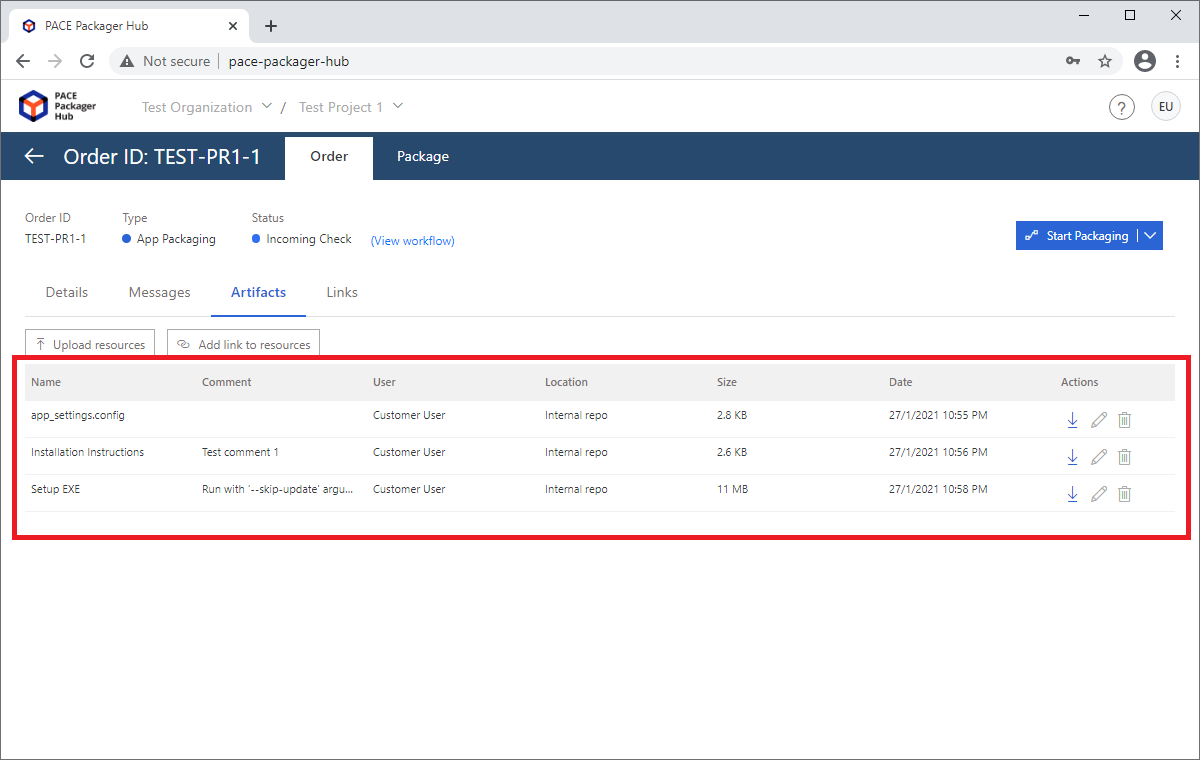
- Find the attached order documentation, source installation and other files on the Artifacts tab. Click Download
 to get the file.
Note
You can only edit and delete resources that you have added.
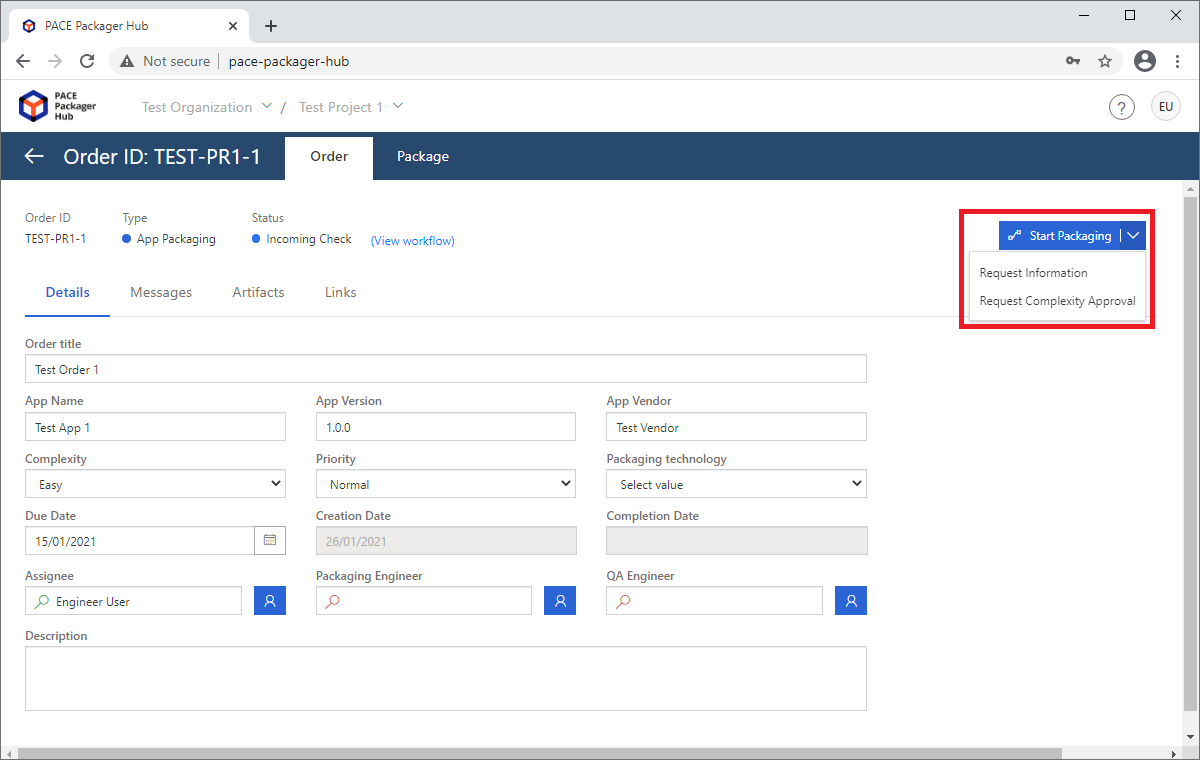
- Check if the provided resources are complete, not corrupted, and correspond to the order details. Perform other steps related to the ‘incoming check’ phase of your project. To indicate the completion of this phase, run the respective transition (e.g. Start Packaging) to move the order by workflow to the next agreed status (e.g.
Packaging).Note
Transition names and statuses can differ in your case and it depends on the project settings. To review, the current order workflow, click View workflow.
Step 2 - Create Package
Create a package in response to the order.
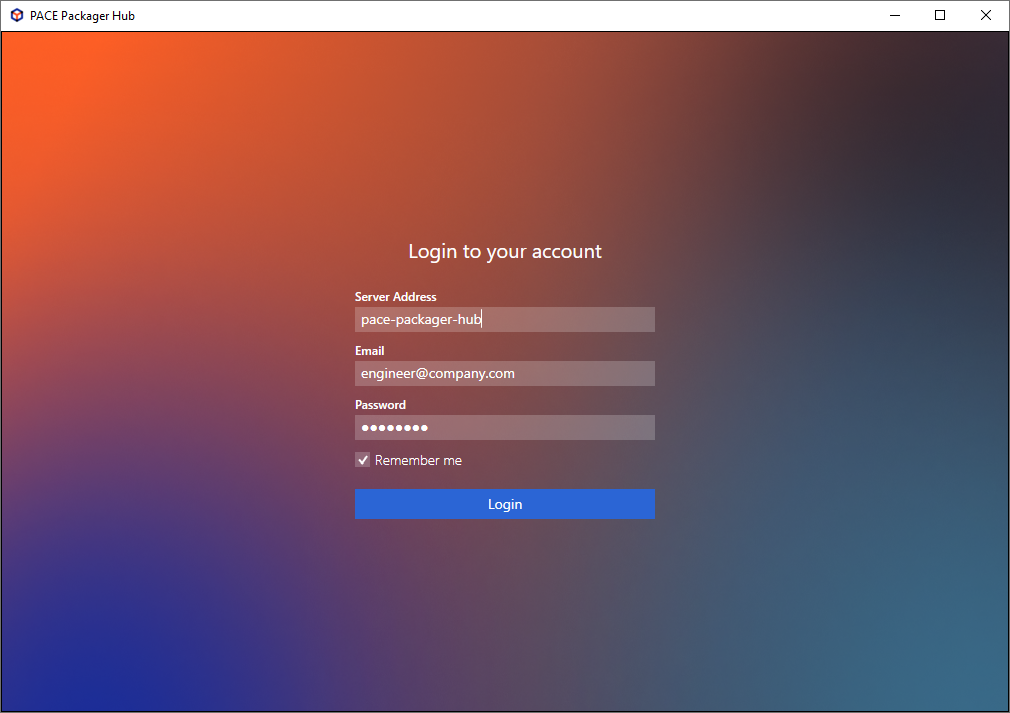
- Run and Sign In on Desktop Client of PACE Packager Hub.
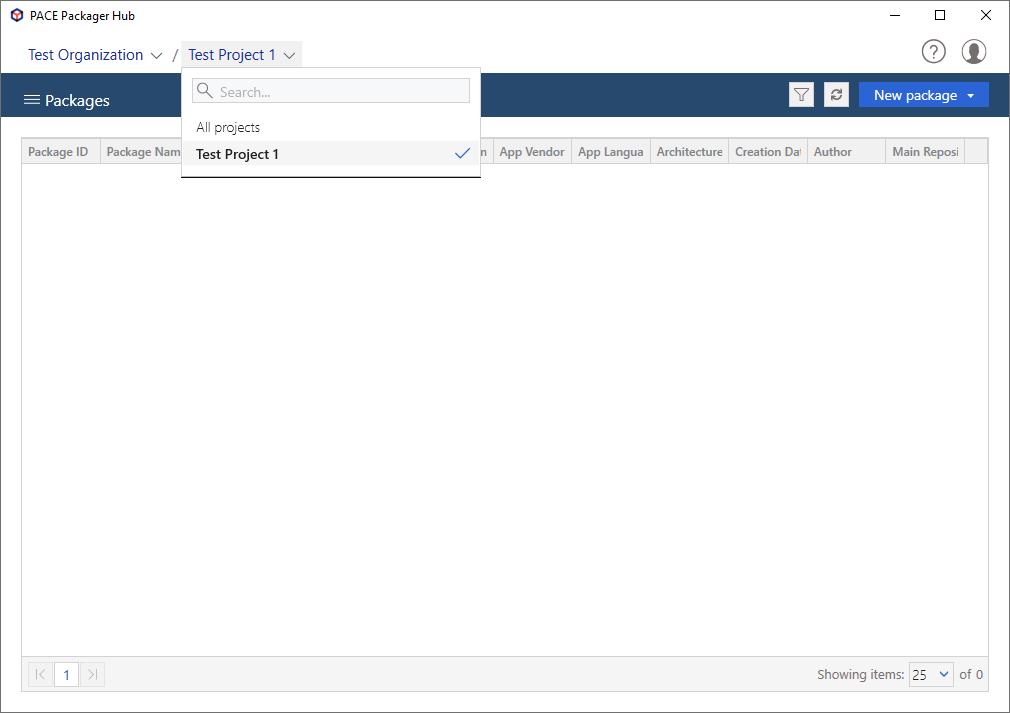
- First, choose an Organization and Project in the top-left corner you will work with. The list shows only those projects that you have access to.
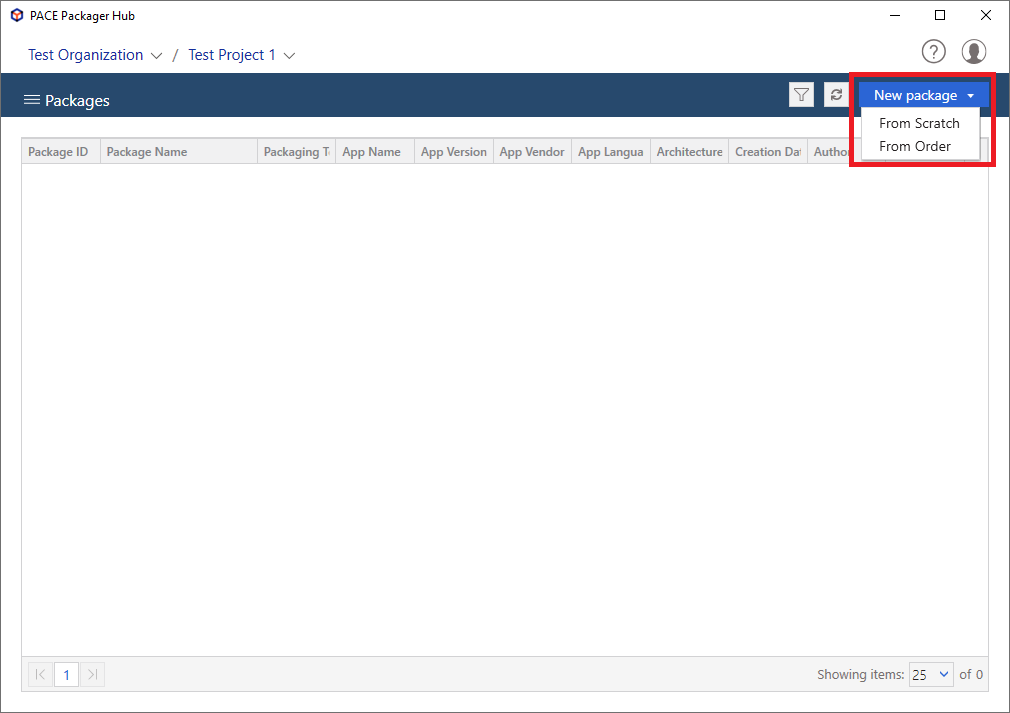
- Click New package > From Order in the top-right corner.
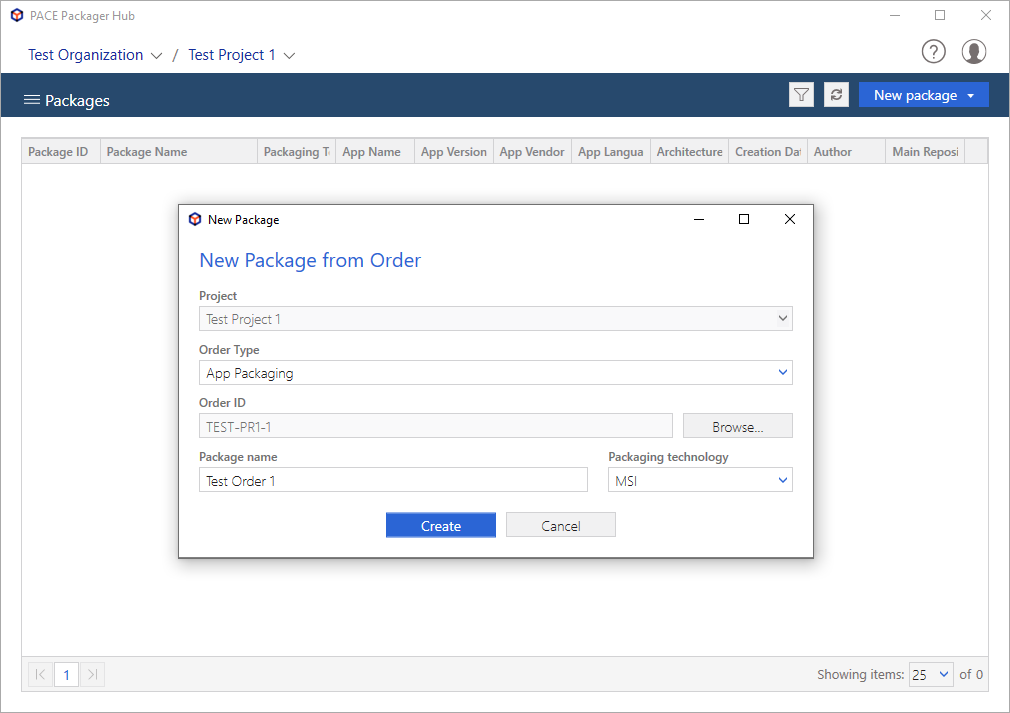
- Select an Order Type and Order ID of the order for which this package will be created. Fill-in/update the required package attributes (e.g. Package Name) and click Create.
Note
Most of pre-defined package attributes automatically inherit values from order attributes.
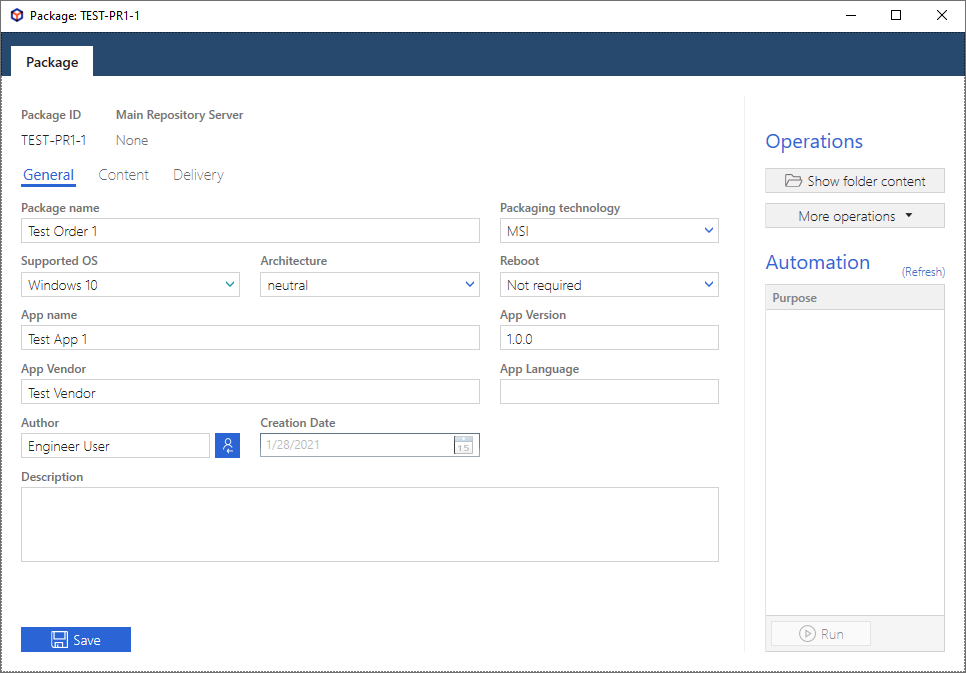
- The newly created package is automatically opened. On the General tab you can specify attributes to describe the package. Note that these values will be visible for customer. To save changes, click Save.
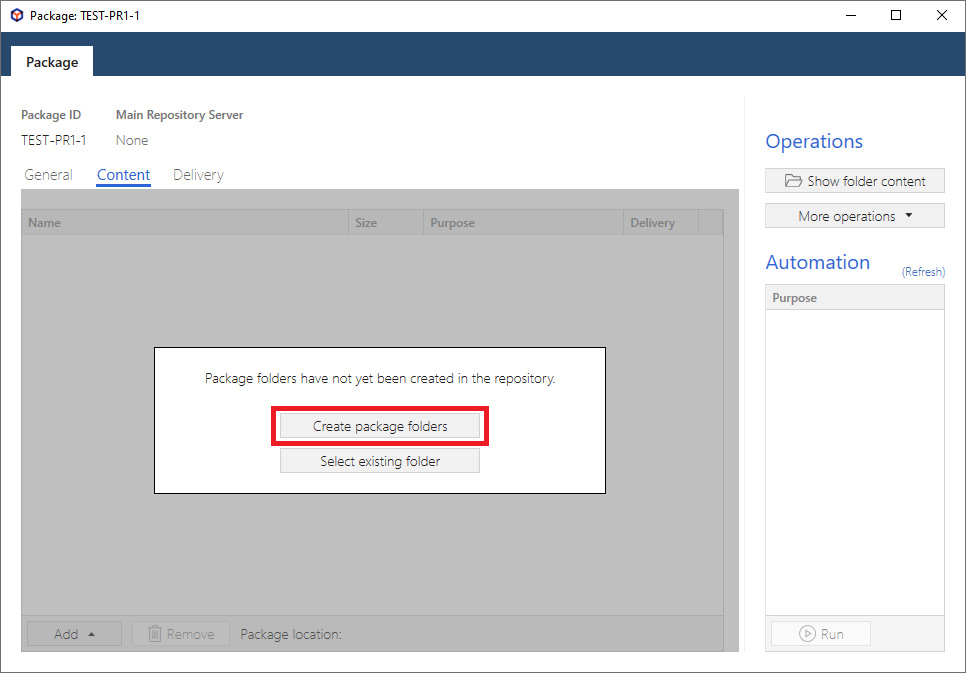
- Switch to the Content tab and click Create package folders. This will created the defined package folder sctructure on the configured repository server.
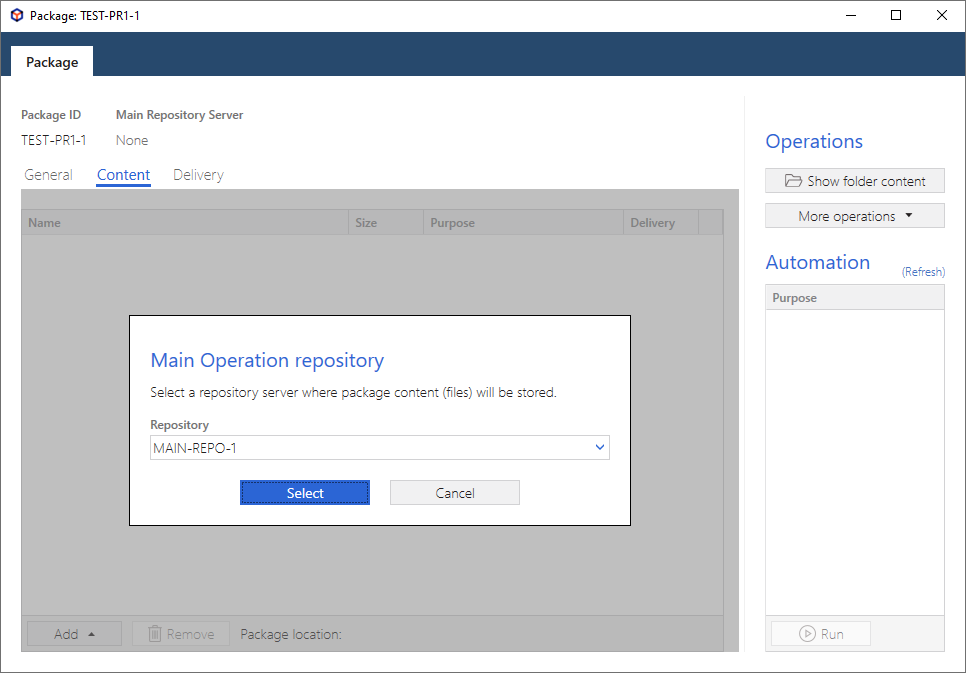
- Select a repository server from the list, where you want to store files of this package, and click Select.
Note
Depending on the project settings, you may be prompted to enter the connection credentials to the repository server.
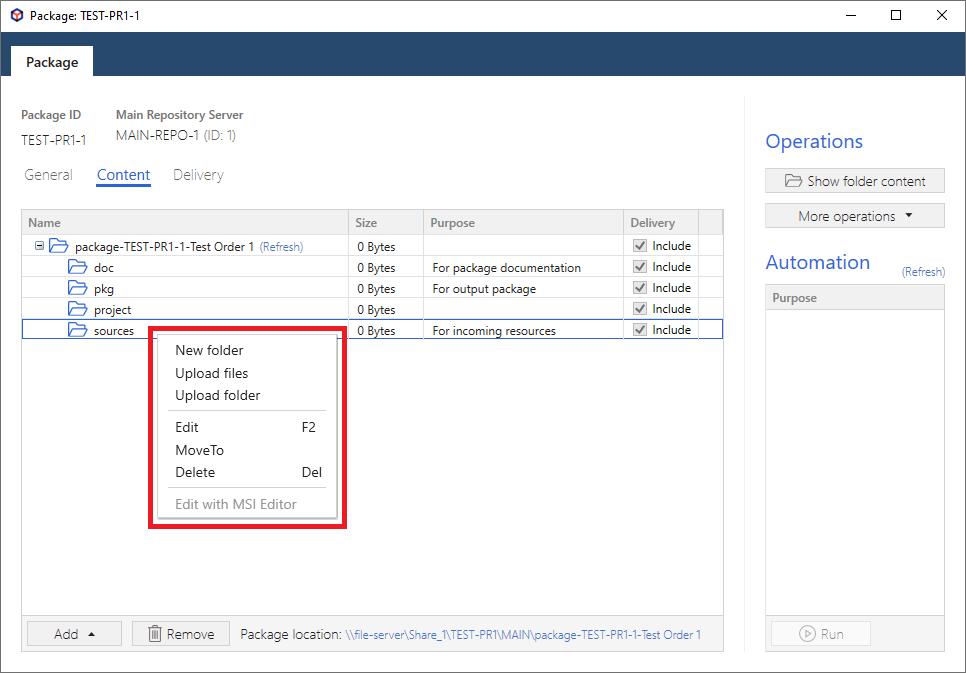
- Using the context menu of the Content tab you can create folders, upload files and folders, move and delete any package resources, stored in the package folder of the project’s repository. Also, files/folders can be managed via Windows Explorer or any other tool.
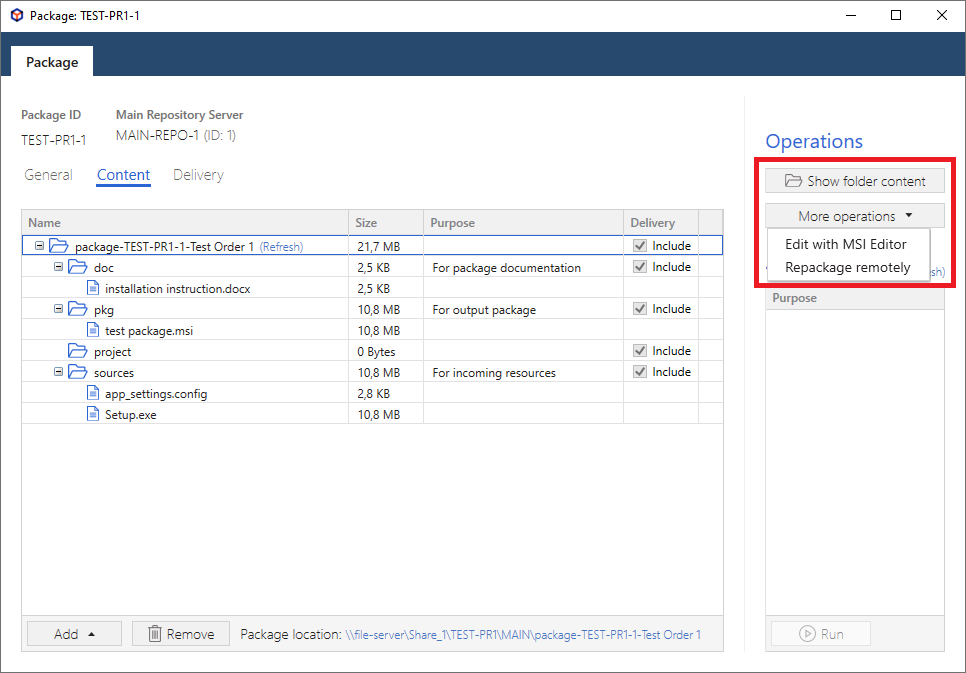
- Create the output package in accordance to the order requirements. For this, you may find useful functions from the Operations panel.
Note
Some functions require PACE Suite tools to be installed and activated.
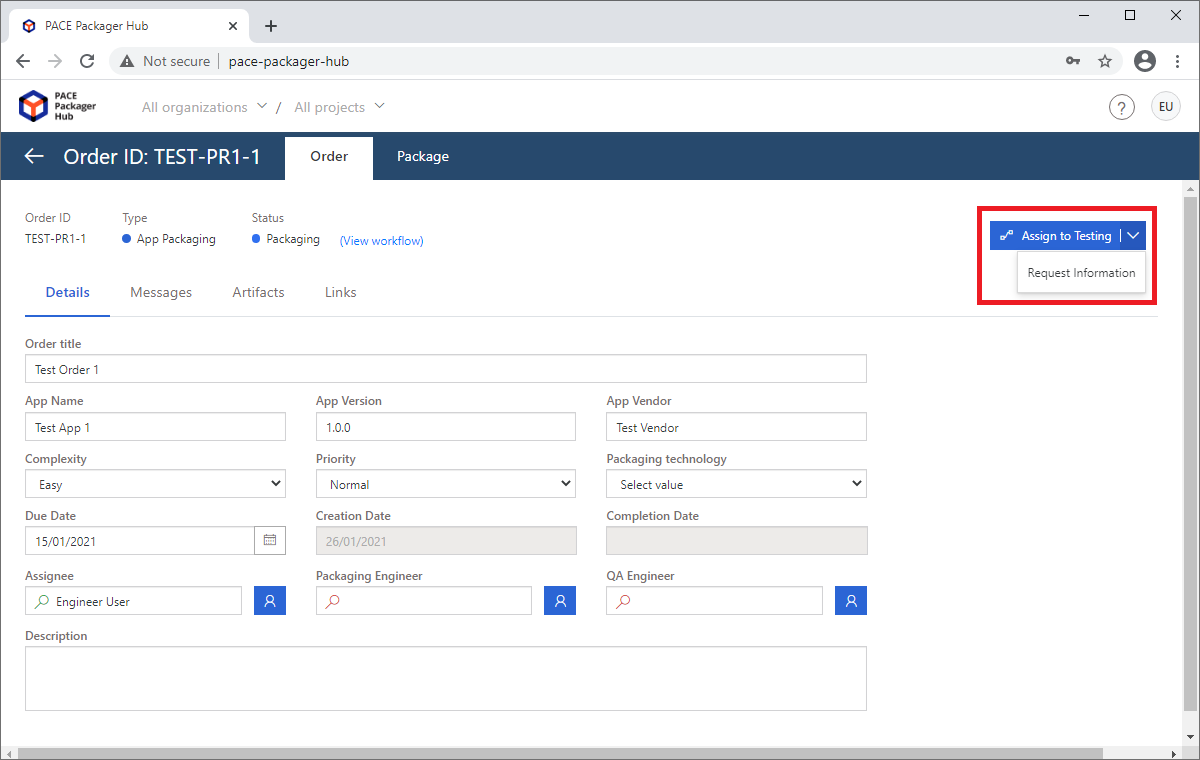
- To reflect the packaging and testing statuses, temporary swtich back from the desktop client to the PACE Packager Hub Web Portal and run the respective transition to move the order by workflow.
Step 3 - Deliver Package
Once the package is created and tested deliver it to the customer.
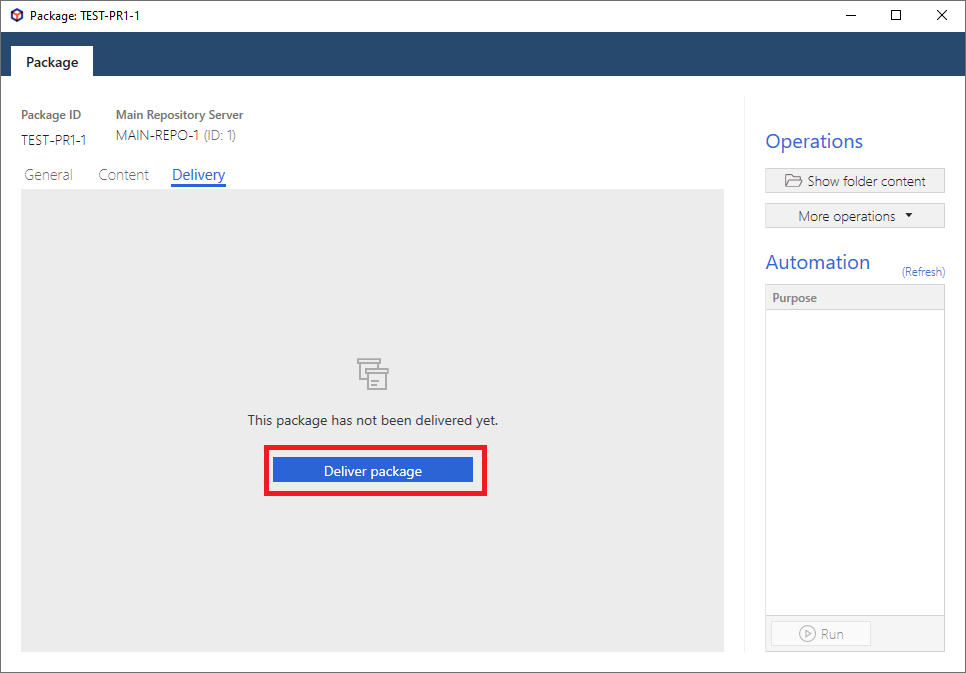
- In the PACE Packager Hub Desktop Client switch to the Delivery tab and click Deliver Package.
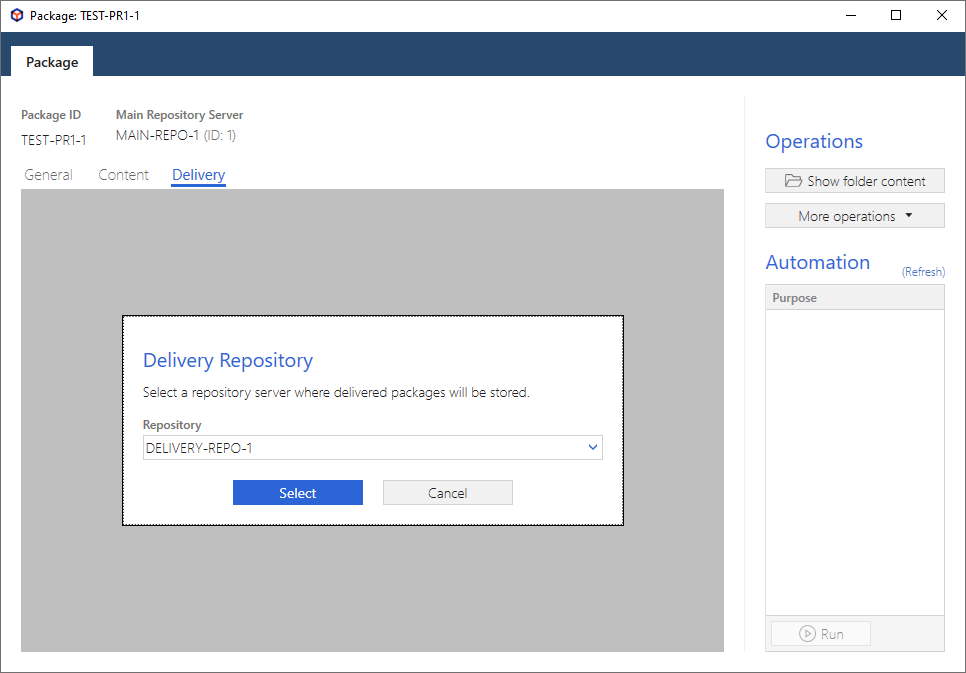
- Choose the delivery repository server from the list, where the package will be uploaded, and click Select.
- Select what files will be included in the delivery package, the archiving and file integrity check settings. Then, click Deliver to start the package delivering process.
Note
Depending on the project settings, you may be prompted to enter the connection credentials to the repository server.
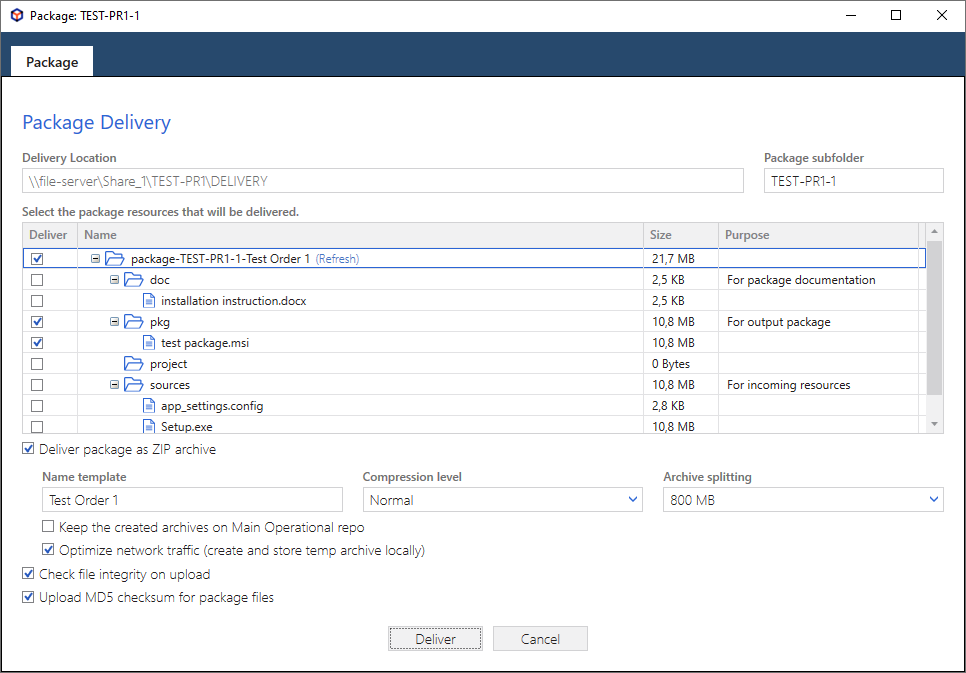
- Wait until the delivery is completed.
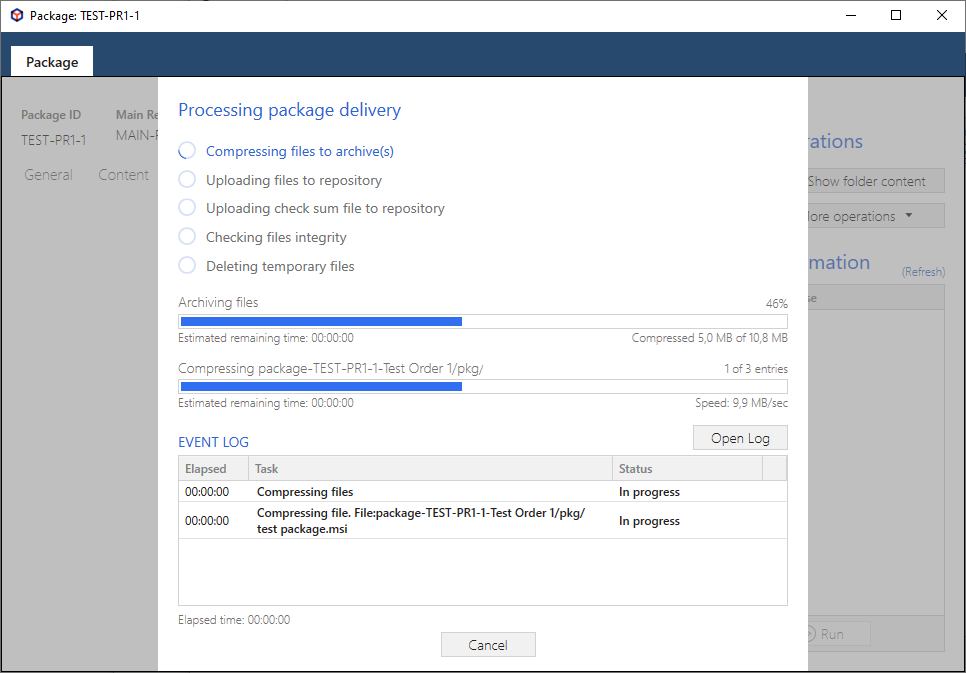
- When completed, click Close.
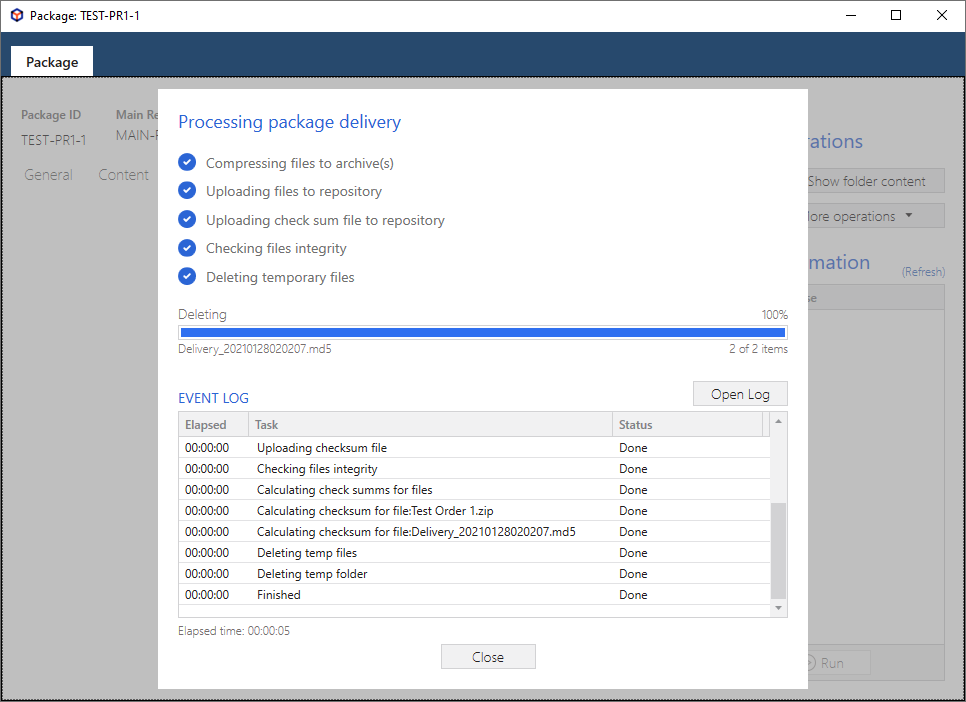
- Review the delivered files and, if needed, delete the unnecessary ones.
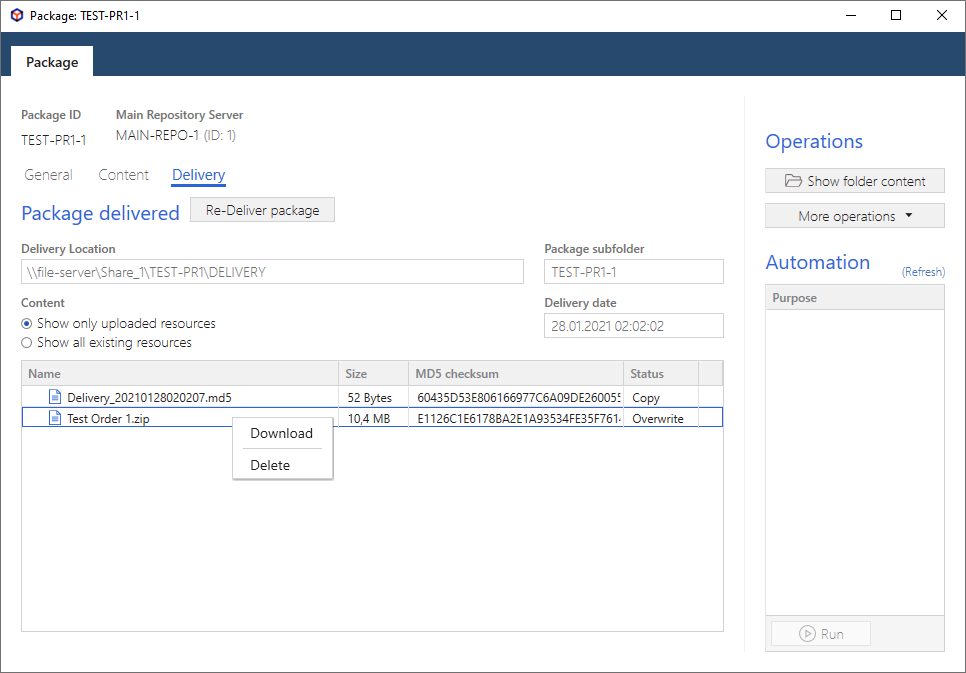
- Finally, let the customer know that the order is completed and package is ready to download. For this, swtich to the PACE Packager Hub Web Portal and run the respective transition (e.g.
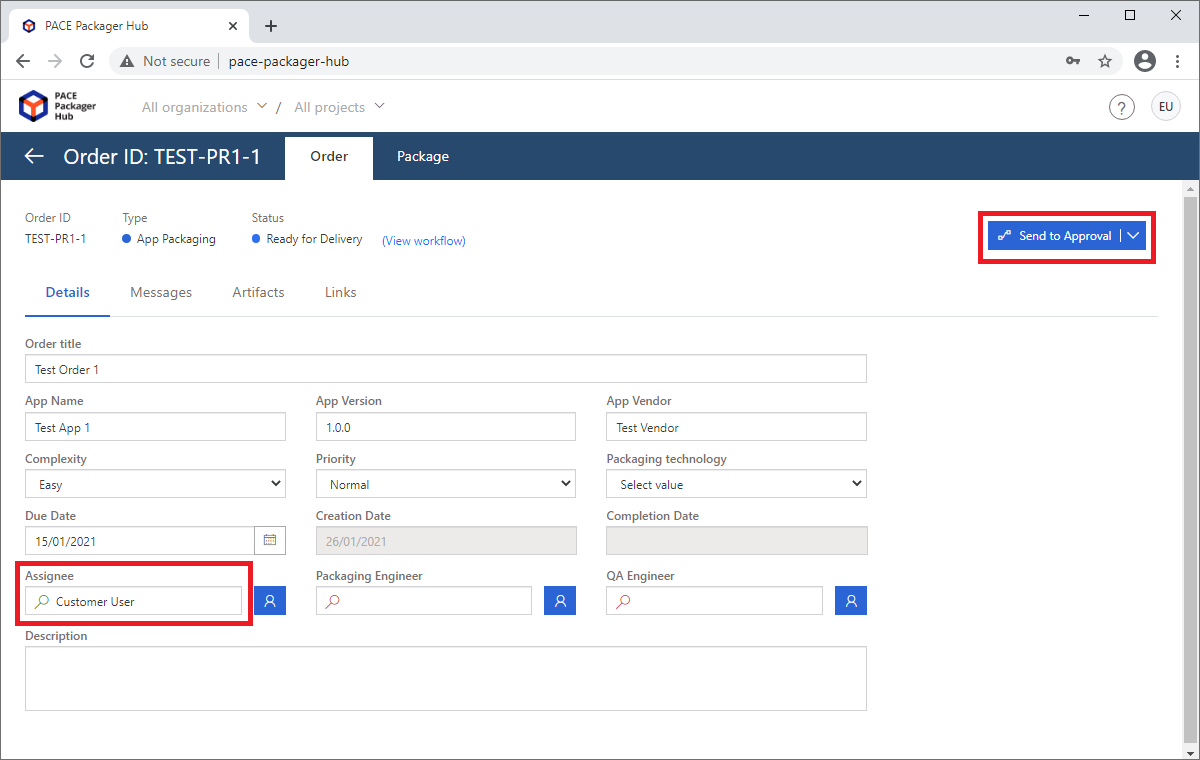
Send to Approval) to move the order by workflow to the necessary status (e.g.Customer Approval). Also, you can assign the order to the customer updating the Assignee field.Note
Transition names and statuses can differ in your case and it depends on the project settings. To review, the current order workflow, click View workflow.
Note
PACE Packager Hub PACE Packager Hub is an end-to-end ecosystem that is fully dedicated to customer servicing, teamwork, and management of packaging tasks in teams of any size - learn more.
Try PACE Packager Hub for free - 21 days no obligations unlimited trial with all functions unlocked.
